Automatically Convert Text to Speech from Google Sheets Using Pabbly Connect and Eden AI

Learn how to automatically convert text to speech from Google Sheets using Pabbly Connect and Eden AI. Step-by-step tutorial with detailed instructions. Eliminate manual repetitive tasks from your workflow. Discover proven automation methods with intuitive steps designed for efficiency-minded professionals.

Watch Step By Step Video Tutorial Below


1. Setting Up Pabbly Connect for Google Sheets and Eden AI

To automatically convert text to speech from Google Sheets, we will use Pabbly Connect as the main integration platform. Start by signing up for Pabbly Connect and accessing the dashboard. This platform will enable the automation between Google Sheets and Eden AI.

Once logged in, click on ‘Create Workflow’. Name your workflow, for instance, ‘Eden AI Google Sheet to Eden AI’, and select the appropriate folder in your Pabbly Connect account. This step is crucial as it establishes the foundation for the automation process.


2. Configuring Google Sheets as a Trigger in Pabbly Connect

In this step, we will set Google Sheets as the trigger app in Pabbly Connect. First, select Google Sheets and choose the trigger event as ‘New or Updated Spreadsheet Row’. This will ensure that every time a new row is added, the trigger activates.

  • Select Google Sheets from the app list.
  • Choose ‘New or Updated Spreadsheet Row’ as the trigger event.
  • Copy the webhook URL provided by Pabbly Connect.

Next, navigate to your Google Sheet, go to Extensions, and select Add-ons. Search for the Pabbly Connect Webhooks add-on and install it. After refreshing your Google Sheet, go back to Extensions, select Pabbly Connect Webhooks, and click on ‘Initial Setup’. Paste the copied webhook URL here and specify the trigger column, which is the last column where you will enter text.


3. Connecting Eden AI for Text-to-Speech Conversion

Now that we have set up Google Sheets as a trigger, we will connect Eden AI to convert the text into speech. In the action step of Pabbly Connect, choose Eden AI and select the action event as ‘Convert Text to Speech’. This step is essential as it allows the automation to process the text received from Google Sheets.

To connect your Eden AI account, you will need the API token from your Eden AI dashboard. After entering the API token in Pabbly Connect, map the text field to the corresponding text received from the Google Sheets trigger. Ensure you select the desired voice and language for the speech conversion.

  • Select the action event ‘Convert Text to Speech’.
  • Map the text field to the response from Google Sheets.
  • Choose the voice type (male or female) and language.

After mapping the required fields, click on ‘Save and Send Test Request’. This will generate the audio file URL based on the text provided. Make sure to test this step to ensure the audio file is generated correctly.


4. Updating Google Sheets with Audio URL

The final step involves updating the Google Sheet with the audio URL generated by Eden AI. In Pabbly Connect, add another action step and select Google Sheets again. This time, choose ‘Update Cell Value’ as the action event. This allows you to insert the generated audio URL back into the same row of your Google Sheet.

Connect your Google Sheets account again, select the spreadsheet and sheet name, and specify the column where the audio URL will be placed. Use the row index received from the trigger step to ensure the URL is placed in the correct row. Map the audio URL from the Eden AI response to the value field.

Select the action event ‘Update Cell Value’. Specify the column for the audio URL (Column C). Map the audio URL from the Eden AI response.

After completing these mappings, click on ‘Save and Send Test Request’ to finalize the integration. Verify that the audio URL appears in the designated cell of your Google Sheet.


5. Testing the Automation Workflow

With everything set up, it’s time to test the automation workflow. Go back to your Google Sheet and add a new row of text. This action should trigger the automation, converting the text into speech and updating the Google Sheet with the audio URL.

Within seconds, the audio URL should populate in the specified column. Click on the URL to verify that the audio file downloads correctly and plays the speech corresponding to the text you entered. This confirms that the integration using Pabbly Connect is functioning as intended.

Remember, you can customize this automation to fit various applications using Pabbly Connect. This powerful tool allows you to connect multiple applications seamlessly, enhancing your productivity and efficiency.


Conclusion

In this tutorial, we explored how to automatically convert text to speech from Google Sheets using Pabbly Connect and Eden AI. By following these steps, you can streamline your workflow and enhance productivity with ease.

Ensure you check out Pabbly Connect to create business automation workflows and reduce manual tasks. Pabbly Connect currently offer integration with 2,000+ applications.

Automate Google Business Profile Posts with Pabbly Connect and OpenAI

Learn how to use Pabbly Connect to automate Google Business Profile posts with OpenAI. Follow our step-by-step guide for seamless integration. Transform complex automation concepts into accessible, actionable steps that eliminate unnecessary manual work while maximizing existing application capabilities.

Watch Step By Step Video Tutorial Below


1. Setting Up Pabbly Connect for Automation

To automate the process of creating Google Business Profile posts, start by accessing Pabbly Connect. Create a free account if you haven’t already, which allows you to test various automations. Once logged in, navigate to the dashboard where you can create your workflow.

Click on the blue ‘Create Workflow’ button. Name your workflow, for example, ‘Automatically Post Google Business Profile Posts’ and select a folder to save it. This initial setup is crucial for connecting your Google Sheets with OpenAI and automating the post creation process.


2. Connecting Google Sheets to Pabbly Connect

In this step, you will connect Google Sheets to Pabbly Connect. Select Google Sheets as your trigger application and choose the trigger event as ‘New Updated Spreadsheet Row’. This configuration will allow Pabbly Connect to capture data whenever a new row is added.

  • Open Google Sheets and prepare your data with titles and image URLs.
  • Copy the webhook URL provided by Pabbly Connect.
  • Install the Pabbly Connect Webhooks add-on in Google Sheets.

After installing the add-on, paste the webhook URL into the initial setup and specify the trigger column. This setup ensures that every time a new row is added to Google Sheets, Pabbly Connect will automatically send the data to the next application in the workflow.


3. Integrating OpenAI with Pabbly Connect

Next, you will integrate OpenAI with Pabbly Connect. Select OpenAI as the action application and choose ‘ChatGPT’ as the action event. This integration allows you to generate content based on the data received from Google Sheets.

To connect OpenAI, you need an API key. Go to your OpenAI account, generate a new API key if needed, and paste it in Pabbly Connect. After connecting, select the AI model you wish to use, such as GPT-3.5 Turbo, and set up the prompt for content creation.

  • Map the title from Google Sheets to the prompt in OpenAI.
  • Specify the content length to not exceed 200 words.

This mapping ensures that when a new row is added, OpenAI generates relevant content automatically for your Google Business Profile posts.


4. Posting to Google Business Profile via Pabbly Connect

After generating content with OpenAI, the next step is to post it to your Google Business Profile through Pabbly Connect. Select Google Business Profile as the action application and choose ‘Create Call to Action Post’. This will enable you to create a post with the content generated by OpenAI.

Connect your Google Business Profile account to Pabbly Connect. Map the generated content and the image URL from Google Sheets to the respective fields in the post creation form.

Ensure the image URL is in JPG or PNG format to avoid errors. Provide a relevant action URL for the ‘Learn More’ button.

Once everything is mapped correctly, click the button to create the post. If successful, your post will appear on your Google Business Profile automatically.


5. Finalizing Automation with Pabbly Connect

To finalize your automation, ensure that the ‘Send on Event’ option is enabled in Pabbly Connect. This setting allows the workflow to trigger automatically whenever a new row is added to Google Sheets, ensuring seamless operation.

Additionally, it’s recommended to use an incognito window or avoid multiple Gmail accounts in the same tab to prevent authentication errors while connecting Google Sheets to Pabbly Connect.

Once your automation is set up, you can relax as Pabbly Connect will handle the entire process of creating and posting to your Google Business Profile without any manual intervention.


Conclusion

In this tutorial, you learned how to use Pabbly Connect to automate Google Business Profile posts with OpenAI. By following these steps, you can streamline your posting process and save time on manual updates.

Ensure you check out Pabbly Connect to create business automation workflows and reduce manual tasks. Pabbly Connect currently offer integration with 2,000+ applications.

Automate Invoice Generation with Google Docs, Sheets, and Forms Using Pabbly Connect

Learn how to automate invoice generation using Pabbly Connect with Google Docs, Sheets, and Forms in this detailed tutorial. Explore efficient methods for automating routine tasks with clear, concise instructions suited for both newcomers and experienced professionals.

Watch Step By Step Video Tutorial Below


1. Create an Invoice Template in Google Docs with Pabbly Connect

To generate invoices automatically, the first step is to create an invoice template in Google Docs. This template will include variables that will be replaced with form submission data. Using Pabbly Connect, you can automate this process, ensuring that every new form submission updates the invoice accordingly.

In your Google Docs template, include placeholders for customer name, email, phone number, product details, and pricing. These placeholders will be replaced by actual data from Google Forms submissions, which Pabbly Connect will facilitate.


2. Set Up Google Forms for Collecting Orders with Pabbly Connect

Next, create a Google Form to collect customer details and order information. This form should include fields for the customer’s name, email, phone number, cake weight, flavor, celebration type, and a message. With Pabbly Connect, you can link this form to your Google Docs invoice template seamlessly.

  • Add fields for customer details and order specifics.
  • Ensure the form is user-friendly and collects all necessary data.
  • Test the form to ensure submissions are recorded correctly.

Once the form is ready, you can start using Pabbly Connect to automate the invoice generation process based on the form submissions.


3. Connect Google Forms to Pabbly Connect for Automation

To connect Google Forms to Pabbly Connect, you need to set up a workflow that triggers when a new form submission is received. Start by logging into your Pabbly Connect account and creating a new workflow. Choose Google Forms as the trigger application and select the ‘New Response Received’ event.

Next, you will be prompted to connect your Google account. Once connected, select the specific form you created earlier. This integration allows Pabbly Connect to capture form submission data instantly, which will be used to populate your invoice template in Google Docs.


4. Generate Invoice in Google Docs Using Pabbly Connect

After setting up the trigger, the next step is to configure the action that generates the invoice in Google Docs. In your Pabbly Connect workflow, add Google Docs as the action application and select the ‘Create Document from Template’ action event. This will allow Pabbly Connect to create a new invoice based on your predefined template.

When configuring this action, you will need to map the variables from your Google Forms submission to the corresponding placeholders in your Google Docs template. This includes mapping fields like customer name, email, and order details. Pabbly Connect will ensure that these details are filled in correctly every time an invoice is generated.


5. Test and Automate Invoice Generation with Pabbly Connect

To finalize the automation, it’s crucial to test the entire workflow. Submit a test response through your Google Form and check if the invoice is generated correctly in Google Docs. With Pabbly Connect, you can monitor the workflow execution and ensure everything is functioning as intended.

  • Submit a test order through your Google Form.
  • Check your Google Docs for the newly created invoice.
  • Make adjustments in Pabbly Connect if necessary.

Once confirmed, your automation is complete! Now, every time a customer submits an order through the Google Form, Pabbly Connect will automatically generate a corresponding invoice in Google Docs, saving you time and effort.


Conclusion

In this tutorial, we explored how to automate invoice generation using Pabbly Connect with Google Docs, Google Sheets, and Google Forms. By following the steps outlined, you can streamline your invoicing process and enhance efficiency. With Pabbly Connect, managing invoices becomes effortless and automated.

Ensure you check out Pabbly Connect to create business automation workflows and reduce manual tasks. Pabbly Connect currently offer integration with 2,000+ applications.

Integrate Facebook Leads to Google Sheets with Pabbly Connect

Learn how to automate adding Facebook leads to Google Sheets for your consultancy business using Pabbly Connect. Step-by-step guide included! Follow this definitive guide to creating powerful automated workflows with straightforward, efficiency-focused solutions that save valuable time.

Watch Step By Step Video Tutorial Below


1. Access Pabbly Connect for Integration

To start integrating Facebook Leads with Google Sheets, first, access Pabbly Connect. Go to the Pabbly Connect homepage by entering the URL in your browser. You will find options to sign in or sign up for free.

If you’re a new user, click on the ‘sign up for free’ button to create your account. Once registered, you will receive 100 free tasks every month to explore the features of Pabbly Connect. Existing users can simply sign in to begin.


2. Create a Workflow in Pabbly Connect

After signing in, navigate to the dashboard of Pabbly Connect. Click on the ‘create workflow’ button located in the top right corner. You will be prompted to name your workflow; for example, name it ‘Add Facebook Leads to Google Sheets for Consultancy Services’.

Once named, select a folder to save your workflow, then click ‘create’. This will open two windows for setting up the trigger and action. The trigger will be Facebook Lead Ads, and the action will be Google Sheets. This setup will automate the process of adding new leads to your Google Sheets.


3. Set Up Facebook Lead Ads as Trigger

In the trigger window, select Facebook Lead Ads as your application. The trigger event should be set to ‘New Lead Instant’ so that whenever a new lead is generated, it triggers the workflow in Pabbly Connect.

Click on ‘connect’ and choose to add a new connection. You will need to authorize Pabbly Connect to access your Facebook Lead Ads account. After successful authorization, select the Facebook page associated with your consultancy, ABC Finance Company, and the lead gen form you created.

  • Select your Facebook page: ABC Finance Company
  • Choose the lead gen form: New Lead Form
  • Click on Save and Send Test Request

After clicking save, you will need to perform a test submission of the lead form to ensure that the integration works correctly.


4. Test Your Integration with Facebook Leads

To test the integration, use the Lead Ads Testing Tool available in Meta for Developers. Select your Facebook page and lead form, then submit a test lead using dummy details.

Once the test submission is complete, return to Pabbly Connect and verify that the lead details have been captured. This confirms that your Facebook leads are being successfully integrated into Pabbly Connect.

  • Submit test lead with dummy details
  • Check for captured response in Pabbly Connect

Once verified, you can proceed to the next step of adding these leads to Google Sheets.


5. Connect Google Sheets to Pabbly Connect

Now, let’s set up Google Sheets as the action application. In the action window, search for and select Google Sheets. Set the action event to ‘Add New Row’ to ensure that each new lead will be added as a new row in your Google Sheets. using Pabbly Connect

Click on ‘connect’ and select an existing connection or create a new one by signing in with your Google account. Once connected, you will need to select the correct spreadsheet and sheet where you want to store the lead data.

Select your spreadsheet: ABC Consultancy Services Map the lead details: First Name, Last Name, Email, Phone Number

After mapping the fields, click on ‘Save and Send Test Request’ to finalize the setup. Check your Google Sheets to confirm that the lead details have been added successfully.


Conclusion

In this tutorial, we demonstrated how to use Pabbly Connect to automate the addition of Facebook leads into Google Sheets for your consultancy business. This integration allows you to manage your leads efficiently without manual effort, ensuring that you can focus on growing your business.

Ensure you check out Pabbly Connect to create business automation workflows and reduce manual tasks. Pabbly Connect currently offer integration with 2,000+ applications.

Automate WhatsApp Messages to Your Physiotherapy Clinic Leads Using Pabbly Connect

Learn how to send automated WhatsApp messages to your physiotherapy clinic leads using Pabbly Connect, Facebook Lead Ads, and Vati. Follow this detailed step-by-step tutorial.

Watch Step By Step Video Tutorial Below


1. Accessing Pabbly Connect for Automated Messaging

To send automated WhatsApp messages to your physiotherapy clinic leads, first, access Pabbly Connect. This platform allows you to create integrations between various applications, including Facebook Lead Ads and WhatsApp.

Start by visiting the Pabbly Connect website. If you don’t have an account, you can sign up for free, which takes only a few minutes. Once logged in, navigate to the dashboard, where you can create a new workflow for your automated messaging.


2. Creating a New Workflow in Pabbly Connect

In this step, we will create a new workflow in Pabbly Connect to automate the WhatsApp messaging process. Click on the ‘Create Workflow’ button to begin. You will be prompted to name your workflow, such as ‘Automated WhatsApp Messages for Leads.’ Select a folder to save your workflow.

  • Click on ‘Create’ to proceed to the workflow setup.
  • You will see two main sections: Trigger and Action.
  • Select ‘Facebook Lead Ads’ as the Trigger application.

Now, specify the trigger event as ‘New Lead Instant’. This sets up the connection to capture new leads generated from your Facebook ads.


3. Connecting Facebook Lead Ads with Pabbly Connect

Next, connect your Facebook Lead Ads account to Pabbly Connect. Click on the ‘Connect’ button and select ‘Add New Connection’. You will need to provide access to your Facebook account to allow Pabbly Connect to fetch leads.

Once connected, you will choose your Facebook page and the specific lead generation form. For this, navigate to your Facebook page, select ‘Peak Performance Physio,’ and then access the Meta Business Suite to find your lead form, named ‘Physiotherapy Form’. Map these details back in Pabbly Connect.


4. Setting Up WhatsApp Messaging via Vati

With your trigger set, it’s time to establish the action that sends the WhatsApp message. In Pabbly Connect, select Vati as your action application and choose ‘Send Template Message’ as the action event. This allows you to send messages through WhatsApp using the WhatsApp API.

To connect Vati with Pabbly Connect, you will need your API endpoint and access token. These can be found in your Vati account under API documentation. Copy these details into Pabbly Connect to finalize the connection.

  • Map the WhatsApp number from the Facebook lead response.
  • Select the appropriate message template you created in Vati.
  • Fill in the required custom parameters to personalize the message.

After mapping all necessary details, click on ‘Save and Send Test Request’ to verify that your setup works correctly. You should receive a confirmation response indicating success.


5. Verifying Your Integration and Final Steps

To ensure everything is working, check your WhatsApp for the automated message sent to the lead. The message should reflect the template you set up earlier, confirming that the integration between Facebook Lead Ads, Vati, and Pabbly Connect is functioning properly.

In summary, you have successfully created a workflow in Pabbly Connect that sends automated WhatsApp messages to your physiotherapy clinic leads. The key steps involved setting up the trigger with Facebook Lead Ads and the action through Vati.


Conclusion

Using Pabbly Connect, you can efficiently automate WhatsApp messaging for your physiotherapy clinic leads. This integration not only saves time but ensures that your leads receive timely communication, enhancing your clinic’s customer engagement.

Ensure you check out Pabbly Connect to create business automation workflows and reduce manual tasks. Pabbly Connect currently offer integration with 2,000+ applications.

How to Add Unsubscribed SendGrid Subscriber in MySQL Using Pabbly Connect

Learn how to use Pabbly Connect to integrate SendGrid and MySQL, automatically adding unsubscribed contacts to your MySQL database. Explore systematic approaches to creating efficient automation solutions that convert technical concepts into practical, implementable instructions.

Watch Step By Step Video Tutorial Below


1. Setting Up Pabbly Connect for SendGrid and MySQL Integration

To start integrating SendGrid and MySQL, we first need to access Pabbly Connect. This platform allows us to automate workflows by connecting different applications seamlessly. Begin by visiting Pabbly’s website and logging into your account or signing up for a new one.

Once logged in, navigate to the Pabbly Connect dashboard. Here, you can create a new workflow by clicking on the ‘Create Workflow’ button. This is where you will define the trigger and action for your integration.


2. Creating the Workflow in Pabbly Connect

In the workflow creation window, you need to name your workflow. For this integration, we will name it ‘Add Unsubscribed SendGrid Subscriber in MySQL’. Next, select the folder where you want to save this workflow.

  • Click on the ‘Create’ button to proceed.
  • Choose ‘SendGrid’ as the trigger application.
  • Select ‘Webhook’ as the trigger event.

After setting the trigger, you will be prompted to connect SendGrid with Pabbly Connect. This requires copying the provided webhook URL and setting it up in your SendGrid account.


3. Configuring the SendGrid Webhook

To configure the webhook in SendGrid, log into your SendGrid account and navigate to the settings. Under the Mail Settings, find the Webhook settings. Here, click on ‘Create New Webhook’ and enter a friendly name for your webhook.

  • Paste the webhook URL from Pabbly Connect into the Post URL field.
  • Select ‘Unsubscribed’ as the action to be posted.
  • Test the integration to ensure the connection is successful.

After saving the webhook, return to Pabbly Connect to verify that you have received the test response from SendGrid, confirming that the integration is working correctly.


4. Setting Up MySQL Action in Pabbly Connect

Now that we have the SendGrid trigger set up, the next step is to configure the action in Pabbly Connect to insert the unsubscribed contact details into MySQL. Select ‘MySQL’ as the action application.

Choose ‘Insert Rows’ as the action event. You will need to connect your MySQL database with Pabbly Connect. If you have an existing connection, select it; otherwise, create a new one by entering your database credentials.


5. Mapping Data to MySQL Database

After connecting MySQL, you will need to map the data fields from SendGrid to your MySQL database. Start by selecting the appropriate table where the data will be stored, such as ‘new_contact’.

Map the ID, email, and date fields from the SendGrid response to the corresponding columns in your MySQL table. After mapping, click on ‘Save and Send Test Request’ to verify the integration.

Once the test is successful, you can check your MySQL database to confirm that the unsubscribed contact details have been added automatically. This completes the integration process using Pabbly Connect to manage unsubscribed contacts from SendGrid.


Conclusion

In this tutorial, we explored how to use Pabbly Connect to automate the process of adding unsubscribed SendGrid contacts to a MySQL database. By following these steps, you can efficiently manage your subscriber data and ensure accurate records in your database.

Ensure you check out Pabbly Connect to create business automation workflows and reduce manual tasks. Pabbly Connect currently offer integration with 2,000+ applications.

How to Use OpenAI as Your Personal Answer Machine with Pabbly Connect

Learn how to integrate OpenAI as your personal answer machine using Pabbly Connect to automate responses in Google Sheets effortlessly. Transform complex automation concepts into accessible, actionable steps that eliminate unnecessary manual work while maximizing existing application capabilities.

Watch Step By Step Video Tutorial Below


Accessing Pabbly Connect for Integration

To begin using Pabbly Connect, start by navigating to the homepage of Pabbly Connect. You can access it by entering the URL in your browser. Here, you will find options to sign in or sign up for free. New users can create an account to explore the platform’s features, including 100 free tasks per month.

Once logged in, you will be directed to the dashboard where you can manage your workflows. To create a new automation, click on the ‘Create Workflow’ button in the top right corner. A dialog box will prompt you to name your workflow, which can be something like ‘Generate Answers Using OpenAI Automatically.’ After naming, select a folder for your workflow, if desired.


Setting Up Google Sheets Trigger in Pabbly Connect

In this step, you will configure Google Sheets as the trigger application in Pabbly Connect. Select Google Sheets as your trigger application and choose the trigger event as ‘New or Updated Spreadsheet Row.’ This means that whenever a new question is added to your Google Sheets, it will trigger the workflow.

After selecting the trigger event, Pabbly Connect will provide a webhook URL. This URL acts as a bridge to send data from Google Sheets to Pabbly Connect. Copy this URL and proceed to your Google Sheets to set up the integration. You will need to install the Pabbly Connect Webhooks add-on from the Google Workspace Marketplace.

  • Open Google Sheets and go to Extensions > Add-ons > Get Add-ons.
  • Search for ‘Pabbly Connect Webhooks’ and install it.
  • After installation, refresh your spreadsheet to see the new options under Extensions.

Once installed, navigate to Initial Setup under the Pabbly Connect Webhooks menu. Paste the copied webhook URL and specify the trigger column (Column A) where questions will be entered. This setup ensures that Pabbly Connect captures the responses effectively.


Generating Answers with OpenAI

Next, you will connect OpenAI to generate answers for the questions added in Google Sheets using Pabbly Connect. In the action step, select OpenAI as the application and choose the action event as ‘Chat GPT’. This action will allow you to generate responses based on the questions received from Google Sheets.

After connecting OpenAI, you will need to provide your API token, which you can generate from your OpenAI account. Once connected, select the AI model you wish to use, such as GPT 3.5 Turbo. The next crucial step is to set the prompt for the AI model. The prompt should be a command instructing OpenAI to generate answers for the questions.

  • Map the question from the previous step to the prompt.
  • Ensure the prompt remains static while the question input remains dynamic.

After configuring the prompt, click on ‘Save and Send Test Request’ to test the integration. If successful, you will receive a generated answer from OpenAI, confirming that the connection works as intended.


Updating Google Sheets with Generated Answers

Now that you have generated answers using OpenAI, the next step is to update Google Sheets with these answers through Pabbly Connect. Add another action step in your workflow and select Google Sheets again. This time, choose the action event ‘Update Cell Value’ to insert the generated answer into the appropriate cell.

After connecting Google Sheets, you will specify the spreadsheet name and the sheet where the answers will be updated. For the range, you will define where the answer should be placed. For instance, if you want to update Column B, you will set the column as B and map the row index dynamically to ensure it updates correctly for each new question.

Select the spreadsheet name from the dropdown menu. Map the row index dynamically to ensure answers are placed in the correct rows.

Once all details are configured, click on ‘Save and Send Test Request’ again. If everything is set up correctly, you will observe that the answer is automatically populated in Google Sheets next to the corresponding question, confirming the successful integration.


Finalizing the Automation

To finalize the automation process, ensure that the Pabbly Connect Webhooks add-on is set to send data on every new row added. Go to Extensions > Pabbly Connect Webhooks and select ‘Send on Event’ to enable this feature. This step ensures that every time a new question is added to your Google Sheets, an answer will be generated automatically.

To test the entire workflow, add a new question in your Google Sheets. As soon as you enter the question, wait a few seconds to see the answer populate in the adjacent cell. This demonstrates that your integration is functioning correctly, allowing you to automate the answering process using OpenAI.

With this setup, you can easily create a record of questions and answers in your Google Sheets without manual intervention, showcasing the power of Pabbly Connect to streamline your workflow.


Conclusion

In this tutorial, you learned how to use Pabbly Connect to integrate OpenAI as your personal answer machine. By automating the process of generating answers in Google Sheets, you can save time and enhance productivity effortlessly.

Ensure you check out Pabbly Connect to create business automation workflows and reduce manual tasks. Pabbly Connect currently offer integration with 2,000+ applications.

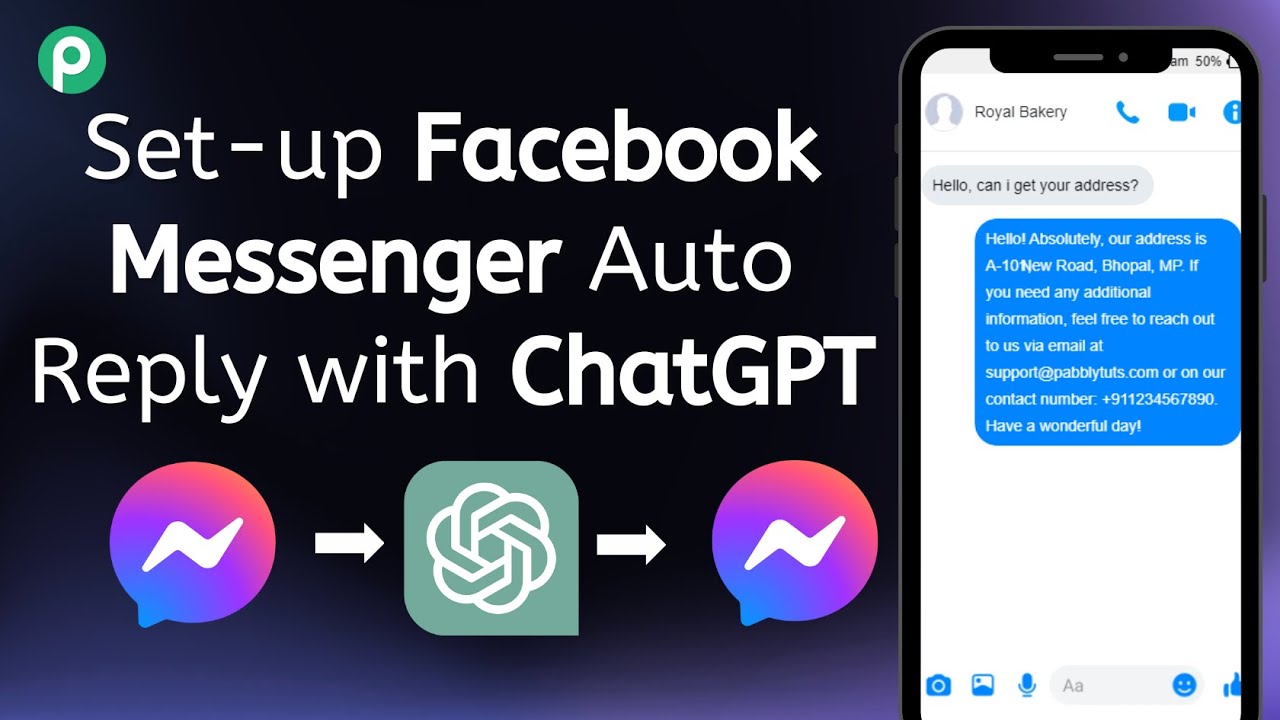
Automatically Respond to Facebook Messenger with Pabbly Connect and ChatGPT

Learn how to set up automatic replies on Facebook Messenger using Pabbly Connect and ChatGPT. Follow this detailed tutorial for seamless integration. Develop expertise in application integration and learn how to design streamlined automation workflows using proven, simplified approaches.

Watch Step By Step Video Tutorial Below


1. Setting Up Pabbly Connect for Facebook Messenger Automation

To automatically respond to messages on Facebook Messenger, we will use Pabbly Connect as our integration platform. First, sign up for a free Pabbly Connect account. This will allow you to create workflows that link Facebook Messenger with AI tools like ChatGPT.

After signing up, access your Pabbly Connect dashboard. Here, you will create a new workflow. Click on the ‘Create Workflow’ button and name it, for example, ‘Facebook Messenger to OpenAI.’ Then select the folder for your workflow and click on ‘Create’ to proceed.


2. Connecting Facebook Messenger to Pabbly Connect

In this step, we will connect Facebook Messenger as a trigger in Pabbly Connect. This allows us to receive messages sent to our Facebook page. Click on the trigger window and choose ‘Facebook Messenger’ from the app search.

  • Select the trigger event as ‘New Message Sent to Page’.
  • Click on ‘Connect’ and choose ‘Add New Connection’.
  • Log in to Facebook and authorize Pabbly Connect to access your Messenger.

After connecting, select your Facebook page where you want to receive messages. Click on ‘Save and Send Test Request’. Pabbly Connect will now wait for a new message on your Facebook page, confirming the connection is successful.


3. Generating Replies Using ChatGPT

Now that we have set up the trigger, the next step is to use Pabbly Connect to generate replies using ChatGPT. In the action window, search for ‘OpenAI’ and select it as your action application.

Choose the action event as ‘ChatGPT’. Click on ‘Connect’ and enter your OpenAI API key to establish the connection. You can find this key in your OpenAI account under the API section. Copy the key and paste it into Pabbly Connect.

  • Select the AI model you want to use, for instance, GPT-4.
  • Provide a prompt for ChatGPT to generate a response.
  • Map the user’s message from the trigger step to the prompt field.

Click on ‘Save and Send Test Request’. ChatGPT will generate a response based on the prompt you provided, which will be used as a reply to the user.


4. Sending Generated Replies Back to Facebook Messenger

After generating the reply, the next step is to send this response back to the user on Facebook Messenger using Pabbly Connect. Add a new action step and select ‘Facebook Messenger’ again.

In the action event, choose ‘Send Message’. Since we already connected Facebook Messenger in the trigger step, select the existing connection. Now, you need to map the required fields:

Map the Facebook page ID from the trigger step. Use the sender ID from the trigger to specify who will receive the reply. Insert the generated message from ChatGPT as the reply.

Click on ‘Save and Send Test Request’. This will send the generated reply to the user on Facebook Messenger, completing the automation process.


5. Testing and Optimizing the Workflow

With the setup complete, it’s time to test your automation using Pabbly Connect. Send a message to your Facebook page from another account and monitor the response time.

Check if the reply generated by ChatGPT matches the inquiry sent. If everything works as expected, consider optimizing your prompt for better responses. You can adjust the wording or details in your prompt to refine the replies further.

Remember, you can also use this automation for other applications beyond Facebook Messenger, such as Telegram or WhatsApp, using Pabbly Connect. This flexibility allows you to scale your customer interaction strategy across multiple platforms.


Conclusion

In this tutorial, we demonstrated how to automatically respond to Facebook Messenger messages using Pabbly Connect and ChatGPT. By following these steps, you can enhance your customer service experience and streamline communication effectively.

Ensure you check out Pabbly Connect to create business automation workflows and reduce manual tasks. Pabbly Connect currently offer integration with 2,000+ applications.

How to Create Google Documents from Google Sheets using OpenAI with Pabbly Connect

Learn how to automate the creation of Google Documents from Google Sheets using OpenAI and Pabbly Connect in this step-by-step tutorial. Explore efficient methods for automating routine tasks with clear, concise instructions suited for both newcomers and experienced professionals.

Watch Step By Step Video Tutorial Below


1. Accessing Pabbly Connect for Automation

To start automating the creation of Google Documents from Google Sheets, first access Pabbly Connect. This platform is essential for integrating various applications seamlessly.

Once you log into your Pabbly Connect account, you can easily create a free account if you haven’t done so already. Click on the ‘Create Workflow’ button to begin setting up your automation.


2. Setting Up Your Workflow in Pabbly Connect

In this step, you will name your workflow and select a folder for it in Pabbly Connect. Name it something descriptive, such as ‘Create Google Documents from Google Sheets using OpenAI’.

  • Select the folder to store your workflow.
  • Click on the ‘Create’ button to proceed.

After the workflow is created, you will see two boxes: Trigger and Action. The Trigger box is where you will specify the event that initiates the automation, while the Action box will define what happens afterward.


3. Connecting Google Sheets with Pabbly Connect

Now, select Google Sheets as your trigger application in Pabbly Connect. Choose the trigger event as ‘New or Updated Spreadsheet Row’. This ensures that whenever a new row is added in your Google Sheets, it will trigger the automation.

Copy the provided webhook URL and head to your Google Sheets. Go to the ‘Add-ons’ menu, search for the Pabbly Connect Webhooks add-on, and install it if you haven’t already. Then, configure the add-on by pasting the webhook URL into the setup section.

  • Specify the trigger column that will activate the automation.
  • Send a test to ensure the connection is successful.

Once the test is successful, your Google Sheets will be connected to Pabbly Connect, ready to capture data in real-time.


4. Using OpenAI to Generate Content

Next, you will integrate OpenAI with Pabbly Connect to generate content based on the topics from Google Sheets. Select OpenAI as the action application and connect it using your API key.

Map the topic data from the Google Sheets step to the prompt field in OpenAI. This will instruct OpenAI to create content based on the provided topic. Specify any additional parameters such as image URLs or formatting requirements in the prompt.

Choose the AI model you wish to use. Test the OpenAI integration to ensure content is generated correctly.

After testing, you will receive the generated content which can then be used to create a Google Document.


5. Creating Google Documents from Generated Content

Finally, you will create a Google Document using the content generated by OpenAI. Select Google Drive as the action application in Pabbly Connect and choose the ‘Create a File in a Specific Folder’ option.

Map the content generated from OpenAI to the file content field and specify the folder where you want to save the document. Make sure to test this action to confirm that the document is created successfully in your Google Drive.

Select the specific folder in Google Drive for the document. Map the file name based on the topic from Google Sheets.

Once everything is set up and tested, your automation is complete. You can now sit back and let Pabbly Connect handle the process of creating Google Documents from Google Sheets data automatically.


Conclusion

In this tutorial, we explored how to automate the creation of Google Documents from Google Sheets using OpenAI and Pabbly Connect. This integration streamlines your workflow, saving time and effort in document creation.

Ensure you check out Pabbly Connect to create business automation workflows and reduce manual tasks. Pabbly Connect currently offer integration with 2,000+ applications.

Automatically Generate WordPress Blogs with Images using OpenAI & Airtable

Learn how to automate blog creation with images on WordPress using Pabbly Connect, OpenAI, and Airtable. Step-by-step guide included. Discover how to seamlessly connect your essential tools through accessible instructions that make powerful automation available to professionals at every skill level.

Watch Step By Step Video Tutorial Below


1. Setting Up Pabbly Connect for Automation

To automate the process of generating WordPress blogs with images, you need to set up Pabbly Connect. Begin by signing up for a free account on Pabbly Connect. Once logged in, navigate to the dashboard where you can create a new workflow.

Click on ‘Create Workflow’ and name it something like ‘Airtable to OpenAI to WordPress’. This workflow will connect Airtable, OpenAI, and WordPress through Pabbly Connect, allowing you to automate blog content generation and posting.


2. Connecting Airtable to Pabbly Connect

In this step, you will connect Airtable to Pabbly Connect to trigger the automation whenever a new blog entry is added. Select Airtable as the app and choose the trigger event as ‘New Record’. Click ‘Connect’ and then ‘Add New Connection’.

  • Enter your Airtable Personal Access Token to establish the connection.
  • Select the base and table from which you want to pull the new records.
  • Ensure that the trigger field is set to ‘Created Time’ to track new entries accurately.

After saving the connection, test it to ensure that Pabbly Connect retrieves the latest data from your Airtable base. This step is crucial as it sets the foundation for the automation process.


3. Generating Images with OpenAI

Next, you will use Pabbly Connect to generate images based on the prompts provided in Airtable. Add an action step and select OpenAI as the app. Choose the action event ‘Generate Image’. Connect your OpenAI account by adding your API key.

Once connected, map the image prompt from your Airtable trigger step to the OpenAI action. Specify the model (like DALL-E 3), the number of images, and the desired quality. After completing these fields, click ‘Save and Send Test Request’ to generate the image.


4. Creating Blog Content with OpenAI

In this section, you will create the actual blog content using OpenAI. Add another action step in Pabbly Connect and select OpenAI again, this time choosing ‘ChatGPT’ as the model for generating text. Connect using the existing connection.

Map the blog title and image URL from previous steps into the prompt field. For example, instruct ChatGPT to write a blog using the title and include the generated image. This will ensure that the blog content is relevant and formatted correctly for WordPress.

  • Use HTML formatting to ensure proper display in WordPress.
  • Test the request to verify that the content is generated successfully.

After testing, you should receive a complete blog post ready for publication.


5. Posting the Blog to WordPress

Finally, you will post the generated blog content to WordPress using Pabbly Connect. Add one last action step and select WordPress as the app, choosing ‘Create Post’ as the action event. Connect your WordPress account by entering the necessary credentials.

Map the post title and content from the previous OpenAI action. You can choose to save the post as a draft or publish it immediately. After setting up these details, click ‘Save and Send Test Request’. This will create a new blog post in your WordPress account.


Conclusion

By following this tutorial, you can automate the process of generating WordPress blogs with images using Pabbly Connect, OpenAI, and Airtable. This integration simplifies content creation, allowing bloggers to focus on other important tasks while ensuring high-quality output.

Ensure you check out Pabbly Connect to create business automation workflows and reduce manual tasks. Pabbly Connect currently offer integration with 2,000+ applications.