How to Send Business Flyers to Your Customers on WhatsApp Using Pabbly Connect

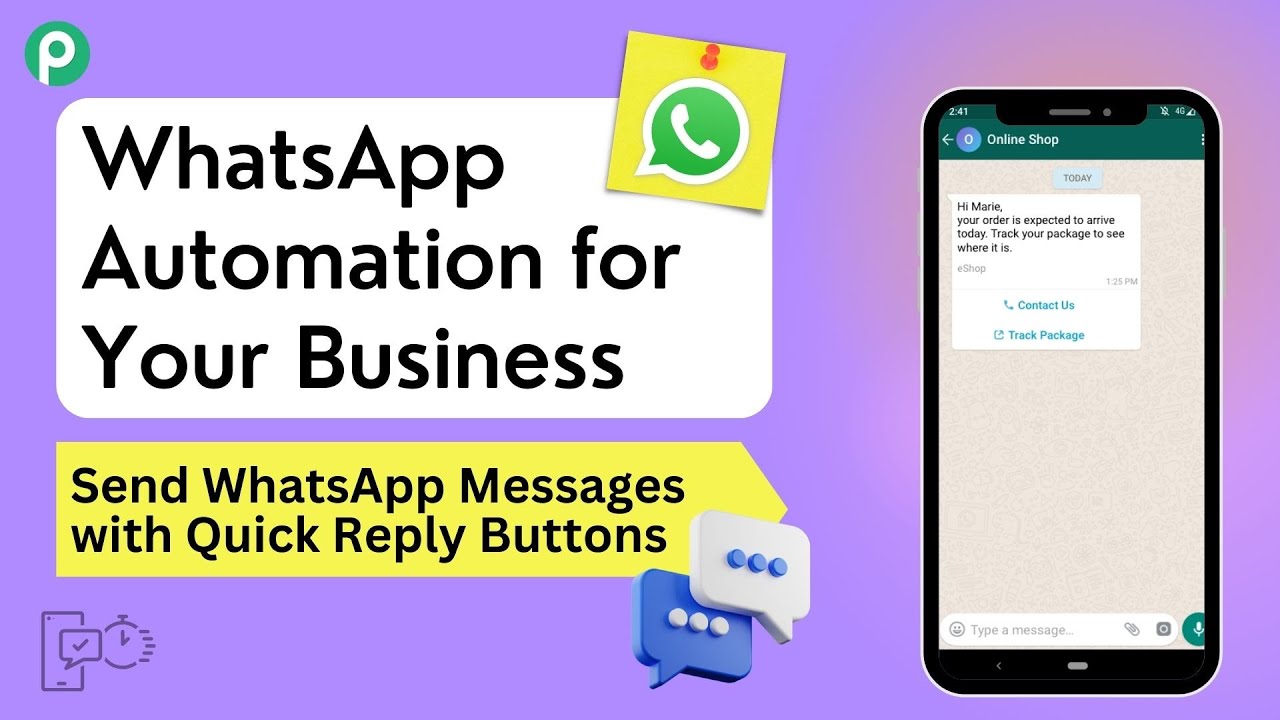
Learn how to automate sending business flyers to customers on WhatsApp using Pabbly Connect. Step-by-step tutorial with detailed instructions. Develop expertise in application integration and learn how to design streamlined automation workflows using proven, simplified approaches.

Watch Step By Step Video Tutorial Below


1. Setting Up Pabbly Connect for WhatsApp Integration

To send business flyers to customers on WhatsApp, we will use Pabbly Connect to automate the process. First, access Pabbly Connect by visiting the official website. If you are a new user, click on ‘Sign Up for Free’ to create an account. Existing users can click on ‘Sign In’ to access their dashboard.

Once logged in, navigate to the dashboard and find the ‘Create Workflow’ button. Click on it to start a new workflow. Name your workflow ‘Send Flyers to Customers on WhatsApp’ and select an appropriate folder to organize your automation. After clicking ‘Create’, you will see options to set up triggers and actions.


2. Selecting Google Sheets as Trigger in Pabbly Connect

In this step, we will set Google Sheets as the trigger application in Pabbly Connect. Click on the trigger application option and select ‘Google Sheets’. The trigger event we will choose is ‘New or Updated Spreadsheet Row’. This event will initiate the workflow whenever a new entry is added to your Google Sheets.

  • Select ‘New or Updated Spreadsheet Row’ as the trigger event.
  • Copy the provided webhook URL to connect Google Sheets with Pabbly Connect.
  • Set the trigger column in Google Sheets where data will be added.

After setting up the trigger, go to your Google Sheets document. Use the ‘Extensions’ menu to find the Pabbly Connect add-on and click on ‘Initial Setup’. Paste the webhook URL and specify the trigger column in your sheet. This column will determine when the automation is activated.


3. Connecting WhatsApp Cloud API in Pabbly Connect

Next, we will connect the WhatsApp Cloud API as the action application in Pabbly Connect. Click on the action application option and select ‘WhatsApp Cloud API’. The action event will be ‘Send Template Message’. This setup allows us to send automated messages including flyers to customers via WhatsApp.

To establish this connection, select ‘Add New Connection’ and input the required fields: Token, Phone Number ID, and WhatsApp Business Account ID. You can find these details in the Meta for Developers dashboard after setting up your WhatsApp Cloud API account. Once entered, click on ‘Save’ to connect WhatsApp Cloud API with Pabbly Connect.

  • Visit the Meta for Developers dashboard to access your WhatsApp Cloud API.
  • Copy and paste the necessary tokens and IDs into Pabbly Connect.
  • Click ‘Save’ to finalize the connection.

After successfully connecting, you will specify the template details for your WhatsApp messages. Ensure the template is approved and ready for use to send messages along with your flyers.


4. Sending Flyers to Customers via WhatsApp

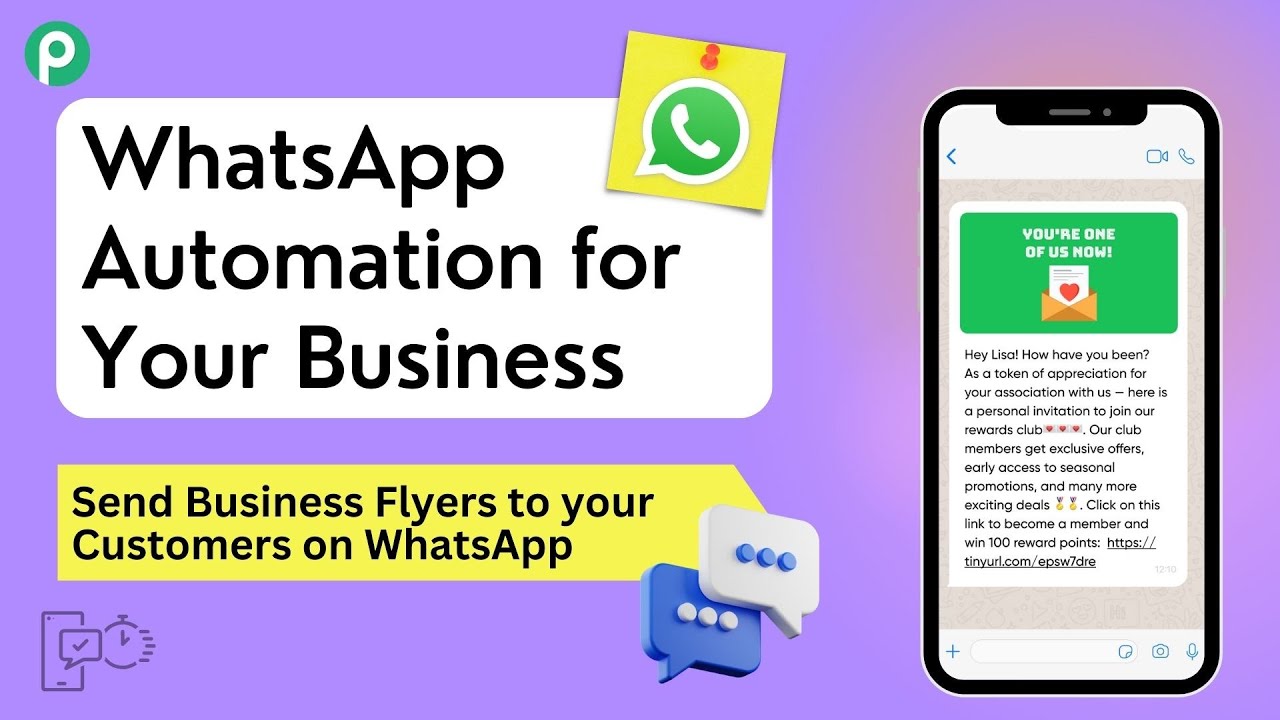
With the connection established, we can now send flyers to customers using Pabbly Connect. In the action setup, enter the template name, recipient mobile number, and the header image URL of your flyer. Make sure to map the recipient’s number dynamically from the previous step so that each customer receives their personalized message.

Once all required fields are filled, click on the ‘Save and Send Test Request’ button. This action will allow you to test if the WhatsApp message is sent successfully. If you receive a confirmation that the message is accepted, it indicates that the integration is working correctly.

Ensure the recipient’s number is correctly mapped to send personalized messages. Test the setup by sending a message to a real phone number. Verify the message received on WhatsApp for accuracy.

After confirming the test message, you can proceed to send messages to all customers listed in your Google Sheets. This automation will save you time and effort while ensuring your customers receive timely updates.


5. Automating WhatsApp Messages for All Customers

To automate the process for all customers, return to your Google Sheets and use the Pabbly Connect add-on once more. Click on the ‘Send All Data’ button, which will trigger the automation for every customer listed in your sheet. This way, all customers will receive your flyers without any manual effort.

In summary, using Pabbly Connect, you have successfully set up an automation that sends WhatsApp messages with flyers to your customers. This integration allows for a seamless flow of information and enhances customer engagement for your business.

By following these steps, you can easily manage your communications and keep your customers informed about your offerings. This automation not only saves time but also ensures that your marketing efforts reach your audience effectively.


Conclusion

In this tutorial, we explored how to automate sending business flyers to customers on WhatsApp using Pabbly Connect. By integrating Google Sheets and WhatsApp Cloud API, you can efficiently manage customer communications and enhance your business outreach.

Ensure you check out Pabbly Connect to create business automation workflows and reduce manual tasks. Pabbly Connect currently offer integration with 2,000+ applications.

How to Add ActiveCampaign Subscriber from WooCommerce Order Using Pabbly Connect

Learn how to automate adding ActiveCampaign subscribers from WooCommerce orders using Pabbly Connect. Follow this detailed step-by-step tutorial. Eliminate manual repetitive tasks from your workflow. Discover proven automation methods with intuitive steps designed for efficiency-minded professionals.

Watch Step By Step Video Tutorial Below


1. Setting Up Pabbly Connect for WooCommerce and ActiveCampaign

To begin, we will set up Pabbly Connect to automate the process of adding an ActiveCampaign subscriber from WooCommerce orders. First, log in to your Pabbly Connect account. If you do not have an account, you can sign up for free using the link provided in the description.

Once logged in, navigate to the dashboard and click on the ‘Create Workflow’ button. Name your workflow, for example, ‘WooCommerce to ActiveCampaign,’ and select the folder where you want to save it. After this, click on ‘Create Now’ to proceed. You will see a trigger window and an action window that will help you set up the integration.


2. Connecting WooCommerce with Pabbly Connect

The next step is to connect WooCommerce to Pabbly Connect. In the trigger window, search for ‘WooCommerce’ and select it. From the dropdown menu, choose the trigger event as ‘New Order Created.’ This will allow Pabbly Connect to capture new order details from your WooCommerce store.

  • Select WooCommerce as the app in Pabbly Connect.
  • Choose ‘New Order Created’ as the trigger event.
  • Copy the webhook URL provided by Pabbly Connect.

Now, go to your WooCommerce account settings. Navigate to WooCommerce > Settings > Advanced > Webhooks. Click on ‘Add Webhook’ and fill in the details. Name the webhook (e.g., ‘Pabbly Connect’), set the status to ‘Active,’ and paste the copied webhook URL in the Delivery URL field. Ensure the topic is set to ‘Order Created’ and click on ‘Save Webhook.’ This will link your WooCommerce store to Pabbly Connect.


3. Adding ActiveCampaign as an Action in Pabbly Connect

After successfully connecting WooCommerce to Pabbly Connect, we will now add ActiveCampaign as an action step. In the action window, search for ‘ActiveCampaign’ and select it. Choose ‘Create or Update Contact’ as the action event. This will allow us to add the customer details to ActiveCampaign whenever a new order is placed.

Next, click on ‘Connect’ and create a new connection by entering your ActiveCampaign API key and URL. You can find these in your ActiveCampaign account under Settings > Developer. Make sure to remove ‘https://’ and any trailing slashes from the URL before pasting it into Pabbly Connect. After entering the necessary details, click on ‘Save’ to establish the connection.

  • Select ActiveCampaign as the app in Pabbly Connect.
  • Choose ‘Create or Update Contact’ as the action event.
  • Enter your ActiveCampaign API key and URL to connect.

Once connected, map the customer details from the WooCommerce trigger response to the corresponding fields in ActiveCampaign. This includes the customer’s email, first name, last name, and phone number. This mapping ensures that the correct details are sent to ActiveCampaign whenever a new order is placed.


4. Tagging Customers with Product Names in ActiveCampaign

To enhance our automation, we will tag customers in ActiveCampaign with the product names they purchase. After mapping the customer details, locate the field for ‘Tag ID’ in the ActiveCampaign action step. Instead of selecting a static tag, we will dynamically map the product name from the WooCommerce order. using Pabbly Connect

To do this, we will first add an action step to search for the tag in ActiveCampaign. Click on ‘Add Action Step,’ search for ActiveCampaign, and choose the action event ‘Search Tag.’ Connect using the existing ActiveCampaign connection. In the tag name field, map the product name from the WooCommerce trigger response. This allows Pabbly Connect to find the correct tag ID associated with the purchased product.

Add an action step to search for the tag in ActiveCampaign. Map the product name from WooCommerce to find the corresponding tag. Use the tag ID in the ‘Tag ID’ field of the ActiveCampaign contact creation step.

After mapping the tag ID, you can select the list in ActiveCampaign where you want to add the contact. Click on ‘Save and Send Test Request’ to check if the automation is working as expected. If successful, you will see the customer added as a contact with the correct tag in your ActiveCampaign account.


5. Testing the Automation Workflow in Pabbly Connect

Now that we have set up the entire automation workflow in Pabbly Connect, it’s time to test it. Go back to your WooCommerce store and place a new order for a different product. Fill in the customer details and complete the order process. This will trigger the webhook and send the new order details to Pabbly Connect.

Once the order is placed, return to your ActiveCampaign account. Check the contacts section to verify if the new customer has been added with the appropriate tag for the product they purchased. This real-time testing confirms that our integration is functioning correctly.

By utilizing Pabbly Connect, you can automate the process of adding subscribers from WooCommerce orders to ActiveCampaign efficiently. This integration not only saves time but also ensures that your marketing efforts are targeted based on customer purchases.


Conclusion

In this tutorial, we explored how to use Pabbly Connect to automate adding ActiveCampaign subscribers from WooCommerce orders. By following these steps, you can enhance your email marketing efforts and improve customer engagement effectively.

Ensure you check out Pabbly Connect to create business automation workflows and reduce manual tasks. Pabbly Connect currently offer integration with 2,000+ applications.

Integrating Facebook Leads to Google Sheets for Solar Energy Business with Pabbly Connect

Learn how to integrate Facebook leads to Google Sheets for your solar energy business using Pabbly Connect. Step-by-step guide for seamless automation. Transform complex automation concepts into accessible, actionable steps that eliminate unnecessary manual work while maximizing existing application capabilities.

Watch Step By Step Video Tutorial Below


1. Accessing Pabbly Connect for Integration

To integrate Facebook leads into Google Sheets for your solar energy business, you will first need to access Pabbly Connect. This platform is essential for automating workflows between applications.

Begin by visiting the Pabbly website. If you don’t have an account, you can sign up for free, which allows you to perform 100 tasks monthly. Once logged in, click on the ‘Access Now’ button under Pabbly Connect to reach the dashboard.


2. Creating a Workflow in Pabbly Connect

Next, you need to create a new workflow in Pabbly Connect. Click on the ‘Create Workflow’ button and name your workflow, such as ‘Add Facebook Leads to Google Sheets for Solar Energy Business’. Choose the folder where you want to save this workflow.

  • Click the ‘Create’ button to proceed.
  • You will see two main sections: Trigger and Action.
  • Select Facebook Lead Ads as your trigger application.

After selecting Facebook Lead Ads, choose ‘New Lead Instant’ as your trigger event. This setup will allow Pabbly Connect to capture new leads from your Facebook ads automatically.


3. Connecting Facebook Lead Ads to Pabbly Connect

To connect your Facebook Lead Ads to Pabbly Connect, click on the ‘Connect’ button and then select ‘Add New Connection’. You will need to log into your Facebook account to grant access.

Once connected, select the specific Facebook page associated with your solar energy business. In this case, choose the page named ‘Solar Rise’. Then, select the lead generation form you want to use from the dropdown. This step is crucial for mapping your leads accurately.


4. Creating Sample Submission for Testing

After setting up the trigger, you must create a sample submission to test the connection. Ensure your lead generation form is live, then use the Meta for Developers tool to preview the form.

  • Fill in the form with dummy details like name, email, and phone number.
  • Click on the ‘Submit’ button to send the data.

Return to Pabbly Connect to check if the sample submission was successful. You should see the lead details appear on your dashboard.


5. Adding Leads to Google Sheets Automatically

The final step is to set up the action in Pabbly Connect to add the leads to Google Sheets. Select Google Sheets as your action application and choose ‘Add New Row’ as your action event.

Connect your Google Sheets account by clicking on ‘Connect’ and then ‘Add New Connection’. Sign in and allow access. Next, select the spreadsheet you want to use, which is named ‘Facebook Leads’, and map the fields such as full name, email, and phone number from your trigger data.

Click on the ‘Save and Send Test Request’ button to finalize the setup. Check your Google Sheets to confirm that the new lead data has been added successfully. This integration allows you to manage your leads effectively for your solar energy business.


Conclusion

Using Pabbly Connect, you can seamlessly integrate Facebook leads into Google Sheets for your solar energy business. This automation helps in efficiently managing leads and improving conversion rates.

Ensure you check out Pabbly Connect to create business automation workflows and reduce manual tasks. Pabbly Connect currently offer integration with 2,000+ applications.

How to Add Mailchimp Subscriber from Google Contacts Using Pabbly Connect

Learn how to add a Mailchimp subscriber from Google Contacts using Pabbly Connect. Follow our step-by-step guide to automate your email marketing. Discover hidden automation capabilities within your existing tools. This guide shows you how to connect your essential applications and permanently eliminate redundant manual processes.

Watch Step By Step Video Tutorial Below


1. Accessing Pabbly Connect for Integration

To add a Mailchimp subscriber from Google Contacts using Pabbly Connect, first, access the Pabbly Connect platform. If you don’t have an account, you can sign up for free, which takes just a couple of minutes.

Once you have logged in, you will see the dashboard. Click on the ‘Access Now’ button under Pabbly Connect to navigate to the workflow section. Here, you can create and manage your automation workflows effectively.


2. Creating a New Workflow in Pabbly Connect

In this section, you will create a new workflow in Pabbly Connect. Click on the ‘Create Workflow’ button, and a pop-up window will appear. Name your workflow something descriptive, such as ‘Add Mailchimp Subscriber with Tag from Google Contacts’.

  • Choose the folder where you want to save your workflow.
  • Click on the ‘Create’ button to finalize your workflow setup.

This will take you to the main workflow window, which contains two main boxes: Trigger and Action. The Trigger is the event that starts the workflow, while Action is what happens as a result.


3. Setting Up the Trigger in Pabbly Connect

Now, you need to set up the Trigger in Pabbly Connect. Select ‘Google Contacts’ as your trigger application. For the Trigger Event, choose ‘New or Updated Contact’. This will ensure that every time a new contact is added, it triggers the workflow.

Next, you will need to connect your Google Contacts to Pabbly Connect. Click on ‘Connect’, then select ‘Add New Connection’. Sign in with your Google account and allow access. Once connected, you can proceed to create a new contact in Google Contacts.


4. Creating a New Contact in Google Contacts

After setting up the trigger, it’s time to create a new contact in Google Contacts. Click on the ‘Create Contact’ button, and fill in the contact details. Make sure to select a label, such as ‘Subscriber’, to categorize this contact.

  • Enter the first name, last name, and email address.
  • Add a phone number if necessary.

Once you have filled in all the required fields, click on ‘Save’. This action will trigger the workflow you created in Pabbly Connect, capturing the new contact details.


5. Adding a Mailchimp Subscriber with Tag

Now that the trigger is set up, it’s time to add the new subscriber to Mailchimp. In Pabbly Connect, add another action step and select ‘Mailchimp’ as your action application. Choose the action event ‘Add New Member with Custom Fields’.

Connect Mailchimp to Pabbly Connect by clicking on ‘Connect’ and entering your API key and data center information. You can find these details in your Mailchimp account under ‘Profile’ > ‘Extras’ > ‘API Keys’.

Map the fields from Google Contacts to Mailchimp, including email address, first name, last name, and the tag you created earlier. Once all fields are mapped, click on ‘Save and Test Request’. This will add the subscriber to your Mailchimp audience with the specified tag.


Conclusion

In this tutorial, we demonstrated how to add a Mailchimp subscriber from Google Contacts using Pabbly Connect. By following these steps, you can automate the process of managing your email subscribers efficiently. This integration not only saves time but also ensures that your marketing efforts are streamlined and effective.

Ensure you check out Pabbly Connect to create business automation workflows and reduce manual tasks. Pabbly Connect currently offer integration with 2,000+ applications.

How to Add Facebook Leads to Podio Using Pabbly Connect

Learn how to seamlessly integrate Facebook Leads with Podio using Pabbly Connect in this detailed tutorial. Step-by-step guide included. Eliminate manual repetitive tasks from your workflow. Discover proven automation methods with intuitive steps designed for efficiency-minded professionals.

Watch Step By Step Video Tutorial Below


1. Introduction to Pabbly Connect for Facebook Leads

In this tutorial, we will explore how to use Pabbly Connect to add Facebook leads to Podio. This integration allows businesses to automate the process of capturing leads from Facebook Lead Ads directly into their Podio account. By using Pabbly Connect, you can ensure that every new lead is efficiently managed without manual entry.

To begin, ensure that you have a Pabbly Connect account. If you are new to Pabbly Connect, you can sign up for free and receive 100 tasks monthly. Once signed in, you will be ready to create your first workflow to connect Facebook Lead Ads with Podio.


2. Setting Up Your Pabbly Connect Workflow

The first step in integrating Facebook leads with Podio using Pabbly Connect is to create a new workflow. Start by navigating to the dashboard and clicking on the ‘Create Workflow’ button. Name your workflow appropriately, such as ‘Facebook Leads to Podio,’ and select a folder for organization.

  • Click on ‘Create’ to establish the workflow.
  • Choose Facebook Lead Ads as your trigger application.
  • Select ‘New Lead Instant’ as the trigger event.

Once you have set up the trigger, you need to establish a connection between Facebook Lead Ads and Pabbly Connect. Click on ‘Connect’ and authorize access to your Facebook account. After successful authorization, select the Facebook page and lead gen form that you want to use for this integration.


3. Testing the Facebook Lead Trigger

After completing the trigger setup in Pabbly Connect, it is essential to test the connection. You will need to perform a test submission using the Facebook Lead Ads testing tool. This step ensures that Pabbly Connect captures the lead data correctly.

Follow these steps to test the trigger:

  • Visit the Meta for Developers page and navigate to your apps.
  • Select the lead form and click ‘Preview Form’ to fill in the lead details.
  • Submit the form and check for a successful response in Pabbly Connect.

If the test lead data appears in Pabbly Connect, your trigger is set up correctly. This means that any new lead from Facebook Lead Ads will now be captured automatically.


4. Connecting Podio as the Action Application

Now that the trigger is functioning, the next step is to connect Podio as the action application in your Pabbly Connect workflow. Click on the action window and select Podio as your action application. The action event will be to create an item in Podio.

To set up the connection, click on ‘Connect’ and authorize Pabbly Connect to access your Podio account. Once connected, you will need to select the organization and workspace where the lead data will be added.

Choose the organization from the dropdown. Select the workspace where you want to create the item. Map the lead data fields such as name, email, and phone number according to the specified format.

After mapping the fields, click on ‘Save and Send Test Request’ to confirm that the lead data is added to Podio successfully. You should see a positive response indicating that the integration works.


5. Finalizing Your Integration and Conclusion

With both the trigger and action set up successfully, your Pabbly Connect workflow is now complete. Whenever a new lead is generated through Facebook Lead Ads, the lead details will automatically be added to your Podio account. This automation saves time and prevents manual errors.

To confirm the successful integration, check your Podio workspace for the newly added lead details. This process ensures that all leads are captured efficiently and can be managed directly from Podio.

Using Pabbly Connect allows you to integrate various applications seamlessly, enhancing your business operations. You can explore more integrations and automate other tasks to optimize your workflow further.


Conclusion

In this tutorial, we covered how to add Facebook leads to Podio using Pabbly Connect. This integration streamlines lead management, ensuring that all incoming leads are captured automatically in Podio, improving efficiency and accuracy.

Ensure you check out Pabbly Connect to create business automation workflows and reduce manual tasks. Pabbly Connect currently offer integration with 2,000+ applications.

How to Send WhatsApp Messages to Facebook Leads for Pharmaceutical Business Using Pabbly Connect

Learn how to integrate Facebook Leads with WhatsApp messages for your pharmaceutical business using Pabbly Connect. Step-by-step guide included! Build sophisticated automated workflows in less time than you think. This guide translates complex integrations into straightforward steps for immediate implementation.

Watch Step By Step Video Tutorial Below


1. Accessing Pabbly Connect for Facebook Leads and WhatsApp Integration

To begin the integration process, you need to access Pabbly Connect. If you’re a new user, click on the ‘Sign Up for Free’ button to create an account. Existing users can simply log in to their dashboard.

Once logged in, navigate to your dashboard and locate the ‘Create Workflow’ button on the right-hand corner. Click it and name your workflow, such as ‘Send WhatsApp Messages to Facebook Leads’. Save it into a folder named ‘Facebook Lead Ads to WhatsApp’ for easy organization.


2. Setting Up the Trigger with Facebook Leads

In this step, you will set up the trigger application, which is Facebook Lead Ads. Select Facebook Lead Ads as your trigger app and choose the trigger event as ‘New Lead Instant’. This ensures that every time a new lead is generated, the workflow will activate.

  • Select Facebook Lead Ads as the trigger application.
  • Choose ‘New Lead Instant’ as the trigger event.
  • Click on ‘Connect’ to link your Facebook account to Pabbly Connect.

Once connected, select the Facebook page associated with your pharmaceutical business and the lead generation form you wish to use. This setup allows Pabbly Connect to capture new leads effectively.


3. Establishing Connection with WhatsApp Cloud API

Next, you need to set up the action application, which is WhatsApp Cloud API. Choose WhatsApp Cloud API as your action app and select ‘Send Template Message’ as the action event. This allows you to send messages to leads captured from Facebook.

To connect WhatsApp Cloud API with Pabbly Connect, you will need to enter your token, phone number ID, and WhatsApp business account ID. These details can be found in the Meta for Developers dashboard under the WhatsApp API setup.

  • Input your temporary access token from Meta for Developers.
  • Paste the phone number ID and WhatsApp business account ID.
  • Click ‘Save’ to establish the connection.

Once saved, Pabbly Connect will facilitate sending WhatsApp messages to the leads captured from your Facebook ads.


4. Sending WhatsApp Messages to Leads

Now that the connections are established, you can configure the WhatsApp message template. Select the template you created, such as ‘New Lead Message’, and ensure the language code is set to English (US).

In the body of the message, include a greeting and a variable placeholder for the lead’s name. This ensures that every WhatsApp message sent will be personalized based on the lead’s information captured by Pabbly Connect.

Choose the template name and language code. Map the mobile number and lead name from the previous step. Click ‘Save and Send Request’ to send the message.

After clicking save, Pabbly Connect will process the request and send the WhatsApp message to the lead, confirming the successful automation.


5. Conclusion

In conclusion, using Pabbly Connect to send WhatsApp messages to Facebook leads for your pharmaceutical business enhances communication and engagement. This integration streamlines the process, ensuring that every new lead receives timely responses through WhatsApp.

Ensure you check out Pabbly Connect to create business automation workflows and reduce manual tasks. Pabbly Connect currently offer integration with 2,000+ applications.

By following the detailed steps outlined in this tutorial, you can set up this automation effectively, improving your lead management and customer interaction strategies.

How to Sync Microsoft Excel with Notion Using Pabbly Connect

Learn how to sync Microsoft Excel with Notion using Pabbly Connect. This step-by-step guide covers the integration process and automation setup. Develop expertise in application integration and learn how to design streamlined automation workflows using proven, simplified approaches.

Watch Step By Step Video Tutorial Below


1. Accessing Pabbly Connect for Integration

To sync Microsoft Excel with Notion, you need to access Pabbly Connect. Start by signing into your Pabbly account on the Pabbly website. If you are a new user, you can sign up for free and get 100 free tasks every month, which is a great way to begin your automation journey.

Once logged in, navigate to the Pabbly Connect dashboard. Here, you will create a new workflow that connects Notion and Microsoft Excel. Click on the ‘Create Workflow’ button on the top right corner to initiate the integration process.


2. Creating a Workflow in Pabbly Connect

In the new dialog box that appears, name your workflow something descriptive, such as ‘Notion to Microsoft Excel’. After naming your workflow, select the folder where you want to save it. For this example, you can create a folder named ‘Notion to Microsoft Excel’ and select it.

  • Click on ‘Create’ to finalize your workflow setup.
  • You will see two windows: one for the trigger and another for the action.
  • The trigger application will be Notion, and the action application will be Microsoft Excel.

Now, set up your trigger application by selecting Notion and the trigger event as ‘New Database Item’. This means every time a new item is added to your Notion database, Pabbly Connect will capture this event and execute the action in Microsoft Excel.


3. Configuring the Notion Trigger in Pabbly Connect

To connect your Notion account with Pabbly Connect, click on ‘Connect’. A window will prompt you to add a new connection. Click on ‘Add New Connection’ and then select ‘Connect with Notion’. You will be asked to allow access to your Notion account, which is a secure process.

After authorizing, you need to select your database ID from Notion. Choose the database where you will add new items, such as a task list. Fill in the required fields in your Notion database to test the connection. For instance, add a demo user, project date, task creator, and task name.

  • Click on ‘Save and Send Test Request’ to check if the data is captured successfully.
  • If the response is accurate, it confirms that your Notion trigger is set up correctly.

Keep in mind that Notion has a polling time of 8 hours, meaning it will check for new data every 8 hours. This is important for ensuring your Excel sheet receives the latest updates.


4. Setting Up Microsoft Excel Action in Pabbly Connect

After successfully configuring the Notion trigger, it’s time to set up the action in Microsoft Excel using Pabbly Connect. Click on the arrow to choose your action application, which will be Microsoft Excel. The action event you need to select is ‘Add Row to Worksheet’. This means every time a new entry is made in Notion, it will automatically add a new row in your Excel worksheet.

To connect Microsoft Excel with Pabbly Connect, click on ‘Connect’ and then ‘Add New Connection’. You will be prompted to connect with Microsoft Excel. Click on ‘Accept’ to authorize the connection. Once authorized, you will be asked to select a workbook from your Microsoft account. Choose your workbook, for example, ‘Todo List’.

After selecting the workbook, you will need to choose the specific worksheet, such as ‘Tasks’. Map the data from your Notion trigger to the appropriate columns in your Excel worksheet.

Make sure to map fields like employee name, project date, task creator, task name, and submission date to their respective columns in Excel. This ensures that every new entry in Notion is reflected accurately in your Excel worksheet.


5. Finalizing the Integration Process

After mapping all necessary fields, click on ‘Save and Send Test Request’ to verify if the data from your Notion database is captured in Microsoft Excel. Go back to your Excel worksheet and refresh it to see if the new data appears correctly. If it does, congratulations! You have successfully set up the integration using Pabbly Connect.

Now, every time you add a new item in your Notion database, it will automatically sync with Microsoft Excel, thanks to the automation established through Pabbly Connect. This integration saves time and ensures that your data is always up-to-date.

In summary, you have created a workflow that connects Notion and Microsoft Excel. The trigger is set to capture new database items from Notion, and the action is configured to add rows in Excel. This is how you can effectively use Pabbly Connect for your automation needs.


Conclusion

In this tutorial, we explored how to sync Microsoft Excel with Notion using Pabbly Connect. By following the detailed steps, you can automate data transfers between these applications seamlessly. This integration enhances productivity and keeps your data organized and up-to-date.

Ensure you check out Pabbly Connect to create business automation workflows and reduce manual tasks. Pabbly Connect currently offer integration with 2,000+ applications.

How to Send WhatsApp Messages with Quick Reply Buttons & Call to Actions Using Pabbly Connect

Learn how to automate sending WhatsApp messages with quick reply buttons using Pabbly Connect and Google Sheets. Step-by-step guide included. Eliminate manual repetitive tasks from your workflow. Discover proven automation methods with intuitive steps designed for efficiency-minded professionals.

Watch Step By Step Video Tutorial Below


1. Accessing Pabbly Connect for WhatsApp Integration

To send WhatsApp messages with quick reply buttons, you first need to access Pabbly Connect. This platform allows you to automate tasks without any coding skills. Simply visit the Pabbly Connect homepage and sign in or create a new account to get started.

Once you are logged in, you will see various options. Click on the ‘Access Now’ button under Pabbly Connect to enter the dashboard where you can create workflows connecting Google Sheets and WhatsApp Cloud API.


2. Creating Your Workflow in Pabbly Connect

In Pabbly Connect, creating a workflow is straightforward. Click on the ‘Create Workflow’ button and name your workflow, such as ‘Send Automated WhatsApp Messages from Google Sheets with Buttons’. Select a folder to organize your workflow efficiently.

  • Name your workflow appropriately.
  • Choose a folder for better organization.

After naming, you will set up a trigger. Select Google Sheets as the trigger application and choose the event ‘New or Updated Spreadsheet Row’. This will ensure that every time you add data to your Google Sheets, it triggers the workflow to send a WhatsApp message.


3. Connecting Google Sheets to Pabbly Connect

To connect Google Sheets with Pabbly Connect, you will need to set up a webhook. Copy the provided webhook URL from Pabbly Connect and go to your Google Sheets. Under the ‘Extensions’ menu, find the Pabbly Connect Webhooks add-on and set it up.

  • Access Google Sheets and navigate to Extensions > Add-ons.
  • Install the Pabbly Connect Webhooks add-on if not already installed.
  • Paste the copied webhook URL in the initial setup of the add-on.

Set your trigger column in Google Sheets. This column will determine when to send data to Pabbly Connect. Once the setup is complete, test the connection by sending a test response to ensure everything is working correctly.


4. Setting Up WhatsApp Cloud API in Pabbly Connect

After successfully connecting Google Sheets, the next step is to set up the WhatsApp Cloud API in Pabbly Connect. Select WhatsApp Cloud API as your action application and choose the action event ‘Send Template Message’. This allows you to send personalized messages with quick reply buttons.

For this, you need to create a new connection by entering your WhatsApp Cloud API token, phone number ID, and WhatsApp Business Account ID. These details can be found in your WhatsApp Cloud API setup on the Meta for Developers site.

Enter your API token from the WhatsApp Cloud API. Input your phone number ID. Provide your WhatsApp Business Account ID.

Once the connection is established, you can create a message template that includes quick reply buttons. After creating the template, ensure it is approved by WhatsApp before using it in your workflow.


5. Sending WhatsApp Messages with Quick Reply Buttons

Now that your workflow is set up, you can start sending WhatsApp messages using Pabbly Connect. Select your approved template in the action step, and map the WhatsApp number and other variables from the Google Sheets data to personalize the message.

Finally, test the workflow by sending a message to ensure everything is functioning as expected. The message will include quick reply buttons that lead customers to your website or allow them to call you directly.

Map the recipient’s WhatsApp number dynamically. Customize the message body with variables. Ensure buttons are correctly linked to actions.

Once tested, you can use the automation to send messages to all your customers seamlessly. This entire process showcases how Pabbly Connect simplifies the integration of Google Sheets and WhatsApp Cloud API for efficient communication.


Conclusion

This tutorial demonstrated how to send WhatsApp messages with quick reply buttons using Pabbly Connect. By integrating Google Sheets and WhatsApp Cloud API, you can automate customer communication effortlessly, enhancing engagement and efficiency.

Ensure you check out Pabbly Connect to create business automation workflows and reduce manual tasks. Pabbly Connect currently offer integration with 2,000+ applications.

How to Create Aweber Subscriber from Xero Contact Using Pabbly Connect

Learn how to automate creating Aweber subscribers from Xero contacts using Pabbly Connect. Follow this detailed tutorial for seamless integration. Build sophisticated automated workflows in less time than you think. This guide translates complex integrations into straightforward steps for immediate implementation.

Watch Step By Step Video Tutorial Below


1. Access Pabbly Connect for Integration

To create Aweber subscribers from Xero contacts, you first need to access Pabbly Connect. This platform enables seamless automation between various applications, including Xero and Aweber. Start by visiting the Pabbly website and signing into your account.

If you are a new user, you can sign up for free and receive 100 tasks monthly. Once logged in, navigate to the dashboard and select the Pabbly Connect option by clicking on ‘Access Now’. This will direct you to the workflow creation area.


2. Create a New Workflow in Pabbly Connect

In the Pabbly Connect dashboard, you will need to create a new workflow to automate the process. Click on the ‘Create Workflow’ button located in the upper right corner. A dialog box will appear asking for a workflow name.

  • Name your workflow (e.g., ‘Aweber Subscriber for Xero Contact’)
  • Select a folder to save your workflow (e.g., ‘Aweber’)
  • Click ‘Create’ to finalize your workflow setup

After creating the workflow, you will see two sections labeled Trigger and Action. Setting up these two components is crucial for the automation process, as they dictate how data flows between Xero and Aweber through Pabbly Connect.


3. Set Up Trigger from Xero in Pabbly Connect

The next step is to configure the trigger application, which in this case is Xero. Click on the arrow in the Trigger section and select Xero as your application. The trigger event will be set to ‘New Contact’, indicating that each time a new contact is created in Xero, Pabbly Connect will capture this event.

After selecting the trigger event, click on ‘Connect’. A dialog box will appear where you can either add a new connection or choose an existing one. If creating a new connection, you will need to authorize Pabbly Connect to access your Xero account by clicking ‘Allow Access’.


4. Create a New Contact in Xero

Now that Pabbly Connect is connected to Xero, you need to create a new contact to test the integration. Navigate to your Xero account, click on ‘Contacts’, and then select ‘All Contacts’. To add a new contact, click on the ‘New Contact’ button.

  • Fill in the contact details such as Name, Account Number, First Name, Last Name, and Email
  • For the phone number, include the country code (e.g., +91)
  • Click ‘Save and Close’ to create the contact

Once saved, go back to Pabbly Connect and check if the new contact details have been captured. Click on ‘Save and Send Test Request’ to confirm that the integration is working correctly. If successful, Pabbly Connect will display the contact information you just entered.


5. Set Up Action to Create Aweber Subscriber

The final step is to configure the action application, which will be Aweber. In the Action section, click on the arrow and select Aweber as the application. The action event should be set to ‘Add or Update Subscriber’. This means that every time a new contact is added in Xero, a corresponding subscriber will be created in Aweber via Pabbly Connect.

Click on ‘Connect’ and authorize your Aweber account by logging in and allowing access. Once authorized, you will need to specify the List ID where the new subscriber should be added. Map the necessary data fields such as Full Name and Email from the previous trigger step.

After filling in the required details, click on ‘Save and Send Test Request’. Check your Aweber account to verify that the new subscriber has been created successfully. You should see the new contact appear in your Aweber subscribers list, confirming that the integration through Pabbly Connect was successful.


Conclusion

In this tutorial, we demonstrated how to create Aweber subscribers from Xero contacts using Pabbly Connect. By following these steps, you can automate your subscriber management efficiently.

Ensure you check out Pabbly Connect to create business automation workflows and reduce manual tasks. Pabbly Connect currently offer integration with 2,000+ applications.

Elementor Salesforce Integration: Create Salesforce Contacts from Elementor Form Responses Using Pabbly Connect

Learn how to integrate Elementor Form Responses with Salesforce using Pabbly Connect. Step-by-step tutorial to automate contact creation in Salesforce. Implement the precise methodologies leading organizations use to automate repetitive tasks, illustrated with practical examples designed for immediate application.

Watch Step By Step Video Tutorial Below


1. Access Pabbly Connect for Elementor Form Responses

To create Salesforce contacts from Elementor form responses, you need to access Pabbly Connect. Start by signing in to your Pabbly Connect account. If you are a new user, you can sign up for free and get 100 tasks each month.

Once you are on the Pabbly Connect dashboard, click on the ‘Access Now’ button to enter the application. From there, you will create a new workflow that connects your Elementor form with Salesforce.


2. Create a New Workflow in Pabbly Connect

In this step, you will create a new workflow to automate the process. Click on the ‘Create Workflow’ button in the top right corner. Name your workflow, such as ‘Create Salesforce Contacts from Elementor Form Responses’. This will help you identify it later. using Pabbly Connect

On the left side, you can see folders you’ve created. Choose a folder named ‘Elementor to Salesforce’. This organization is essential for managing multiple integrations. Click the ‘Create’ button to continue.


3. Set Trigger and Action in Pabbly Connect

Now, you need to define your trigger and action. The trigger application will be Elementor, and the trigger event will be ‘New Form Submission’. This means that every time someone submits a form, it will trigger the workflow. using Pabbly Connect

Next, set the action application as Salesforce, with the action event being ‘Create a Contact’. This means that once a new form submission occurs, a new contact will automatically be created in your Salesforce account. This setup is crucial for the automation process.


4. Connect Elementor with Pabbly Connect

To connect Elementor with Pabbly Connect, you will need to use a webhook URL provided in your Pabbly Connect dashboard. Copy the webhook URL and go to your Elementor form editor.

In Elementor, click on ‘Edit with Elementor’ and navigate to the ‘Actions After Submit’ section. Here, add a new action for ‘Webhook’ and paste the copied URL. Click on ‘Update’ to save your changes. This step establishes a connection between your Elementor form and Pabbly Connect.

  • Go to your Elementor form editor.
  • Add a new action for Webhook.
  • Paste the copied URL and update.

After updating, return to Pabbly Connect, where it will show that it is waiting for a webhook response. This indicates that the connection is now live and ready for testing.


5. Test Submission and Map Data in Pabbly Connect

To test the integration, submit a form response using the Elementor form. Fill in the required fields such as first name, last name, email, and mobile number. After submitting, you should see a confirmation message indicating that the submission was successful.

Once you return to Pabbly Connect, you will see that the form response details have been captured. This includes the first name, last name, email, and mobile number. Next, you need to map these fields to create a contact in Salesforce. This mapping ensures that the correct data is transferred from Elementor to Salesforce.

  • Submit the form with test data.
  • Verify that the data is captured in Pabbly Connect.
  • Map the captured data to Salesforce fields.

After mapping, save the settings and send a test request to ensure that a new contact is created in Salesforce. If successful, you will see the new contact in your Salesforce account.


Conclusion

In this tutorial, we explored how to integrate Elementor Form Responses with Salesforce using Pabbly Connect. By following the steps outlined, you can automate the creation of Salesforce contacts effortlessly. This integration streamlines your workflow and enhances data management.

Ensure you check out Pabbly Connect to create business automation workflows and reduce manual tasks. Pabbly Connect currently offer integration with 2,000+ applications.