Automate WhatsApp Messages for Wedding Planning with Pabbly Connect

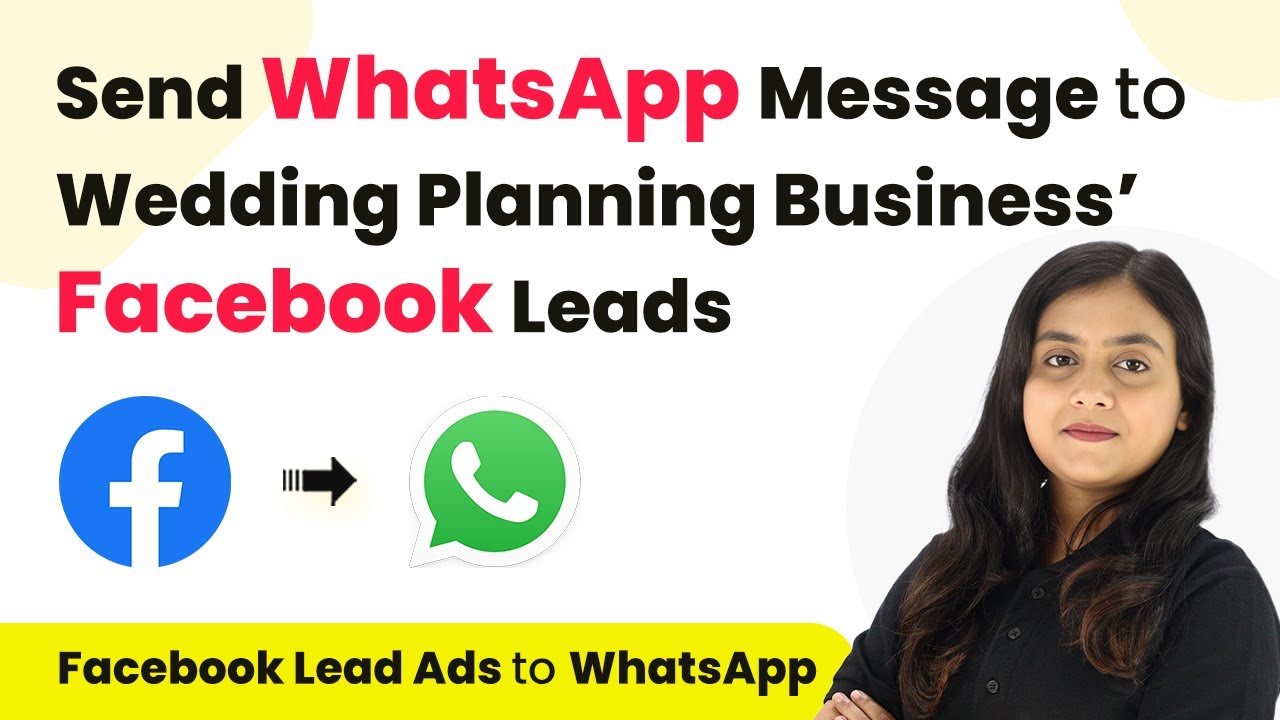
Learn how to automate WhatsApp messages for your wedding planning service using Pabbly Connect to integrate Facebook lead ads and WhatsApp API Cloud. Learn to create powerful connections between your critical applications without requiring specialized programming knowledge or extensive technical background.

Watch Step By Step Video Tutorial Below


1. Setting Up Pabbly Connect for Automation

To send automated WhatsApp messages for your wedding planning service, you need to start by accessing Pabbly Connect. This platform serves as the integration hub for connecting Facebook lead ads with WhatsApp API Cloud.

Begin by signing into your Pabbly Connect account. If you are a new user, you can sign up for free and access 100 free tasks each month. Once logged in, navigate to the ‘All Apps’ window and select Pabbly Connect to access the dashboard.


2. Creating a Workflow in Pabbly Connect

In this section, you will create a new workflow in Pabbly Connect to automate the process. Click on the ‘Create Workflow’ button located at the top right corner. A dialog box will appear asking for a workflow name.

  • Name your workflow, for example, ‘Wedding Planners Facebook Lead Ads to WhatsApp Message’.
  • Select a folder to save your workflow, such as ‘Facebook Lead Ads to WhatsApp’.
  • Click on the ‘Create’ button to finalize the workflow.

Your workflow is now created, and you will see two main sections: Trigger and Action. The trigger will be Facebook lead ads, and the action will be WhatsApp API Cloud.


3. Configuring the Trigger Application: Facebook Lead Ads

The first step in configuring your automation in Pabbly Connect is setting up the trigger application. Click on the trigger section and select Facebook Lead Ads as your app.

  • Choose the trigger event as ‘New Lead’.
  • Click on ‘Connect’ to establish a connection with Facebook Lead Ads.
  • Authorize your Facebook account by selecting the page you created for your wedding planning service.

After selecting your page, choose the lead generation form you created, such as ‘New Contact Form’, and click on ‘Save and Send Test Request’. This will allow Pabbly Connect to capture the lead data.


4. Setting Up the Action Application: WhatsApp API Cloud

Next, you will set up the action application in Pabbly Connect. Click on the action section and choose WhatsApp Cloud API as your app. The action event will be to send a template message.

To connect Pabbly Connect with WhatsApp Cloud API, click on ‘Connect’ and add a new connection. Fill in the required details such as the temporary access token, phone number ID, and WhatsApp business account ID, which you can find in your API setup.

Select the template name you created, for example, ‘Blossom Weddings’. Ensure to map the mobile number and customer name from the trigger data. Click on ‘Save and Send Test Request’ to send a test message.

Once you send the test request, check your WhatsApp to confirm that the message was successfully forwarded to the new lead.


5. Testing the Integration between Facebook Lead Ads and WhatsApp

After setting up both the trigger and action applications in Pabbly Connect, it’s time to test the integration. Go back to your Facebook lead ads testing tools and submit a new lead.

Make sure to delete any existing lead before creating a new one to avoid errors. Once you submit the new lead, Pabbly Connect should capture the response and automatically send a WhatsApp message to the new lead.

Fill in the lead details such as email, name, and phone number. Click on ‘Submit’ to send the lead. Check WhatsApp for the automated message confirming the lead submission.

If everything is set up correctly, you should receive a WhatsApp message with the details from your template, confirming that the integration is successful.


Conclusion

In this tutorial, we demonstrated how to automate WhatsApp messages for your wedding planning service using Pabbly Connect. By integrating Facebook lead ads with WhatsApp API Cloud, you can ensure timely communication with potential clients, enhancing your service’s efficiency.

Ensure you check out Pabbly Connect to create business automation workflows and reduce manual tasks. Pabbly Connect currently offer integration with 2,000+ applications.

How to Add Updated Zendesk Tickets in Google Sheets Using Pabbly Connect

Learn how to automate the addition of updated Zendesk tickets in Google Sheets using Pabbly Connect. Step-by-step tutorial for seamless integration. Transform complex automation concepts into accessible, actionable steps that eliminate unnecessary manual work while maximizing existing application capabilities.

Watch Step By Step Video Tutorial Below


1. Setting Up Pabbly Connect for Zendesk and Google Sheets Integration

To begin the process of adding updated Zendesk tickets in Google Sheets, you need to access Pabbly Connect. This platform facilitates seamless integration between various applications, including Zendesk and Google Sheets. Start by visiting the Pabbly Connect homepage.

Once there, sign in or create a new account. As a new user, you will receive 100 free tasks each month to explore this powerful automation tool. After logging in, navigate to the dashboard where you can create a new workflow.


2. Creating a New Workflow in Pabbly Connect

To create a new workflow in Pabbly Connect, click on the ‘Create Workflow’ button. You will be prompted to name your workflow; for this integration, name it ‘Add Updated Zendesk Tickets to Google Sheets’. Select an appropriate folder to save your workflow.

  • Click on the ‘Create’ button to proceed.
  • This will open two windows: one for the trigger and one for the action.
  • Select ‘Zendesk’ as the trigger application and ‘Google Sheets’ as the action application.

This setup ensures that whenever a ticket is updated in Zendesk, the corresponding details will be added to Google Sheets automatically. Understanding the trigger-action principle is crucial for this integration.


3. Configuring the Trigger for Zendesk

In this step, you will configure the trigger for Zendesk in Pabbly Connect. Select ‘Zendesk’ as your trigger application and choose the event ‘Ticket Solved’. This means that the workflow will activate every time a ticket is marked as solved.

Next, a Webhook URL will be generated. Copy this URL as it will be used to connect your Zendesk account to Pabbly Connect. Now, log into your Zendesk account, navigate to the Admin Center, and select ‘Webhooks’ under the ‘Apps and Integrations’ section.

  • Click on ‘Create Webhook’ and name it ‘Solved Tickets’.
  • Paste the copied Webhook URL in the Endpoint URL field.
  • Set the Request Method to POST and Request Format to JSON.

Once all details are filled, click on ‘Create Webhook’. This establishes the connection between Zendesk and Pabbly Connect.


4. Setting Up the Action in Google Sheets

With the trigger configured, the next step is to set up the action in Google Sheets using Pabbly Connect. Select ‘Google Sheets’ as the action application and choose the action event ‘Add New Row’. This will allow the integration to add data to your Google Sheets whenever a ticket is solved.

Connect your Google Sheets account to Pabbly Connect. If you have previously set up a connection, select it; otherwise, create a new connection by signing in with Google. Once connected, select the spreadsheet where you want the data to be added.

Map the fields from the Zendesk ticket response to your Google Sheets columns. For example, map the ticket title, description, and status. Click on ‘Save and Send Test Request’ to test the integration.

After testing, check your Google Sheets to confirm that the data is being populated correctly from Zendesk.


5. Testing and Verifying the Integration

Once you have set up both the trigger and action, it’s time to test the integration using Pabbly Connect. Update a ticket in your Zendesk account and mark it as solved. This action should trigger the workflow you created.

Return to Pabbly Connect and check for the response. The details of the updated ticket should appear, confirming that the integration is working correctly. Now, check your Google Sheets to ensure that the new row has been added with the ticket details.

To summarize, you have successfully created an automated workflow that connects Zendesk and Google Sheets using Pabbly Connect. This integration allows for real-time updates of ticket statuses without manual input, streamlining your workflow effectively.


Conclusion

In this tutorial, we explored how to automate the addition of updated Zendesk tickets in Google Sheets using Pabbly Connect. By following these steps, you can ensure that your ticket data is consistently up-to-date without manual effort, enhancing your productivity.

Ensure you check out Pabbly Connect to create business automation workflows and reduce manual tasks. Pabbly Connect currently offer integration with 2,000+ applications.

How to Delete Items in Monday.com When Google Task Completed Using Pabbly Connect

Learn how to automate the deletion of items in Monday.com when a Google Task is completed using Pabbly Connect. Step-by-step guide provided. Master proven automation processes with practical implementation examples and strategic recommendations you can apply immediately in your workflow.

Watch Step By Step Video Tutorial Below


1. Accessing Pabbly Connect for Integration

To begin, you need to access Pabbly Connect, the integration platform that automates tasks between Google Tasks and Monday.com. If you are an existing user, simply sign in; if not, click on ‘Sign Up for Free’ to create an account.

Once logged in, you will see the dashboard of Pabbly Connect. Here, you can start creating a new workflow by clicking on the ‘Create Workflow’ button in the top right corner. This is where you will set up the automation between Google Tasks and Monday.com.


2. Creating a New Workflow in Pabbly Connect

In this section, you will create a workflow to delete items in Monday.com when a Google Task is completed. Start by naming your workflow, for example, ‘Delete Item in Monday.com when Google Task Completed’. Save this workflow in a folder named Google Task to Monday.com.

  • Name your workflow appropriately.
  • Select the correct folder for organization.
  • Click on ‘Create’ to proceed.

After creating the workflow, you will be taken to a window where you can set up the trigger and action. This is crucial in defining how Pabbly Connect operates in this automation.


3. Setting Up Trigger and Action in Pabbly Connect

For this automation, set Google Tasks as the trigger application with the event ‘New Task Completed’. This means that every time a task is marked as completed in Google Tasks, it will trigger the action in Monday.com.

Next, select Monday.com as the action application, and choose the action event ‘Delete Item’. This setup ensures that whenever a task is completed in Google Tasks, the corresponding item in Monday.com will be deleted. Click on ‘Connect’ to establish the connection between your Google Tasks account and Pabbly Connect.

  • Select Google Tasks and set the trigger event.
  • Choose Monday.com and the action event.
  • Click on ‘Connect’ to link accounts.

Once connected, your trigger and action setup is complete, and Pabbly Connect will now monitor Google Tasks for completed tasks.


4. Mapping Data in Pabbly Connect

After setting up the trigger, you need to map the data from Google Tasks to Monday.com. This involves selecting the task list from which you want to retrieve completed tasks. Click on ‘Save and Send Test Request’ to capture the latest completed task details.

Once you receive the response, you will see the task title, status, and description. Now, to delete the corresponding item in Monday.com, you will need to search for that item using the task title. In the action window, select Monday.com again and choose ‘Search Items by Column Value’ as your action event.

Select the task board in Monday.com. Map the task title from the previous step. Click on ‘Save and Send Test Request’ to fetch the item details.

This mapping ensures that the correct item in Monday.com will be targeted for deletion when a task is completed in Google Tasks, making the integration seamless with Pabbly Connect.


5. Deleting the Item in Monday.com

Now that you have the item details from Monday.com, you can proceed to delete the item. In the action window, select the appropriate board and group where the item exists. You will also need to map the item ID and group ID from the previous response to ensure the correct item is deleted.

Click on ‘Save and Send Test Request’ to execute the deletion. If successful, you will receive a positive response indicating that the item has been deleted. You can verify this by checking your Monday.com board to confirm that the item is no longer there.

Select the correct board and group in Monday.com. Map the item ID and group ID accurately. Execute the deletion and check for a successful response.

This completes the automation process. Whenever a task is completed in Google Tasks, the corresponding item will be deleted in Monday.com, showcasing the power of Pabbly Connect in automating workflows.


Conclusion

In this tutorial, we explored how to use Pabbly Connect to delete items in Monday.com when a Google Task is completed. This seamless integration enhances productivity by automating task management effectively.

Ensure you check out Pabbly Connect to create business automation workflows and reduce manual tasks. Pabbly Connect currently offer integration with 2,000+ applications.

How to Send Template Email using Postmark Custom API with Pabbly Connect

Learn how to send template emails using Postmark Custom API integrated with Pabbly Connect. Follow our step-by-step tutorial for seamless automation. This comprehensive guide reveals exactly how to connect your applications and automate repetitive tasks — accessible for professionals of all technical backgrounds.

Watch Step By Step Video Tutorial Below


1. Accessing Pabbly Connect for Integration

To send template emails using Postmark Custom API, you must first access Pabbly Connect. Start by visiting the Pabbly Connect website and signing up for an account if you don’t have one.

After logging in, you will be directed to the Pabbly Connect dashboard. Here, you can create a new workflow that will facilitate the integration between Google Sheets and Postmark. This integration is crucial for automating the email sending process.


2. Creating a Workflow in Pabbly Connect

In Pabbly Connect, creating a workflow is straightforward. Click the ‘Create Workflow’ button and name your workflow, for example, ‘Send Template Email using Postmark Custom API’. This name reflects your objective clearly.

  • Click on ‘Create’ to proceed.
  • Select Google Sheets as your trigger application.
  • Choose the trigger event as ‘New or Updated Spreadsheet Row’.

Once you have set up the trigger, connect your Google Sheets account with Pabbly Connect. This connection allows Pabbly Connect to monitor your Google Sheets for any new entries.


3. Configuring Google Sheets Trigger

To configure the Google Sheets trigger in Pabbly Connect, you need to copy the webhook URL provided by Pabbly. This URL will be used to connect Google Sheets to Pabbly Connect.

Go to your Google Sheet, click on ‘Extensions’, and then ‘Pabbly Connect Webhooks’. Here, you will paste the copied webhook URL and specify the trigger column, which is the last column where data will be entered. After setting this up, click on ‘Send Test’ to ensure everything is working correctly.


4. Setting Up Postmark Action in Pabbly Connect

After configuring the Google Sheets trigger, the next step is to set up the action in Pabbly Connect. Select Postmark as your action application and choose ‘Custom API Request’ as the action event.

To connect Postmark, you will need the server token from your Postmark account. Copy this token and paste it into the key-value fields in Pabbly Connect. This is essential for authorizing your requests to send emails.

  • Select the request method as POST.
  • Paste the API endpoint from Postmark.
  • Fill in the required parameters including ‘from’, ‘to’, ‘template_id’, and ‘username’.

This setup ensures that every time a new row is added in Google Sheets, a template email will be sent to the respective customer using Postmark.


5. Testing and Verifying the Integration

Once you have set up the action in Pabbly Connect, it’s time to test the integration. Click on ‘Save and Send Test Request’ to check if the email is sent successfully to the customer.

After testing, check the email account to confirm that the email was received. If everything is set up correctly, you will see the template email in the inbox, confirming that the integration between Google Sheets and Postmark via Pabbly Connect is working seamlessly.


Conclusion

In this tutorial, we demonstrated how to send template emails using Postmark Custom API integrated with Pabbly Connect. By following the steps outlined, you can automate the process of sending personalized emails to your customers efficiently.

Ensure you check out Pabbly Connect to create business automation workflows and reduce manual tasks. Pabbly Connect currently offer integration with 2,000+ applications.

How to Set Up a WhatsApp Chatbot Using Pabbly Connect and WhatsApp Cloud API

Learn how to set up a WhatsApp chatbot using Pabbly Connect and WhatsApp Cloud API. Step-by-step guide for integrating Google Sheets and WhatsApp. Transform complex automation concepts into accessible, actionable steps that eliminate unnecessary manual work while maximizing existing application capabilities.

Watch Step By Step Video Tutorial Below


1. Accessing Pabbly Connect for WhatsApp Chatbot Setup

To set up a WhatsApp chatbot, you first need to access Pabbly Connect. Simply type the URL Pabbly.com/connect into your browser. Once there, you will see options to sign in or sign up for free. If you are a new user, click on the ‘Sign Up for Free’ button to create an account, which comes with 100 free tasks each month.

After signing in, you will be directed to the dashboard of Pabbly Connect. Here, you can create new workflows or manage existing ones. To start your automation, click on the ‘Create Workflow’ button. You will then be prompted to name your workflow, such as ‘Send WhatsApp Message from Google Sheets,’ and select a folder for organization.


2. Integrating Google Sheets with Pabbly Connect

The next step involves integrating Google Sheets with Pabbly Connect. For this, select Google Sheets as your trigger application. Choose the trigger event as ‘New or Updated Spreadsheet Row.’ This means whenever a new row is added or updated, the automation will be triggered.

  • Select Google Sheets as the trigger application.
  • Choose the trigger event: New or Updated Spreadsheet Row.
  • Copy the provided webhook URL from Pabbly Connect.
  • In Google Sheets, install the Pabbly Connect Webhook add-on.

Once the add-on is installed, refresh your spreadsheet, and navigate to Extensions > Pabbly Connect Webhooks. Here, paste the copied webhook URL and specify the trigger column, which is the last column of your data (e.g., column B for WhatsApp numbers). After setting this up, test the configuration to ensure it works correctly.


3. Sending WhatsApp Messages Using Pabbly Connect

With the Google Sheets integration complete, the next step is to set up the action to send WhatsApp messages via the WhatsApp Cloud API using Pabbly Connect. For this, select WhatsApp Cloud API as your action application and choose the action event ‘Send Template Message.’ This allows you to send pre-defined messages to your customers.

To connect your WhatsApp account, you will need to enter the following details:

  • Temporary Access Token
  • Phone Number ID
  • WhatsApp Business Account ID

After entering these details, select the message template you want to use for your WhatsApp messages. Ensure that your template is approved in the WhatsApp Cloud API. Once everything is set up, map the recipient’s mobile number from the previous response, and send a test message to verify that the integration works correctly.


4. Creating Automated Replies for the WhatsApp Chatbot

After successfully sending WhatsApp messages, the next step is to set up automated replies when customers respond. This is done by creating a new workflow in Pabbly Connect for handling incoming messages. Select WhatsApp Cloud API as the trigger application and choose ‘Message Notification’ as the trigger event.

Once you have set up the trigger, you will need to configure the webhook URL again in the WhatsApp Cloud API settings. This time, ensure that you subscribe to message notifications to capture incoming messages. After verifying the webhook, test it by sending a message to your WhatsApp number and check if Pabbly Connect captures the response correctly.

Set up the trigger for incoming messages. Verify the webhook URL in WhatsApp Cloud API settings. Test the workflow by sending a message to your WhatsApp number.

After testing, proceed to set up conditions for sending different replies based on the message received. You can use a lookup table feature in Pabbly Connect to map specific responses to corresponding messages.


5. Conclusion: Setting Up Your WhatsApp Chatbot with Pabbly Connect

In this tutorial, we explored how to set up a WhatsApp chatbot using Pabbly Connect and the WhatsApp Cloud API. We began by integrating Google Sheets to send automated messages to customers. Then, we configured the system to handle incoming messages and send personalized replies based on customer responses.

Ensure you check out Pabbly Connect to create business automation workflows and reduce manual tasks. Pabbly Connect currently offer integration with 2,000+ applications.

By using Pabbly Connect, you can automate your messaging processes without any coding skills, making it easier to manage customer interactions. This setup not only enhances your marketing efforts but also improves customer engagement and satisfaction.

Setting up a WhatsApp chatbot using Pabbly Connect can significantly streamline your communication with customers, allowing for efficient and effective marketing campaigns.

How to Create Google Calendar Events & Share with Specific Users Using Pabbly Connect

Learn how to create Google Calendar events from Google Sheets and share them with specific users using Pabbly Connect in this detailed tutorial. Build sophisticated automated workflows in less time than you think. This guide translates complex integrations into straightforward steps for immediate implementation.

Watch Step By Step Video Tutorial Below


Accessing Pabbly Connect for Google Calendar Integration

To start creating Google Calendar events using Pabbly Connect, first, you need to access the platform. Navigate to the Pabbly Connect website by typing the URL into your browser. Here, you can find options to sign in or sign up for free.

If you are a new user, click on the ‘Sign Up for Free’ button to create your account. Once you have signed up, you will receive 100 free tasks each month to explore the software. If you’re an existing user, simply click on ‘Sign In’ to access your dashboard. This is where you will manage all your integrations, including Google Sheets and Google Calendar through Pabbly Connect.


Creating a Workflow in Pabbly Connect

Once you are logged into Pabbly Connect, the next step is to create a new workflow. Click on the ‘Create Workflow’ option on your dashboard. A dialog box will appear asking you to name your workflow. Enter a name such as ‘Create Google Calendar Events and Give Access to Guests Automatically’.

After naming your workflow, you can select a folder to save it in. For this tutorial, select the folder named ‘Google Sheets to Google Calendar Automation’. Click on ‘Create’, and you will see two windows open: one for the trigger and one for the action. The trigger will be Google Sheets, and the action will be Google Calendar, allowing you to automate the event creation process.


Setting Up Trigger and Action in Pabbly Connect

In this step, you will set up the trigger application as Google Sheets. Select Google Sheets from the available options, and then choose the trigger event as ‘New or Updated Spreadsheet Row’. This means that every time you add a new row to your Google Sheets, it will trigger the workflow in Pabbly Connect.

After selecting the trigger event, you will receive a webhook URL. This URL is crucial as it acts as a bridge between Google Sheets and Pabbly Connect. Copy the webhook URL and go to your Google Sheets. Under the Extensions menu, click on Add-ons, then Get Add-ons, and search for ‘Pabbly Connect Webhooks’ to install it. Once installed, refresh your spreadsheet to see the option under Extensions.

  • Paste the webhook URL in the Pabbly Connect Webhook add-on.
  • Set the trigger column as the final data column (e.g., Column E for guest emails).
  • Click on the ‘Send Test’ button to ensure the connection is successful.

After successfully sending the test response, submit the initial setup. This will allow Pabbly Connect to receive data from Google Sheets automatically whenever a new row is added.


Creating Google Calendar Event Using Pabbly Connect

After setting up the trigger, the next step is to create an event in Google Calendar. In your Pabbly Connect workflow, select Google Calendar as your action application and choose the action event ‘Create Event’. Click on connect and select your existing connection to Google Calendar.

Now, you need to fill in the details for the event. Choose the calendar you want to create the event in, such as ‘Demo Events Calendar’. Then, map the title, description, start date, and end date from the data received from Google Sheets. Make sure to format the dates correctly as specified in the Pabbly Connect interface.

  • Select the calendar name from the dropdown.
  • Map the title and description received from Google Sheets.
  • Ensure to include the correct time zone (e.g., Asia/Kolkata).

After mapping all the necessary fields, click on ‘Save and Send Test Request’ to create the event. You can then verify in Google Calendar that the event has been created successfully.


Providing Access to Guests for the Google Calendar Event

The final step in this workflow is to provide access to the guests for the created event. Add another action step in your Pabbly Connect workflow and select Google Calendar again. This time, choose the action event ‘Update Detailed Event’. Connect to your existing Google Calendar connection once more.

In this step, select the calendar and map the event ID from the previous step. You will also need to map the title, description, and other relevant details again. To grant guests the ability to modify the event, select the option that allows guests to modify the event.

Select the calendar and map the event ID from the previous response. Map the guest email addresses to provide access. Click ‘Save and Send Test Request’ to finalize the access settings.

Once you have completed these steps, check the email inbox of the guests to confirm that they have received access to the event. This process demonstrates how Pabbly Connect can automate the entire workflow from Google Sheets to Google Calendar.


Conclusion

In this tutorial, we explored how to create Google Calendar events and share them with specific users using Pabbly Connect. By effectively integrating Google Sheets and Google Calendar, you can automate event creation and guest access seamlessly. This powerful automation tool enhances productivity and streamlines your scheduling tasks.

Ensure you check out Pabbly Connect to create business automation workflows and reduce manual tasks. Pabbly Connect currently offer integration with 2,000+ applications.

How to Use Google Gemini API With Pabbly Connect: A Step-by-Step Guide

Learn how to integrate Google Gemini API with Pabbly Connect in this detailed tutorial. Discover the steps to automate your workflows effectively. Implement the precise methodologies leading organizations use to automate repetitive tasks, illustrated with practical examples designed for immediate application.

Watch Step By Step Video Tutorial Below


1. Accessing Pabbly Connect for Google Gemini Integration

To start using Google Gemini with Pabbly Connect, first, log into your Pabbly Connect account. This platform allows seamless integration between various applications, including Google Gemini and Gemini Pro.

Once logged in, navigate to the dashboard. Here, you can create a new workflow specifically for integrating Google Gemini. This will enable you to automate tasks using the powerful capabilities of the Google Gemini AI model.


2. Setting Up Google Gemini in Pabbly Connect

In this section, you will set up the integration of Google Gemini with Pabbly Connect. Start by creating a new workflow and scroll down to the action step. Here, you will select the app for integration.

  • Choose ‘Google Generative AI’ from the app list.
  • Select ‘Generate Content’ as the action event.
  • Click on ‘Connect’ and select ‘Add New Connection’.

After selecting the action, you will need to connect your Google AI Studio account with Pabbly Connect. This involves entering your API key, which you will retrieve from Google AI Studio.


3. Retrieving Your API Key from Google AI Studio

To connect Google Gemini with Pabbly Connect, you need an API key. Click on the hyperlink in the help text to access Google AI Studio. Here, you can generate your API key to facilitate the integration.

Follow these steps to obtain your API key:

  • Click on the ‘Get API Key’ button.
  • Choose to create a new project or select an existing Google Cloud project.
  • Click ‘Create API Key’ after selecting your project.

Once you have the API key, copy it and return to Pabbly Connect to paste it into the designated field. This will establish the connection between Google AI Studio and Pabbly Connect.


4. Generating Content Using Google Gemini Pro

With your API key set up, you can now generate content using Google Gemini through Pabbly Connect. In the action settings, you will be prompted to enter the text prompt for the AI model.

For example, you might input a prompt such as ‘Write an essay on Automation and Integration’. After entering the prompt, select the model from the dropdown list, ensuring to choose ‘Google Gemini Pro’ for the latest capabilities.

Next, specify the method you want to use. For generating content, select ‘Generate Content’ and click on ‘Save and Send Test Request’. This will send your prompt to Google Gemini Pro, which will generate the desired content.


5. Reviewing the Generated Content

After sending your request, Pabbly Connect will display the response from Google Gemini Pro. You can review the generated content, which should match your initial prompt.

The AI model will provide a coherent response, such as an essay on the topic of Automation and Integration. This showcases how effectively Pabbly Connect can utilize Google Gemini to automate content generation.

In conclusion, using Pabbly Connect to integrate with Google Gemini allows you to harness the power of AI for content creation, enhancing your workflow efficiency and creativity.


Conclusion

This guide has shown how to use Pabbly Connect to integrate with Google Gemini and Gemini Pro effectively. By following these steps, you can automate content generation and enhance your productivity.

Ensure you check out Pabbly Connect to create business automation workflows and reduce manual tasks. Pabbly Connect currently offer integration with 2,000+ applications.

How to Send Emails from Google Sheets Using Postmark with Pabbly Connect

Learn how to send emails from Google Sheets using Postmark through Pabbly Connect in this detailed tutorial. Step-by-step guide included! Explore efficient methods for automating routine tasks with clear, concise instructions suited for both newcomers and experienced professionals.

Watch Step By Step Video Tutorial Below


1. Accessing Pabbly Connect for Integration

To send emails from Google Sheets using Postmark, you first need to access Pabbly Connect. Start by visiting the Pabbly website, where you can sign in or sign up for a free account. This will allow you to utilize the automation features of Pabbly Connect effectively.

Once logged in, navigate to the Pabbly Connect dashboard. Here, you can create a new workflow that connects Google Sheets and Postmark. This integration will automate the process of sending emails based on the data you input into your Google Sheets.


2. Creating a Workflow in Pabbly Connect

To create a workflow in Pabbly Connect, click on the ‘Create Workflow’ button. You will be prompted to name your workflow. For this example, name it ‘Send Emails from Google Sheets using Postmark’. After naming, select the folder where you want to save this workflow.

  • Click on ‘Create’ to proceed to the workflow setup.
  • In the workflow editor, you will see two sections: Trigger and Action.
  • Select ‘Google Sheets’ as the Trigger application and ‘Postmark’ as the Action application.

Setting up the trigger is crucial as it defines when the emails will be sent. Choose ‘New or Updated Spreadsheet Row’ as your trigger event. This means that every time a new row is added or an existing row is updated in your Google Sheets, the workflow will initiate.


3. Connecting Google Sheets with Pabbly Connect

After selecting Google Sheets as your trigger, you need to connect it with Pabbly Connect. Copy the webhook URL provided by Pabbly Connect. Next, open your Google Sheets, and navigate to Extensions > Add-ons > Get Add-ons. Search for the Pabbly Connect Webhook add-on and install it.

Once installed, go back to Extensions > Pabbly Connect Webhook > Initial Setup. Here, paste the copied webhook URL and specify the trigger column. This column determines when the data will be sent to Pabbly Connect. In this case, use the last column (e.g., Column D) of your Google Sheet as the trigger column.


4. Configuring Postmark in Pabbly Connect

Now that you have set up Google Sheets, it’s time to configure Postmark in Pabbly Connect. In the Action section of your workflow, select Postmark as the application. Choose ‘Send Email’ as the action event. You will need to connect your Postmark account by providing your Server API token, which you can find in your Postmark account under API Tokens.

Fill in the required fields for sending the email. You will need to specify the ‘From Email’, which must be a verified email address in your Postmark account. For the recipient’s email address, map the email field from your Google Sheets response. Additionally, map the subject and body of the email from the corresponding fields in Google Sheets.


5. Testing and Activating Your Workflow

After configuring everything, it’s important to test your workflow in Pabbly Connect. Click on the ‘Save and Send Test Request’ button. If everything is set up correctly, you should receive a confirmation response indicating that the email has been sent successfully.

To finalize, ensure that your Google Sheets is set up to automatically send emails when new rows are added. You can do this by enabling the ‘Send on Event’ option in the Pabbly Connect Webhook settings. This automation will allow you to send emails to multiple users in one go, enhancing your email sending efficiency.


Conclusion

In this tutorial, we explored how to send emails from Google Sheets using Postmark through Pabbly Connect. By following the steps provided, you can automate your email sending process efficiently. This integration not only saves time but also ensures that your emails reach the intended recipients promptly.

Ensure you check out Pabbly Connect to create business automation workflows and reduce manual tasks. Pabbly Connect currently offer integration with 2,000+ applications.

How to Share WhatsApp Messages on Microsoft Teams Using Pabbly Connect

Learn how to seamlessly share WhatsApp messages on Microsoft Teams using Pabbly Connect. Follow this step-by-step tutorial for easy integration. Discover how to seamlessly connect your essential tools through accessible instructions that make powerful automation available to professionals at every skill level.

Watch Step By Step Video Tutorial Below


1. Accessing Pabbly Connect for Integration

To share WhatsApp messages on Microsoft Teams, you first need to access Pabbly Connect. This platform allows you to automate and integrate various applications effortlessly. Start by visiting the Pabbly website and either signing in or creating a new account.

Once logged in, navigate to the Pabbly Connect dashboard. Here, you can create a new workflow that will facilitate the connection between WhatsApp Cloud API and Microsoft Teams. Click on the ‘Create Workflow’ button to begin your integration process.


2. Creating a Workflow in Pabbly Connect

In this step, you will create a workflow specifically designed to share WhatsApp messages on Microsoft Teams. After clicking on ‘Create Workflow’, name your workflow accordingly, such as ‘Share WhatsApp Messages on MS Teams’. This helps in identifying your workflow later. using Pabbly Connect

  • Name your workflow to reflect its purpose.
  • Select the folder for easy organization.
  • Click on ‘Create’ to finalize your workflow setup.

After creating the workflow, you will be taken to a new screen where you can set up the trigger and action. The trigger will be WhatsApp Cloud API, which will initiate the workflow when a new message is received. This is the first step in automating your message sharing process.


3. Setting Up Trigger and Action in Pabbly Connect

In this section, you will set up the trigger for your workflow. Select ‘WhatsApp Cloud API’ as your trigger application. Then, choose the trigger event as ‘Message Notification’. This event will activate whenever a new message is sent or received on WhatsApp.

Next, you need to connect the WhatsApp Cloud API with Pabbly Connect. To do this, copy the webhook URL provided by Pabbly Connect and follow the instructions to set it up in your WhatsApp Cloud API settings. This step ensures that messages can be captured and processed by your workflow.

  • Copy the webhook URL and navigate to your WhatsApp Cloud API settings.
  • Add the webhook URL in the appropriate section.
  • Verify and save your settings to finalize the connection.

After setting up the trigger, test the webhook to ensure it is working correctly. You should see a test message received in Pabbly Connect, confirming that the connection is successful.


4. Filtering Messages Before Sharing

Once you have successfully set up the trigger, the next step involves filtering the messages that you want to share on Microsoft Teams. This is crucial to ensure that only relevant messages are sent to your team. In Pabbly Connect, select the filter action and set the condition based on the message received.

Configure the filter to check if the message contains specific keys or values that indicate it is a valid customer inquiry. This way, only messages that meet your criteria will be forwarded to your Microsoft Teams channel.

Select the filter action in Pabbly Connect. Set the filter condition based on the message content. Test the filter to ensure it works correctly.

Once the filter is set up, you can move on to configuring the action that will send the message to Microsoft Teams. This ensures that only the relevant messages are shared with your team, streamlining communication and response times.


5. Sending Messages to Microsoft Teams

In the final step, you will set up the action to send the filtered messages to Microsoft Teams. Select ‘Microsoft Teams’ as your action application and choose the action event as ‘Send Message in a Channel’. This action will allow you to share the WhatsApp messages with your team directly.

Connect Microsoft Teams with Pabbly Connect by clicking on the connection button and granting the necessary permissions. Once connected, select the appropriate team and channel where you want the messages to be sent.

Choose the team and channel in Microsoft Teams. Map the message content from WhatsApp to the message field. Test the action to verify that messages are sent successfully.

After testing, you should see the messages appear in your selected Microsoft Teams channel, confirming that the integration works seamlessly. This finalizes your setup, allowing for efficient communication between WhatsApp and Microsoft Teams through Pabbly Connect.


Conclusion

This tutorial provided a detailed guide on how to share WhatsApp messages on Microsoft Teams using Pabbly Connect. By following these steps, you can automate the process of sharing customer inquiries and feedback with your team, enhancing collaboration and response times.

Ensure you check out Pabbly Connect to create business automation workflows and reduce manual tasks. Pabbly Connect currently offer integration with 2,000+ applications.

Automatically Generate Event Passes with Pabbly Connect and Microsoft Excel

Learn how to automatically generate event passes using Pabbly Connect, Microsoft Excel, and Passcreator in this detailed step-by-step tutorial. Eliminate manual repetitive tasks from your workflow. Discover proven automation methods with intuitive steps designed for efficiency-minded professionals.

Watch Step By Step Video Tutorial Below


1. Access Pabbly Connect for Event Pass Generation

To start generating event passes automatically, you need to access Pabbly Connect. First, open your web browser and navigate to the Pabbly Connect website. If you don’t have an account, you can sign up for free, which takes just a couple of minutes.

Once logged in, click on the Access Now button under Pabbly Connect. This will take you to the dashboard where you can create new workflows. Here, you can manage all your integrations effectively.


2. Create a New Workflow in Pabbly Connect

After accessing your Pabbly Connect dashboard, you need to create a new workflow. Click on the Create Workflow button and name your workflow something descriptive, like ‘Automatically Generate Event Passes’. This name reflects the purpose of the workflow.

Next, you will see two main sections: Trigger and Action. The trigger is the event that starts the workflow, and the action is what happens as a result. In this case, the trigger will be Microsoft Excel, and the action will be Passcreator.


3. Set Up Trigger with Microsoft Excel in Pabbly Connect

To set up the trigger, select Pabbly Connect and search for Microsoft Excel. Choose the event New Row in Worksheet as your trigger event. This means that every time a new row is added to your Excel sheet, the workflow will trigger.

Next, connect your Microsoft Excel account with Pabbly Connect. Click on Add New Connection and follow the prompts to log in. Once connected, you’ll need to select the specific workbook and worksheet where your data is stored, such as the one named ‘Event Passes’.

  • Select your workbook: Event Passes
  • Choose the worksheet: Sheet1

After mapping these details, click Save and Continue. Pabbly Connect will now start polling for new data in your Excel sheet, ready to trigger the next action.


4. Set Up Action with Passcreator in Pabbly Connect

Now that your trigger is set up, it’s time to configure the action step. Search for Passcreator in Pabbly Connect and select it. The action event will be Create Wallet Pass, which allows you to create a customized pass.

To connect Passcreator with Pabbly Connect, you’ll need an API key. Log into your Passcreator account, navigate to the Integration section, and generate a new API key. Copy this key and paste it back into Pabbly Connect to establish the connection.

  • Navigate to Integration > API Keys in Passcreator
  • Create a new API key named Demo

Once connected, select the template for your pass, like the example template. Map the required fields such as first name, last name, and email address from your Excel sheet into the respective fields in Passcreator.


5. Test and Preview the Pass Creation Process

After completing the mapping, click on Save and Test to create a pass. Pabbly Connect will process the information and generate a new wallet pass using the data from your Microsoft Excel sheet.

To verify the creation of the pass, go back to your Passcreator account and navigate to the Wallet Passes section. Here, you can see the newly created pass with the user’s details. This confirms that your workflow is functioning correctly.

In summary, you have successfully set up an automated process where adding a new row in Microsoft Excel triggers the creation of a customized event pass using Pabbly Connect and Passcreator. This integration saves time and ensures accuracy in event management.


Conclusion

In this tutorial, we explored how to automatically generate event passes using Pabbly Connect, Microsoft Excel, and Passcreator. By following these steps, you can streamline the process of creating customized passes for your events efficiently.

Ensure you check out Pabbly Connect to create business automation workflows and reduce manual tasks. Pabbly Connect currently offer integration with 2,000+ applications.