How to Add AWeber Subscribers to FunnelKit as Contacts Using Pabbly Connect

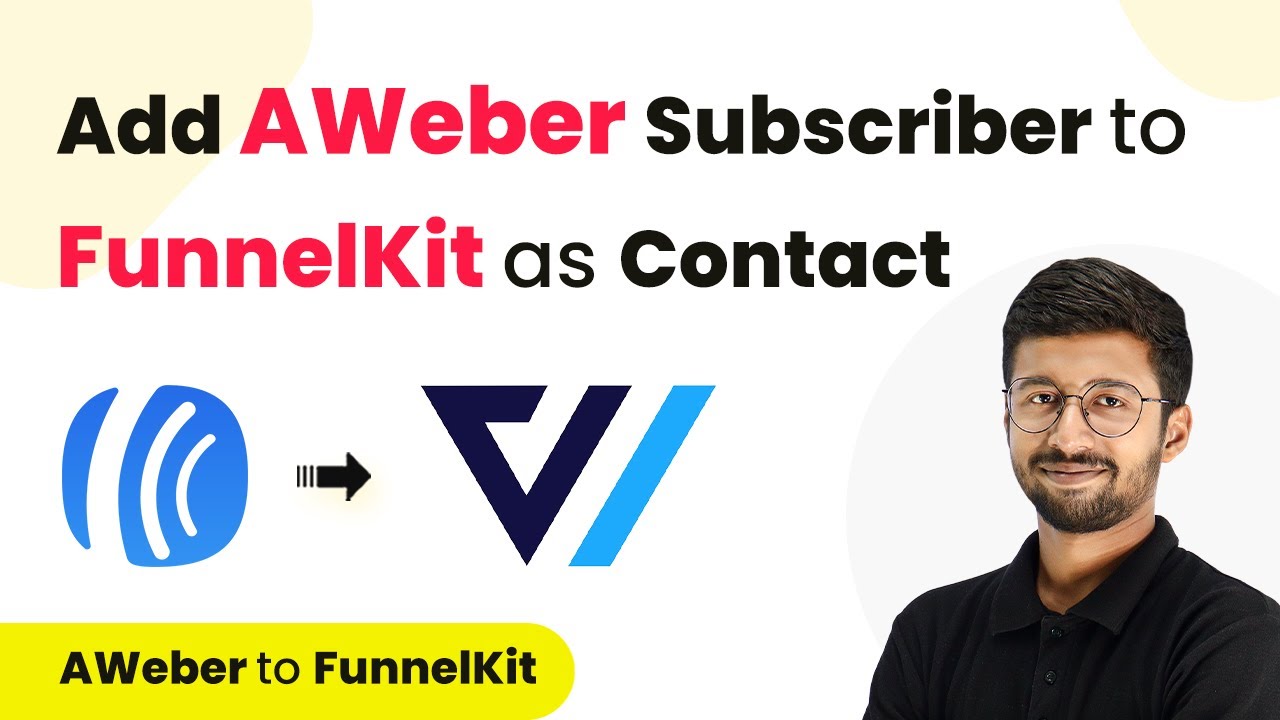
Learn how to seamlessly integrate AWeber with FunnelKit using Pabbly Connect. This step-by-step tutorial guides you through the process of adding subscribers as contacts. Discover how to seamlessly connect your essential tools through accessible instructions that make powerful automation available to professionals at every skill level.

Watch Step By Step Video Tutorial Below


1. Setting Up Pabbly Connect for AWeber and FunnelKit Integration

To add AWeber subscribers as contacts in FunnelKit, we will use Pabbly Connect. Begin by signing up for a free account on Pabbly Connect. Once logged in, navigate to the dashboard where you can create a new workflow for this integration.

Click on ‘Create Workflow’ and name it something relevant, like ‘AWeber to FunnelKit’. This will allow you to automate the process of adding new subscribers from AWeber into FunnelKit as contacts.


2. Configuring the Trigger with AWeber in Pabbly Connect

In this step, we will set up the trigger in Pabbly Connect to listen for new subscribers in AWeber. Select AWeber as the app in the trigger window and choose the event ‘New Subscriber in a List’ from the dropdown.

  • Select AWeber from the app list.
  • Choose the trigger event as ‘New Subscriber in a List’.
  • Connect your AWeber account by clicking ‘Connect’ and follow the prompts to authorize Pabbly Connect.

Once connected, select the account and the specific list ID from which you want to receive subscriber details. This setup will ensure that whenever a new subscriber is added in AWeber, their details will be sent to Pabbly Connect.


3. Adding AWeber Subscriber Details to FunnelKit

After configuring the trigger, the next step is to set up the action in Pabbly Connect to add the subscriber details to FunnelKit. Choose FunnelKit as the action app and select ‘Create Contact’ as the action event.

To connect FunnelKit, you will need the API key and Insight URL from your FunnelKit account. Go to your WordPress dashboard, navigate to FunnelKit settings, and generate a new API key. Copy this key and paste it into Pabbly Connect along with the Insight URL.

  • Map the email address of the new subscriber from AWeber to the email field in FunnelKit.
  • Map the full name to both first and last name fields by using the text formatter feature in Pabbly Connect.
  • Add any additional details such as contact number and city.

Once all fields are mapped correctly, save the action step in Pabbly Connect. This ensures that the subscriber information from AWeber is accurately reflected in FunnelKit.


4. Testing the Integration Between AWeber and FunnelKit

With the workflow set up, it’s time to test the integration using Pabbly Connect. Add a new subscriber in AWeber through your subscription form. This action will trigger the workflow you created.

After you submit the new subscriber’s details, wait for a few minutes as Pabbly Connect checks for new entries every 10 minutes. Once the details are fetched, they will be added to FunnelKit as a new contact.

To verify, go to your FunnelKit account and check the contacts section. You should see the new subscriber listed there, complete with all the details you mapped earlier. This confirms that your automation is working correctly!


Conclusion

In this tutorial, we demonstrated how to use Pabbly Connect to automate the process of adding AWeber subscribers to FunnelKit as contacts. By following the steps outlined, you can easily streamline your email marketing efforts and ensure that new subscribers are promptly added to your contact list.

Ensure you check out Pabbly Connect to create business automation workflows and reduce manual tasks. Pabbly Connect currently offer integration with 2,000+ applications.

How to Add Facebook Leads to Google Sheets for Polymer Industries Using Pabbly Connect

Learn how to automate the process of adding Facebook leads to Google Sheets for Polymer Industries using Pabbly Connect. Step-by-step tutorial included. Build sophisticated automated workflows in less time than you think. This guide translates complex integrations into straightforward steps for immediate implementation.

Watch Step By Step Video Tutorial Below


1. Accessing Pabbly Connect for Integration

To automate adding Facebook leads to Google Sheets, you need to access Pabbly Connect. First, navigate to the Pabbly Connect landing page and sign up if you are a new user or sign in if you already have an account.

Once you are logged in, you will see the dashboard. Click on the ‘Create Workflow’ button located at the top right corner. This is where you will set up your integration between Facebook leads and Google Sheets.


2. Creating a Workflow in Pabbly Connect

In the ‘Create Workflow’ dialog box, name your workflow, for instance, ‘Poly Crafters Facebook Lead Ads to Google Sheets’. You can also select a folder for better organization of your workflows. using Pabbly Connect

  • Name your workflow appropriately.
  • Select a folder to organize your workflows.

After naming your workflow, click on the ‘Create’ button. This will open the workflow window where you can set your trigger and action.


3. Setting Up the Trigger in Pabbly Connect

The next step is to set up your trigger. For this integration, select ‘Facebook Lead Ads’ as your trigger application and choose ‘New Lead’ as the trigger event. This means that whenever a new lead is generated, Pabbly Connect will capture the response immediately.

To connect your Facebook account, click on ‘Connect’ and then ‘Add New Connection’. Once authorized, select your Facebook page and the lead generation form you want to use. Click on ‘Save and Send Test Request’ to ensure the connection works properly.


4. Setting Up the Action in Google Sheets

Now that your trigger is set, it’s time to define the action. Select ‘Google Sheets’ as your action application and choose ‘Add New Row’ as the action event. This allows Pabbly Connect to add new lead details to your Google Sheets automatically.

  • Click on ‘Connect’ to build a new connection with Google Sheets.
  • Sign in with your Google account and authorize access.
  • Select the spreadsheet you created for Facebook leads.

Map the fields from your Facebook lead form to the corresponding columns in your Google Sheets. For example, map the full name, email, and phone number from the lead details.


5. Testing the Automation

To ensure your integration is functioning correctly, it’s important to test the automation. Go back to the Facebook Lead Ads testing tool and submit a new lead. After submitting, check your Google Sheets to see if the new lead information appears as a new row.

If the lead details are successfully added to your Google Sheets, your automation is working! You can repeat the test by deleting the previous lead and submitting a new one to verify that Pabbly Connect captures all new leads accurately.


Conclusion

This tutorial demonstrated how to use Pabbly Connect to automate the process of adding Facebook leads to Google Sheets for Polymer Industries. By following these steps, you can efficiently manage leads and streamline your business operations.

Ensure you check out Pabbly Connect to create business automation workflows and reduce manual tasks. Pabbly Connect currently offer integration with 2,000+ applications.

How to Set Up Webhook Inside Google Sheets with Pabbly Connect

Learn how to set up a webhook inside Google Sheets using Pabbly Connect for seamless data integration with Facebook and other applications. Eliminate manual repetitive tasks from your workflow. Discover proven automation methods with intuitive steps designed for efficiency-minded professionals.

Watch Step By Step Video Tutorial Below


1. Introduction to Webhooks and Pabbly Connect

In this tutorial, we will explore how to set up a webhook inside Google Sheets using Pabbly Connect. Webhooks serve as a bridge to connect applications, allowing data to be sent automatically as events occur. By integrating Google Sheets with Pabbly Connect, you can streamline data transfer to other applications like Facebook.

To begin, ensure you have access to Pabbly Connect. This platform is essential for creating the webhook that will facilitate data movement. The process starts by selecting Google Sheets as your trigger application within Pabbly Connect.


2. Setting Up the Trigger in Pabbly Connect

To set up the webhook, first log in to your Pabbly Connect account. Navigate to the trigger section and search for Google Sheets. Select it as your trigger application and choose the event as ‘New or Updated Spreadsheet Row’. This event triggers whenever a new row is added or updated.

After selecting the trigger, you will be provided with a webhook URL. This URL is crucial as it connects Google Sheets with Pabbly Connect. Follow these steps to complete the setup:

  • Log in to your Google Sheets account.
  • Open the sheet where you want to set up the webhook.
  • Go to Extensions > Pabbly Connect Webhooks > Initial Setup.
  • Paste the webhook URL from Pabbly Connect into the designated field.

Next, define your trigger column, which is the final data column where new data will be added. For this example, we will use column B as our trigger column. Once you have completed these steps, click on submit to configure the setup successfully.


3. Configuring the Webhook in Google Sheets

After successfully configuring the webhook setup, return to Google Sheets. Navigate again to Extensions > Pabbly Connect Webhooks and select ‘Send on Event’. This ensures that every time a new row is added, the data will be automatically sent to Pabbly Connect.

To verify the webhook functionality, refresh your Google Sheet. Now, add a new row with the desired post details, such as a title and an image link. For example, you could enter:

  • Title: Trending Fashion Accessories for 2024
  • Image Link: [Insert Image URL]

Once you input this data, it should be captured in Pabbly Connect. Check your Pabbly Connect dashboard to see the incoming data and confirm that everything is working as intended.


4. Integrating with Facebook Using Pabbly Connect

Now that we have set up the webhook in Google Sheets, the next step is to use Pabbly Connect to create a Facebook post automatically. In Pabbly Connect, search for Facebook Pages as your action application and select ‘Create Page Post’ as the action event.

To connect your Facebook account, click on ‘Connect’ and authorize Pabbly Connect to access your Facebook pages. Once connected, choose your Facebook page, for example, Divine Glamour, from the dropdown menu. Next, map the fields from Google Sheets to the Facebook post, ensuring that the title and image link are correctly inserted into the post.

After mapping the fields, click on ‘Save and Send Test Request’. This action will send a test post to your Facebook page. You should receive a confirmation response in Pabbly Connect indicating that the post was created successfully. Check your Facebook page to see the new post reflecting the data from Google Sheets.


5. Conclusion: Automating Data Transfer with Pabbly Connect

In conclusion, setting up a webhook inside Google Sheets using Pabbly Connect allows for seamless data transfer to other applications like Facebook. By following the steps outlined in this tutorial, you can automate the process of posting updates directly from your Google Sheets.

Ensure you check out Pabbly Connect to create business automation workflows and reduce manual tasks. Pabbly Connect currently offer integration with 2,000+ applications.

Check out Pabbly Connect – Automate your business workflows effortlessly! Sign Up Free – Start your journey with ease! 10,000+ Video Tutorials – Learn step by step! Join Pabbly Facebook Group – Connect with 21,000+ like minded people!

This integration not only saves time but also ensures that your data is consistently updated across platforms. With Pabbly Connect, you can enhance your workflow and easily manage data transfers between multiple applications.

How to Send WhatsApp Messages to Facebook Leads for Optical Fiber Industry Using Pabbly Connect

Learn how to use Pabbly Connect to send WhatsApp messages to Facebook leads in the optical fiber industry. Follow our step-by-step tutorial for seamless integration.

Watch Step By Step Video Tutorial Below


1. Accessing Pabbly Connect for Integration

To send WhatsApp messages to Facebook leads, you need to access Pabbly Connect. Start by visiting the Pabbly Connect landing page where you can either sign in or sign up for a free account.

If you are a new user, click on the ‘Sign Up Free’ option. This process will take less than two minutes and provides you with 100 free tasks every month. If you’re an existing user, simply click on ‘Sign In’ to access your dashboard.


2. Creating a New Workflow in Pabbly Connect

Once logged into Pabbly Connect, you will see the option to create a new folder for your workflow. Click on the folder icon and name it ‘Facebook Leads to WhatsApp’. After creating the folder, click on ‘Create Workflow’ to set up your automation.

  • Name your workflow: ‘Send WhatsApp Messages to Facebook Leads for Optical Fiber Industry’.
  • Select the created folder from the dropdown menu.
  • Click on ‘Create’ to proceed.

You will now see options for setting up a trigger and an action. The trigger application will be Facebook Lead Ads, and the action application will be WhatsApp Cloud API.


3. Setting Up the Trigger with Facebook Lead Ads

In this step, you will configure the trigger using Pabbly Connect. Select Facebook Lead Ads as your trigger application and choose the trigger event as ‘New Lead Instant’. This event activates when a new lead is submitted through your lead gen form.

Now, connect your Facebook Lead Ads account to Pabbly Connect. Click on ‘Add New Connection’, select your Facebook account, and grant the necessary permissions. After connecting, select your Facebook page and the specific lead form that you have set up.

  • Ensure your lead ads form is live to receive lead data correctly.
  • Click on ‘Save and Send Test Request’ to initiate a test submission.
  • Make sure to generate a sample submission in your lead form.

After clicking ‘Save and Send Test Request’, you should see a waiting message for a webhook response. This indicates that your setup is correctly configured to receive data from Facebook Lead Ads.


4. Configuring the Action with WhatsApp Cloud API

Now that the trigger is set up, it’s time to configure the action using Pabbly Connect. Choose WhatsApp Cloud API as your action application and select the action event as ‘Send Template Message’. This allows you to send a predefined message to your leads.

Next, you need to connect your WhatsApp Cloud API account. Click on ‘Add New Connection’ and fill in the required details such as Token, Phone Number ID, and WhatsApp Business Account ID. These details can be found in your WhatsApp Cloud API account settings.

Copy the temporary access token from your WhatsApp Cloud API account. Enter the Phone Number ID and Business Account ID. Click ‘Save’ to establish the connection.

After successfully connecting, select your WhatsApp message template and map the recipient’s mobile number from the lead data received from Facebook.


5. Sending WhatsApp Messages to Leads

With everything configured, you can now send WhatsApp messages to your leads. In Pabbly Connect, ensure that you have mapped the recipient’s mobile number correctly, including the country code without the plus sign.

Fill in the message body with your template content and click on ‘Save and Send Test Request’. You should receive a confirmation message indicating that your WhatsApp message has been accepted for delivery.

Check your WhatsApp account to confirm receipt of the message. Verify that the message body matches the template you created. Ensure the dynamic variables in the message are replaced with lead-specific information.

This process confirms that you have successfully integrated Facebook Lead Ads with WhatsApp Cloud API using Pabbly Connect.


Conclusion

In this tutorial, we demonstrated how to use Pabbly Connect to automate the process of sending WhatsApp messages to Facebook leads in the optical fiber industry. By following these steps, you can enhance your customer engagement effectively.

Ensure you check out Pabbly Connect to create business automation workflows and reduce manual tasks. Pabbly Connect currently offer integration with 2,000+ applications.

How to Upload YouTube Videos from Google Drive Folder Using Pabbly Connect

Learn how to automate uploading YouTube videos from a Google Drive folder using Pabbly Connect. Follow this detailed step-by-step tutorial for seamless integration. Build sophisticated automated workflows in less time than you think. This guide translates complex integrations into straightforward steps for immediate implementation.

Watch Step By Step Video Tutorial Below


1. Accessing Pabbly Connect for Video Upload Automation

To automate uploading YouTube videos from a Google Drive folder, the first step is to access Pabbly Connect. Start by opening a new tab and searching for Pabbly Connect. If you don’t have an account, sign up for free to get started.

Once logged in, you will see the dashboard where you can create workflows. Click on the ‘Access Now’ button under Pabbly Connect to reach the workflow section. Here, you can manage existing workflows or create new ones for automating your YouTube uploads.


2. Creating a New Workflow in Pabbly Connect

To set up a workflow for uploading videos to YouTube, click on the ‘Create Workflow’ button. This will prompt you to name your workflow, such as ‘Upload YouTube Videos from Google Drive Folder’. Choose the folder where you want to save this workflow in Pabbly Connect. using Pabbly Connect

  • Name the workflow appropriately for easy identification.
  • Select the folder in Pabbly Connect to save the workflow.
  • Click on ‘Create’ to finalize.

Now, you will see the trigger and action boxes. The trigger initiates the workflow, and the action follows. In this case, the trigger application will be Google Drive, which is essential for detecting new uploads.


3. Setting Up the Google Drive Trigger in Pabbly Connect

In the trigger section, select Google Drive as your application. For the trigger event, choose ‘New Folder in Specific Folder’. This option allows Pabbly Connect to monitor a designated Google Drive folder for new uploads.

Next, connect Google Drive with Pabbly Connect by clicking on ‘Connect’ and selecting ‘Add New Connection’. Sign in with your Google account and allow access to your Google Drive. Once connected, select the specific folder you want to monitor for new video uploads.


4. Configuring Action Steps for Uploading Videos

After setting up the trigger, the next step is to configure the action steps. The first action will also involve Google Drive, specifically to list the folder content. This allows Pabbly Connect to retrieve the details of the videos uploaded. using Pabbly Connect

  • Select Google Drive again as the action application.
  • Choose ‘List Folder Content’ as the action event.
  • Map the folder ID received from the trigger response.

Once the action is configured, save your settings and test the connection. This will ensure that Pabbly Connect can accurately retrieve the content of the uploaded videos from your Google Drive folder.


5. Finalizing the YouTube Upload Process

The last step is to set up the final action to upload the videos to YouTube. Select YouTube as your action application and choose ‘Upload Video’ as the action event. Connect your YouTube account to Pabbly Connect by allowing access. using Pabbly Connect

Fill in the required fields such as video title, description, and tags, which can be pulled from your Google Sheets containing SEO details. Finally, click on ‘Save and Send Test Request’ to initiate the upload process. You will receive a response indicating that the video upload has been initiated successfully.


Conclusion

This tutorial demonstrated how to automate the process of uploading YouTube videos from a Google Drive folder using Pabbly Connect. By following these steps, you can streamline your video upload workflow, saving time and effort while ensuring your YouTube channel stays updated.

Ensure you check out Pabbly Connect to create business automation workflows and reduce manual tasks. Pabbly Connect currently offer integration with 2,000+ applications.

How to Set Up Webhook Inside WordPress Using Pabbly Connect

Learn how to set up a webhook inside WordPress using Pabbly Connect to automate data transfer to Google Sheets. Follow our step-by-step guide for seamless integration.

Watch Step By Step Video Tutorial Below


1. Setting Up Pabbly Connect for WordPress Integration

To set up a webhook inside WordPress, we will use Pabbly Connect as the central platform. Begin by logging into your Pabbly Connect account and creating a new workflow. This workflow will help in connecting your WordPress account with Google Sheets through a webhook.

In your Pabbly Connect dashboard, select WordPress as your trigger application. The trigger event you need to choose is ‘New Post Published’. This event will activate the webhook every time you publish a new post on your WordPress site.


2. Configuring WordPress for Webhook

Next, you need to configure your WordPress account to work with Pabbly Connect. Go to your WordPress dashboard and navigate to the Plugins section. Here, you will need to install and activate the ‘WP Webhooks’ plugin.

  • Go to Plugins > Add New.
  • Search for ‘WP Webhooks’ and install it.
  • Activate the plugin once installed.

After activating the plugin, navigate to the settings of WP Webhooks. Here, you will configure the webhook to send data to Pabbly Connect. Select the event ‘Post Created’ and add the webhook URL provided by Pabbly Connect.


3. Adding Webhook URL in WordPress

To complete the setup, you need to add the webhook URL in your WordPress settings. In the WP Webhooks settings, click on ‘Send Data’ and then enter a name for the webhook, such as ‘PAB Connect Webhook’. Paste the webhook URL from Pabbly Connect into the designated field.

Once you have added the URL, select the trigger status as ‘Published’. This ensures that the webhook will only send data when a post is published. After making these selections, click on ‘Save Settings’ to finalize your configuration.


4. Testing the Webhook Setup

With the webhook configured, it’s time to test the setup. Return to your Pabbly Connect dashboard and check that it is waiting for a webhook response. Now, create a new post in your WordPress account.

  • Go to Posts > Add New.
  • Enter a title and content for your post.
  • Add a featured image if desired.
  • Publish the post.

Once the post is published, return to Pabbly Connect to verify that the details of the new post have been captured. You should see the post title, content, and image link in the response.


5. Adding Post Details to Google Sheets

Now that the webhook is successfully capturing data, the next step is to add the post details to Google Sheets using Pabbly Connect. In your Pabbly Connect workflow, select Google Sheets as the action application and choose the action event ‘Add a New Row’.

Connect your Google account to Pabbly Connect to establish the link. Select the spreadsheet where you want to store the post details. You can map the post title, content, and image link from the webhook response into the appropriate fields.

After mapping the fields, click on ‘Save and Send Test Request’. Check your Google Sheets to confirm that the new post details have been successfully added. This process automates the data transfer from WordPress to Google Sheets seamlessly through Pabbly Connect.


Conclusion

In conclusion, setting up a webhook inside WordPress using Pabbly Connect allows for seamless automation of data transfer to Google Sheets. By following these detailed steps, you can easily integrate your applications for efficient workflow management.

Ensure you check out Pabbly Connect to create business automation workflows and reduce manual tasks. Pabbly Connect currently offer integration with 2,000+ applications.

How to Create GoHighLevel Contact for Swipe Pages Form Submission Using Pabbly Connect

Learn how to create GoHighLevel contacts for Swipe Pages form submissions using Pabbly Connect. Follow these detailed steps for seamless integration. Explore efficient methods for automating routine tasks with clear, concise instructions suited for both newcomers and experienced professionals.

Watch Step By Step Video Tutorial Below


1. Accessing Pabbly Connect for Integration

To begin the process of creating GoHighLevel contacts for Swipe Pages form submissions, you need to access Pabbly Connect. Start by signing in to your Pabbly Connect account. If you are a new user, click on the ‘Sign Up Free’ button to create an account, which offers 100 free tasks each month.

Once logged in, navigate to the dashboard of Pabbly Connect. Here, you can create a new folder for your workflow. Click on the folder icon and name it ‘Go High Level Contacts for Swipe Pages’. This organization helps in managing your workflows efficiently.


2. Creating a Workflow in Pabbly Connect

After accessing Pabbly Connect, the next step is to create a new workflow. Click on the ‘Create Workflow’ button. A dialog box will prompt you to name your workflow; enter ‘Create Go High Level Contact for Swipe Pages Form Submission’ and select the folder you created earlier.

  • Click on ‘Create’ to proceed.
  • Choose ‘Swipe Pages’ as your trigger application.
  • Select ‘New Form Submission’ as your trigger event.

This setup will initiate the workflow whenever a new form submission occurs on Swipe Pages, allowing you to automate the contact creation process in GoHighLevel.


3. Setting Up the Webhook in Swipe Pages

To connect Swipe Pages with Pabbly Connect, you will receive a webhook URL after setting your trigger. Copy this URL as you will need it for the integration.

Next, log into your Swipe Pages account and navigate to the ‘Integrations’ section. Click on ‘Get Started’ to create a new workflow. Name your workflow (e.g., ‘Test’) and select the trigger as ‘Form Submitted’. Choose the specific page you want to connect.

  • Select the funnel associated with your form.
  • Set the action to send webhooks and paste the URL from Pabbly Connect.
  • Choose the POST method for the webhook.

Ensure that you set the required body fields such as full name, email, and phone number for the webhook to function correctly. Save your changes to activate the integration.


4. Testing the Integration with Pabbly Connect

After setting up the webhook in Swipe Pages, return to Pabbly Connect to test the integration. Click on ‘Recapture Webhook Response’ to ensure the connection is working. Then, go back to Swipe Pages and submit a test form with dummy details.

Once you submit the form, check Pabbly Connect to see if the response is captured successfully. You should see the test user details populated in the response section, confirming that the data is being sent correctly from Swipe Pages.

Verify that the full name, email, and phone number match the test submission. If successful, proceed to set up the action application.

This successful test indicates that the trigger from Swipe Pages is functioning as intended, allowing for the next steps in the workflow.


5. Creating GoHighLevel Contact from Pabbly Connect

The final step is to create a contact in GoHighLevel using Pabbly Connect. Set your action application to ‘Lead Connector V2’ and select ‘Create Contact’ as the action event. Click on ‘Connect’ to establish a connection between Pabbly Connect and your GoHighLevel account.

Fill in the required fields such as name, email, and phone number by mapping the data from the previous steps. Click on ‘Save and Send Test Request’ to create the contact. If the response is positive, it confirms that the contact has been successfully created in your GoHighLevel account.

Check your GoHighLevel contacts list to verify the new contact. Refresh the page to see the test user you created.

This completes the integration process, demonstrating how Pabbly Connect effectively links Swipe Pages form submissions with GoHighLevel contacts.


Conclusion

In conclusion, using Pabbly Connect allows you to automate the creation of GoHighLevel contacts from Swipe Pages form submissions. Following these steps ensures an efficient workflow, saving you time and effort in managing your contacts.

Ensure you check out Pabbly Connect to create business automation workflows and reduce manual tasks. Pabbly Connect currently offer integration with 2,000+ applications.

Automate Thank You Emails for NGO Donations Using Pabbly Connect

Learn how to send automated thank you emails for NGO donations using Pabbly Connect, Razor Pay, Google Docs, and Gmail. Step-by-step tutorial inside. Explore systematic approaches to creating efficient automation solutions that convert technical concepts into practical, implementable instructions.

Watch Step By Step Video Tutorial Below


1. Accessing Pabbly Connect for Automation

To automate thank you emails for NGO donations, you first need to access Pabbly Connect. Begin by visiting the Pabbly website and clicking on ‘Sign Up for Free’ if you’re a new user. If you already have an account, simply click on ‘Sign In’.

Once signed in, navigate to the dashboard of Pabbly Connect. Here, you can create a new workflow by clicking on the ‘Create Workflow’ button. Name your workflow something like ‘Send Thank You Email for Donations Received via Razor Pay’ and select the relevant folder to save it.


2. Setting Up the Trigger with Razor Pay

In this step, you will set up Razor Pay as the trigger application in Pabbly Connect. Select Razor Pay from the list of applications and choose the trigger event as ‘Payment Capture’. This will initiate the workflow when a new donation is received.

  • Select Razor Pay as the trigger application.
  • Choose ‘Payment Capture’ as the trigger event.
  • Copy the webhook URL provided by Pabbly Connect.

Next, go to your Razor Pay dashboard, navigate to ‘Account and Settings’, and then to ‘Webhooks’. Click on ‘Add New Webhook’ and paste the copied URL. Make sure to set the active event to ‘Payment Captured’. After saving, return to Pabbly Connect, where you will see it waiting for a response.


3. Testing the Trigger with a Test Payment

To test the trigger, you need to perform a test donation. Go back to Razor Pay and use the payment link to make a test payment. Fill in the necessary details like the donor’s name and email. Once the payment is successful, Pabbly Connect will capture the response.

  • Enter random details for the test payment.
  • Complete the payment process using dummy card details.
  • Confirm the payment is successful to trigger the webhook.

After the payment, return to Pabbly Connect and check if the response has been received. This response will include all the donation details, which will be used to generate the thank you email and ATG certificate.


4. Creating the ATG Certificate Using Google Docs

With the data from Razor Pay captured, the next step is to create an ATG certificate using Google Docs. In Pabbly Connect, add a new action step and select Google Docs. Choose the action event as ‘Create Document from Template’ to generate the certificate.

Map the necessary fields from the Razor Pay response into the Google Docs template. This includes the donor’s name, donation amount, and other relevant details. Ensure that your template in Google Docs has placeholders for these dynamic fields.


5. Sending the Thank You Email via Gmail

After creating the ATG certificate, the final step is to send a thank you email through Gmail. In Pabbly Connect, add another action step and select Gmail as the application. Choose the action event as ‘Send Email’.

Fill in the email details such as the recipient’s email (mapped from the Razor Pay response), sender name, subject, and body content. Attach the PDF link of the ATG certificate generated earlier. This ensures that the donor receives both the thank you message and the certificate in one email.

Once you have filled in all the required fields, click on ‘Save and Send Test Request’. If everything is set up correctly, the email will be sent successfully to the donor.


Conclusion

In this tutorial, we learned how to automate sending thank you emails for NGO donations using Pabbly Connect. By integrating Razor Pay, Google Docs, and Gmail, you can easily streamline the donation acknowledgment process, ensuring donors receive timely appreciation and necessary documentation.

Ensure you check out Pabbly Connect to create business automation workflows and reduce manual tasks. Pabbly Connect currently offer integration with 2,000+ applications.

How to Set Up Webhook Inside WooCommerce Using Pabbly Connect

Learn how to set up a webhook inside WooCommerce using Pabbly Connect to capture new order details and integrate with Google Sheets. Transform complex automation concepts into accessible, actionable steps that eliminate unnecessary manual work while maximizing existing application capabilities.

Watch Step By Step Video Tutorial Below


Setting Up Webhook in WooCommerce with Pabbly Connect

To set up a webhook inside WooCommerce, start by accessing Pabbly Connect. This platform allows you to connect various applications seamlessly. In this tutorial, we will capture new order details from WooCommerce using a webhook that Pabbly Connect generates.

First, navigate to your Pabbly Connect dashboard and create a new workflow. Choose WooCommerce as your trigger application and select the trigger event as ‘New Order Created.’ This event will activate whenever a new order is placed in your WooCommerce store.


Copying the Webhook URL from Pabbly Connect

After selecting the trigger event, Pabbly Connect will provide you with a webhook URL. This URL acts as a bridge between WooCommerce and Pabbly Connect. You will need to copy this URL for the next steps.

Now, head to your WooCommerce settings within your WordPress dashboard. Navigate to the WooCommerce plugin, go to settings, and select the Advanced tab. Under this tab, find the Webhooks option where you can add a new webhook.


Configuring Webhook Settings in WooCommerce

In the webhook settings of WooCommerce, you will need to fill out several fields to ensure proper integration with Pabbly Connect. Start by naming your webhook, for example, ‘Pabbly Connect Webhook.’ Set the status to Active to enable the webhook.

Next, select the topic for the webhook. Choose ‘Order Created’ as the event that will trigger the webhook. Finally, paste the webhook URL you copied from Pabbly Connect into the Delivery URL field. After completing these steps, click on ‘Save Webhook’ to finalize the configuration.


Testing the Webhook with a New Order

To verify that the webhook is working correctly, you will need to place a test order on your WooCommerce store. Go to your store’s front end, select a product, and proceed to checkout. After successfully placing the order, you should see a confirmation message.

Return to Pabbly Connect to check if the order details have been captured. You can do this by clicking on ‘Recapture Webhook Response.’ If the details are successfully displayed, it means the webhook integration is functioning as intended.


Integrating WooCommerce with Google Sheets via Pabbly Connect

Now that the webhook is set up and tested, you can integrate the captured order details into Google Sheets using Pabbly Connect. In your Pabbly Connect workflow, add a new action step and select Google Sheets as your action application.

Choose the action event as ‘Add a New Row’ to insert the order details into your Google Sheet. Connect your Google account and select the appropriate spreadsheet where the order details should be saved. You will need to map the order information from the WooCommerce response to the corresponding columns in your Google Sheet.

  • Map the order key, date and time, customer name, email, phone number, address, product name, quantity, and amount.

After mapping the fields, click on ‘Save and Send Test Request’ to ensure that the data is correctly added to your Google Sheet. If successful, you will see the new order details appear in your specified Google Sheet.


Conclusion

In this tutorial, we demonstrated how to set up a webhook inside WooCommerce using Pabbly Connect. By following these steps, you can easily capture new order details and integrate them with Google Sheets for better order management.

Ensure you check out Pabbly Connect to create business automation workflows and reduce manual tasks. Pabbly Connect currently offer integration with 2,000+ applications.

How to Add New Leads from Facebook Lead Ads to FunnelKit Using Pabbly Connect

Learn how to automate adding new leads from Facebook Lead Ads to FunnelKit as contacts using Pabbly Connect. Step-by-step tutorial with detailed instructions. Learn to create powerful connections between your critical applications without requiring specialized programming knowledge or extensive technical background.

Watch Step By Step Video Tutorial Below


1. Setting Up Pabbly Connect for Facebook Lead Ads

To automate adding new leads from Facebook Lead Ads to FunnelKit, you first need to set up Pabbly Connect. Start by signing up for a free account, which allows you to create workflows that connect various applications seamlessly.

Once logged into Pabbly Connect, navigate to the dashboard. Click on the ‘Create Workflow’ button and name your workflow, for example, ‘Facebook Leads to FunnelKit.’ Select the folder where you want to save this workflow and click on ‘Create’ to proceed.


2. Connecting Facebook Lead Ads to Pabbly Connect

In this section, you will connect your Facebook Lead Ads account to Pabbly Connect. Start by selecting Facebook Lead Ads from the available apps in the trigger window. Choose the trigger event as ‘New Lead Instant’.

  • Select your Facebook account and click on ‘Connect’.
  • Choose the Facebook page where your ads are running.
  • Select the lead generation form you want to capture leads from.

After saving the settings, click on ‘Save and Send Test Request’. This action will allow Pabbly Connect to wait for a response from Facebook Lead Ads, confirming the connection is successful.


3. Generating Test Leads from Facebook Lead Ads

To verify the connection, you will generate a test lead using the Facebook Lead Ads testing tool. Select your Facebook page and the appropriate lead form, then click on ‘Preview Form’.

  • Enter the test lead details, such as name, email, and mobile number.
  • Click on ‘Submit’ to generate the test lead.
  • Check Pabbly Connect for the captured lead details.

Once the lead is generated, you should see the details in Pabbly Connect, confirming that the integration is working correctly.


4. Adding Leads to FunnelKit as Contacts

Now that you have successfully connected Facebook Lead Ads, the next step is to add these leads as contacts in FunnelKit using Pabbly Connect. In the action window, select FunnelKit and choose the action event ‘Create Contact’.

Click on ‘Connect’ and enter the API key and WordPress site URL of your FunnelKit account. To get the API key, navigate to your WordPress site, go to FunnelKit settings, and generate a new API key.

Copy the API key and paste it into Pabbly Connect. Enter the base URL of your WordPress site without the trailing slash.

After entering the necessary details, map the lead details from the trigger step to the action step. This mapping ensures that the correct information is sent to FunnelKit.


5. Testing the Automation Workflow

To ensure everything is functioning as expected, it’s important to test the automation workflow you set up in Pabbly Connect. Generate a new test lead using the Facebook Lead Ads testing tool again.

After submitting the new lead, check your FunnelKit account to see if the lead appears as a contact. This confirms that your automation is successfully adding leads from Facebook to FunnelKit.

Once you verify that the test lead is added, you can confidently use this automation for your actual leads. With Pabbly Connect, the process is seamless and efficient, allowing you to focus on your business growth.


Conclusion

In this tutorial, we have shown how to automate adding new leads from Facebook Lead Ads to FunnelKit using Pabbly Connect. This integration streamlines your lead management process, enhancing efficiency and productivity.

Ensure you check out Pabbly Connect to create business automation workflows and reduce manual tasks. Pabbly Connect currently offer integration with 2,000+ applications.