Automate WhatsApp Messages to Facebook Leads for Your Jewellery Business Using Pabbly Connect
Learn how to send automated WhatsApp messages to Facebook leads for your jewellery business using Pabbly Connect. Step-by-step guide included. This comprehensive guide reveals exactly how to connect your applications and automate repetitive tasks — accessible for professionals of all technical backgrounds.
Watch Step By Step Video Tutorial Below
1. Accessing Pabbly Connect for Automation
To send automated WhatsApp messages to Facebook leads, the first step is to access Pabbly Connect. Sign in to your existing account or create a new one by clicking on the ‘Sign Up for Free’ button to get started with 100 free tasks per month.
Once logged in, navigate to the dashboard by clicking on ‘Access Now’ under Pabbly Connect. On the dashboard, you will find options to create a new workflow, which is essential for setting up your automation process.
2. Creating a Workflow in Pabbly Connect
In this section, you will create a workflow to automate sending WhatsApp messages. Click on the ‘Create Workflow’ button located at the top right corner of your dashboard. Name your workflow something descriptive, like ‘Send Automated WhatsApp Message to Facebook Leads’.
- Choose a folder to save your workflow, such as ‘Facebook Lead Ads’.
- Click on ‘Create’ to finalize the workflow setup.
After creating the workflow, you will see options to set up the trigger and action applications. This is where Pabbly Connect will facilitate the integration between Facebook leads and WhatsApp.
3. Setting Up Trigger and Action in Pabbly Connect
The next step involves setting up the trigger application, which in this case is Facebook Lead Ads. Select ‘Facebook Lead Ads’ as your trigger application and choose the trigger event as ‘New Lead Instant’. This means that the workflow will activate whenever a new lead is captured.
For the action application, search for and select ‘Interact’ to send the WhatsApp message. Choose the action event as ‘Send WhatsApp Template Message’. This setup ensures that every new lead from Facebook will automatically trigger a WhatsApp message through Pabbly Connect.
4. Connecting Facebook Lead Ads to Pabbly Connect
To establish the connection between Facebook Lead Ads and Pabbly Connect, click on ‘Connect’ in the trigger window. You will be prompted to log into your Facebook account if you haven’t already. Once logged in, authorize the connection, and you will see a message confirming the successful connection.
- Select the Facebook page associated with your jewellery store.
- Choose the lead generation form you want to use.
After configuring these settings, click on ‘Save and Send Test Request’ to ensure everything is working correctly. This step is crucial for confirming that Pabbly Connect is capturing the leads accurately.
5. Sending WhatsApp Message to Facebook Leads
Now that the connection is established, you need to configure how to send the WhatsApp message. In the action window, click on ‘Connect’ to link Interact with Pabbly Connect. You will need to enter your secret key from your Interact account to complete this connection.
Once connected, map the full phone number from the response you received from Facebook Lead Ads. You will also need to provide the template code and language for the WhatsApp message. This ensures that the message sent is personalized for each lead.
Enter the template language code, for example, ‘en’ for English. Map the lead name variable to personalize the message.
Finally, click on ‘Save and Send Test Request’ to verify that the WhatsApp message is sent successfully. This completes the automation setup, allowing you to send automated WhatsApp messages to your Facebook leads seamlessly using Pabbly Connect.
Conclusion
Using Pabbly Connect, you can automate the process of sending WhatsApp messages to Facebook leads for your jewellery business. This integration not only saves time but also enhances customer engagement by providing instant communication.
Ensure you check out Pabbly Connect to create business automation workflows and reduce manual tasks. Pabbly Connect currently offer integration with 2,000+ applications.
- Check out Pabbly Connect – Automate your business workflows effortlessly!
- Sign Up Free – Start your journey with ease!
- 10,000+ Video Tutorials – Learn step by step!
- Join Pabbly Facebook Group – Connect with 21,000+ like minded people!
Integrating Google Sheets with Google Calendar Using Pabbly Connect
Learn how to automate Google Calendar creation from Google Sheets using Pabbly Connect. Step-by-step guide to set up the integration effectively. Discover how to seamlessly connect your essential tools through accessible instructions that make powerful automation available to professionals at every skill level.
Watch Step By Step Video Tutorial Below
1. Setting Up Pabbly Connect for Google Sheets and Google Calendar Integration
To begin with, Pabbly Connect is the central platform that enables the integration between Google Sheets and Google Calendar. First, access Pabbly Connect by visiting their website and logging into your account. If you don’t have an account, you can sign up for free, which takes just a couple of minutes. using Pabbly Connect
Once logged in, navigate to the Pabbly Connect dashboard. Here, you can create a new workflow by clicking the ‘Create Workflow’ button. Name your workflow appropriately, such as ‘Create Google Calendar from Google Sheets’, and select a folder to save it in. This setup process is crucial for organizing your automation tasks.
2. Configuring the Trigger in Pabbly Connect
In this step, we will configure the trigger for our integration using Pabbly Connect. The trigger application is Google Sheets, which will monitor for new or updated rows. To set this up, click on the trigger box and select Google Sheets from the list of applications. using Pabbly Connect
- Choose the trigger event as ‘New or Updated Spreadsheet Row’.
- Connect your Google Sheets account to Pabbly Connect.
- Copy the provided webhook URL to connect Google Sheets with Pabbly Connect.
After copying the webhook URL, go to your Google Sheets, click on ‘Extensions’, then ‘Add-ons’, and select ‘Get Add-ons’. Search for the Pabbly Connect Webhook and install it. Once installed, navigate back to Extensions, select Pabbly Connect Webhook, and click on ‘Initial Setup’. Paste the webhook URL and set the trigger column (e.g., column B) to send data whenever a new row is added.
3. Setting Up the Action in Pabbly Connect
Next, we will configure the action step in Pabbly Connect, which involves Google Calendar. This action will create a new calendar based on the details entered in Google Sheets. Click on the action box and select Google Calendar as your action application. using Pabbly Connect
- Choose the action event as ‘Create Calendar’.
- Connect your Google Calendar account to Pabbly Connect.
- Map the calendar name and description fields from the Google Sheets data.
After mapping, click on ‘Save and Test’ to create the calendar. Check your Google Calendar to confirm that a new calendar has been created with the specified name and description from your Google Sheets. This step demonstrates how Pabbly Connect effectively automates the process.
4. Testing the Integration Between Google Sheets and Google Calendar
To ensure everything works smoothly, we will test the integration by adding a new row in Google Sheets. Enter a new calendar name and description in the respective columns. Once you add this data, Pabbly Connect will automatically trigger the action to create a new calendar in Google Calendar. using Pabbly Connect
After adding the new row, refresh your Google Calendar to see if the new calendar appears. This confirms that the integration is functioning correctly. The automation process allows for seamless updates without manual intervention, showcasing the power of Pabbly Connect in streamlining workflows.
5. Conclusion: Automating Calendar Creation with Pabbly Connect
In this tutorial, we successfully demonstrated how to integrate Google Sheets with Google Calendar using Pabbly Connect. By following the steps outlined, you can automate the creation of calendars based on data entered in Google Sheets. This process not only saves time but also minimizes errors, enhancing productivity.
Ensure you check out Pabbly Connect to create business automation workflows and reduce manual tasks. Pabbly Connect currently offer integration with 2,000+ applications.
- Check out Pabbly Connect – Automate your business workflows effortlessly!
- Sign Up Free – Start your journey with ease!
- 10,000+ Video Tutorials – Learn step by step!
- Join Pabbly Facebook Group – Connect with 21,000+ like minded people!
Using Pabbly Connect as the central platform for this integration allows for efficient workflows, enabling users to focus on more important tasks. Start automating your integrations today and experience the benefits of Pabbly Connect!
Integrating Zoho CRM with JotForm Using Pabbly Connect: A Step-by-Step Guide
Learn how to integrate Zoho CRM with JotForm using Pabbly Connect. This step-by-step guide covers the entire process for seamless automation. Eliminate manual repetitive tasks from your workflow. Discover proven automation methods with intuitive steps designed for efficiency-minded professionals.
Watch Step By Step Video Tutorial Below
1. Accessing Pabbly Connect for Integration
To start integrating Zoho CRM with JotForm, the first step is to access Pabbly Connect. This platform serves as the central hub for all your automation needs. You can create a free account on Pabbly Connect in just a few minutes.
Once you have logged in, navigate to the dashboard. Here, click on the ‘Create Workflow’ button, and name your workflow, for example, ‘JotForm to Zoho CRM’. After naming, select the appropriate folder in your Pabbly Connect account and create the workflow. This sets the foundation for your integration.
2. Setting Up the Trigger in Pabbly Connect
In this section, you will set up the trigger for your automation using Pabbly Connect. The trigger will be based on new submissions from JotForm. Start by selecting JotForm as the application in the trigger setup. using Pabbly Connect
- Choose JotForm as the app.
- Select ‘New Response’ from the trigger event dropdown.
- Copy the webhook URL provided by Pabbly Connect.
After copying the webhook URL, go to your JotForm account. In the form settings, navigate to the Integrations section. Search for the Webhook option and paste the copied URL. Complete the integration, and you will see that Pabbly Connect is now waiting for a response from JotForm.
3. Making a Test Submission in JotForm
Now that the trigger is set, it’s time to test the integration. Go back to your JotForm account and make a test submission. Fill in the form with details of an existing contact in Zoho CRM. For example, use a contact named ‘Dumy User’ with a specific email and mobile number. using Pabbly Connect
After filling in the details, click on the submit button. Once the form is submitted, return to Pabbly Connect. You should see the response from JotForm captured in the workflow, confirming that the integration is functioning correctly.
This step demonstrates how Pabbly Connect effectively captures data from JotForm, which will later be used to update or create records in Zoho CRM. The automation process is now ready to proceed to the next step.
4. Configuring the Zoho CRM Action in Pabbly Connect
In this step, you will configure the action that takes place in Zoho CRM based on the JotForm submission. Select Zoho CRM as the action application in Pabbly Connect. Choose the action event as ‘Insert/Update Record’. This action will allow you to either create a new record or update an existing one based on the email address. using Pabbly Connect
- Connect your Zoho CRM account by entering the domain.
- Select the module as ‘Contacts’ for updating or inserting records.
- Map the fields from JotForm to the corresponding fields in Zoho CRM.
Ensure that you map all relevant fields, including custom fields you have created in Zoho CRM. This mapping process is crucial as it defines how the data from JotForm will populate the fields in your Zoho CRM account.
5. Testing the Integration with New Data
With everything set up, it’s time to test the integration. Make another submission in JotForm, this time with a new contact that does not exist in Zoho CRM. For example, use a contact named ‘Test User’. Submit the form and check your Zoho CRM account to see if the new record has been created. using Pabbly Connect
After refreshing the contacts page in Zoho CRM, you should see the new contact with all the details filled in correctly. This confirms that Pabbly Connect has successfully automated the process of creating records based on form submissions.
Additionally, you can perform another test by submitting data for an existing contact. This will demonstrate how Pabbly Connect updates the existing records with new information. By following these steps, you can fully utilize Pabbly Connect to streamline your CRM processes.
Conclusion
This tutorial has shown how to integrate Zoho CRM with JotForm using Pabbly Connect. By automating the process of creating and updating records, you can save time and improve efficiency in managing your CRM data. Pabbly Connect serves as the central platform for this seamless integration, making it a powerful tool for your automation needs.
Ensure you check out Pabbly Connect to create business automation workflows and reduce manual tasks. Pabbly Connect currently offer integration with 2,000+ applications.
- Check out Pabbly Connect – Automate your business workflows effortlessly!
- Sign Up Free – Start your journey with ease!
- 10,000+ Video Tutorials – Learn step by step!
- Join Pabbly Facebook Group – Connect with 21,000+ like minded people!
Automate Sending Google Forms Link via WhatsApp Using Pabbly Connect
Learn how to automate sending Google Forms links through WhatsApp using Pabbly Connect. This step-by-step guide covers everything you need for seamless integration. Discover how to seamlessly connect your essential tools through accessible instructions that make powerful automation available to professionals at every skill level.
Watch Step By Step Video Tutorial Below
1. Accessing Pabbly Connect for Automation
To start automating the process of sending Google Forms links via WhatsApp, you need to access Pabbly Connect. Begin by typing the URL in your browser to reach the homepage of Pabbly Connect. Here, you will find options to sign in or sign up for a free account.
If you are a new user, click on the ‘Sign Up for Free’ button. After creating your account, you will receive 100 free tasks monthly to explore Pabbly Connect’s features. Existing users can directly sign in to access the dashboard where you can create and manage your workflows.
2. Creating a Workflow in Pabbly Connect
Once you are logged into Pabbly Connect, navigate to the dashboard and click on the ‘Create Workflow’ button. A dialog box will appear, prompting you to name your workflow. You can name it something like ‘Send Google Forms Link on WhatsApp’.
After naming your workflow, select the folder where you want to save it. Once you click on ‘Create’, you will see two windows open for trigger and action settings. The trigger initiates the workflow, while the action executes the tasks based on the trigger.
- Name your workflow appropriately.
- Select the folder to save your workflow.
- Understand the trigger-action relationship.
Once the workflow is created, you can proceed to set up the trigger and action applications for your automation.
3. Setting Up the Trigger in Pabbly Connect
The first step in your automation is setting up the trigger in Pabbly Connect. Click on the trigger application and select ‘Schedule’. This feature allows you to schedule when the workflow will run. You can set it to run at a specific time or regularly.
For this tutorial, select the option to run the workflow only once. Choose the date and time you want the workflow to be initiated. For example, if you want it to run at 11:35 AM today, set that time and click ‘Save’. This sets your workflow to trigger at the specified time.
- Select ‘Schedule’ as the trigger application.
- Set the desired date and time for the workflow.
- Click ‘Save’ to schedule the trigger.
Once the trigger is set, you can move on to the action steps where you will retrieve data from Google Sheets.
4. Configuring Action Steps in Pabbly Connect
In this section, you will configure the action steps using Pabbly Connect. Start by selecting Google Sheets as your action application. Choose the action event as ‘Get Rows’ to retrieve the student details stored in your Google Sheets.
To connect Google Sheets with Pabbly Connect, click on ‘Connect’ and then ‘Add New Connection’. Sign in with your Google account and grant permission for Pabbly Connect to access your Google Sheets. After connecting, select the spreadsheet containing your student data.
Choose Google Sheets as the action application. Select ‘Get Rows’ as the action event. Connect your Google account and select the relevant spreadsheet.
Once the data is retrieved, you can proceed to format it for sending through WhatsApp using the next action step.
5. Sending WhatsApp Messages Using Pabbly Connect
For the final action, you will send WhatsApp messages using Pabbly Connect and Wati. Click on the ‘+’ icon to add another action step and select Wati as your application. Choose ‘Send Template Message’ as the action event.
Connect your Wati account by entering the API endpoint and access token from your Wati dashboard. Once connected, you’ll need to fill in the details for the WhatsApp message, including the recipient’s number and the message template you created.
Select Wati as the action application. Fill in the WhatsApp number and message template details. Click ‘Save’ to send the message.
Once everything is set, you can test the workflow to ensure that the message is sent correctly to the intended recipients.
Conclusion
In this tutorial, you learned how to automate sending Google Forms links via WhatsApp using Pabbly Connect. By following the steps outlined, you can streamline your communication process and ensure that your students receive important links effortlessly. This integration not only saves time but also enhances engagement through automated messaging.
Ensure you check out Pabbly Connect to create business automation workflows and reduce manual tasks. Pabbly Connect currently offer integration with 2,000+ applications.
- Check out Pabbly Connect – Automate your business workflows effortlessly!
- Sign Up Free – Start your journey with ease!
- 10,000+ Video Tutorials – Learn step by step!
- Join Pabbly Facebook Group – Connect with 21,000+ like minded people!
Pabbly Chatflow Inbox Overview: A Step-by-Step Tutorial
Explore the Pabbly Chatflow Inbox Overview with this detailed tutorial. Learn how to manage your WhatsApp conversations effectively using Pabbly Chatflow. Discover practical methods for designing chat sequences that capture leads, answer questions, and guide users to the next step in your funnel.
Watch Step By Step Video Tutorial Below
1. Accessing Pabbly Chatflow Inbox for WhatsApp Management
To begin using Pabbly Chatflow, access your account and navigate to the left side panel. Under the dashboard, select the inbox section to manage WhatsApp conversations. This feature centralizes all communications, making it easier to interact with users.
In the inbox, you can manage conversations, send messages, and utilize templates effectively. The interface is designed to streamline your communication process, ensuring no messages are missed. To get started, simply log in and find the inbox option in the navigation menu.
2. Exploring Pabbly Chatflow Inbox Features
The Pabbly Chatflow inbox consists of three main sections: the chat list, message section, and contact details panel. The chat list displays all WhatsApp conversations, allowing you to track new messages efficiently. You can search for specific contacts directly in this list.
- View all WhatsApp conversations in one place.
- Search for specific contacts easily.
- Manage multiple chats simultaneously for better organization.
In the message section, you can type replies, attach files, and use quick replies for efficiency. The contact details panel shows customer information, enhancing your ability to respond accurately and quickly. This comprehensive setup ensures a professional communication experience.
3. Managing Conversations in Pabbly Chatflow
Within the Pabbly Chatflow inbox, managing conversations is straightforward. You can reply to messages directly from the message section, ensuring timely responses. The ability to attach documents and images enhances your communication capabilities.
To reply, simply type your message and click send. For example, if you want to respond to a customer, you might write, ‘Hey, how can I assist you today?’ This direct interaction fosters a better relationship with your users.
- Use emojis to make conversations more engaging.
- Format your messages to highlight important information.
- Utilize quick replies to save time on frequently asked questions.
Additionally, tracking message statuses such as delivered and read ensures you know when your messages are received. This feature is crucial for maintaining effective communication with customers.
4. Configuring Inbox Settings in Pabbly Chatflow
Configuring inbox settings in Pabbly Chatflow allows you to customize how messages are handled. You can set up automatic replies for first-time queries during working hours and define your business hours. This ensures customers receive timely responses.
To configure, navigate to the settings option in the inbox. Here, you can toggle on the welcome message feature and select a pre-approved template or create a custom message. This feature enhances customer interaction by providing immediate responses.
Define working hours to manage customer expectations. Set automated responses for off-hours messages. Customize your welcome message to greet new users effectively.
This configuration ensures your customers always feel valued and attended to, regardless of when they reach out.
5. Understanding Opt-in Management in Pabbly Chatflow
Opt-in management is crucial for compliance with WhatsApp guidelines, and Pabbly Chatflow provides tools to manage this effectively. You can set keywords for customers to opt-in or opt-out of communications, ensuring your messages reach only those who consent.
To manage opt-in settings, navigate to the settings menu and select opt-in management. Here, you can define keywords like ‘start’ for opting in and ‘stop’ for opting out. This feature helps maintain professionalism and compliance.
Set a confirmation message for users who opt-in. Automatically update user status based on their responses. Ensure compliance with WhatsApp’s messaging policies.
By implementing these settings, you can effectively manage your communication strategy and enhance customer trust.
Conclusion
In summary, this tutorial covered the essential features of Pabbly Chatflow, focusing on managing WhatsApp communications effectively. By utilizing the inbox and its settings, you can ensure that your customer interactions are professional and timely. Leverage these tools to enhance your communication strategy.
Ensure you check out Pabbly Connect to create business automation workflows and reduce manual tasks. Pabbly Connect currently offer integration with 2,000+ applications.
- Check out Pabbly Connect – Automate your business workflows effortlessly!
- Sign Up Free – Start your journey with ease!
- 10,000+ Video Tutorials – Learn step by step!
- Join Pabbly Facebook Group – Connect with 21,000+ like minded people!
Broadcast Messages and API Campaigns Using Pabbly Chatflow: A Comprehensive Guide
Learn how to effectively use Pabbly Chatflow for broadcasting messages and setting up API campaigns in this detailed tutorial shows you how to build powerful chat automation that engages visitors and converts prospects—without any coding required.
Watch Step By Step Video Tutorial Below
1. Overview of Pabbly Chatflow
Pabbly Chatflow is a powerful platform that enables users to connect with their audience via WhatsApp. In this tutorial, we will explore how to utilize Pabbly Chatflow to send broadcast messages effectively and set up API campaigns. By leveraging Pabbly Chatflow, you can streamline communication and automate interactions with your users. using Pabbly Connect
To get started, log into your Pabbly Chatflow account. Once logged in, navigate to the left sidebar and select the ‘Broadcast’ section. Here, you will find various metrics related to your broadcast campaigns, including total broadcasts sent and scheduled broadcasts. This section serves as your control center for managing WhatsApp communications.
2. Creating Broadcast Messages in Pabbly Chatflow
To create a broadcast message, start by clicking the ‘Add Broadcast’ button in the Broadcast section. You will be prompted to choose the type of broadcast you wish to create. In Pabbly Chatflow, you can select either a ‘Campaign’ or an ‘API Campaign.’ For this part, we will focus on creating a standard broadcast campaign. using Pabbly Connect
- Select the broadcast type as ‘Campaign’.
- Enter a name for your broadcast, such as ‘New Blog Announcement’.
- Choose your contact list from the dropdown menu.
After entering these details, you will be asked to select the type of message you want to send. Pabbly Chatflow allows you to send either pre-approved template messages or regular messages. Remember, regular messages can only be sent within a 24-hour active chat window with the user.
3. Setting Up API Campaigns with Pabbly Chatflow
API Campaigns in Pabbly Chatflow enable you to send WhatsApp messages through external applications. To set this up, click the ‘Add Broadcast’ button and select ‘API Campaign’ as your broadcast type. This allows you to connect Pabbly Chatflow with other platforms, automating the process of sending messages based on external triggers. using Pabbly Connect
For example, if you run an e-commerce store, you can set up an API Campaign to send order confirmations via WhatsApp. Select the appropriate template from your approved list, and give your campaign a name, such as ‘Order Confirmation.’ This template will be used to send automated messages whenever a new order is placed.
- Choose the template that matches your message requirements.
- Define the parameters that will be dynamically filled when messages are sent.
After configuring your API Campaign, you can test it by sending a test message to ensure everything is set up correctly. This feature is crucial for verifying that your API calls are functioning as intended before going live.
4. Testing Broadcasts in Pabbly Chatflow
Once you have created your broadcast message or API campaign, it’s essential to test it. Pabbly Chatflow provides a straightforward way to send test messages to ensure that your configurations work as expected. In the Broadcast section, find the test option and enter the mobile number of the recipient. using Pabbly Connect
After entering the recipient’s details, click the ‘Send Test Message’ button. This action will send a preview of your broadcast message to the specified WhatsApp number. You can check the message received to confirm that all dynamic fields are populated correctly, and the message format adheres to your specifications.
Testing is a critical step in the process, as it helps catch any errors before the actual broadcast is sent to all contacts. Make sure to review the content of the test message thoroughly to ensure that it meets your expectations.
5. Scheduling Broadcasts in Pabbly Chatflow
Pabbly Chatflow allows you to schedule broadcasts for future dates, enhancing your messaging strategy. After creating your broadcast message, you can choose to send it immediately or schedule it for later. To schedule a broadcast, select the option to schedule and choose your desired date and time. using Pabbly Connect
For instance, if you want to send a message announcing a new blog post, you can set it to go out at a specific time when your audience is most active. After setting the date and time, click ‘Add Broadcast’ to finalize your scheduling. This feature helps you reach your audience at optimal times without manual intervention.
Once scheduled, you can view all your broadcasts, including their statuses, in the Broadcast section of Pabbly Chatflow. You can also modify or delete scheduled broadcasts as needed, ensuring flexibility in your communication strategy.
Conclusion
In this tutorial, we explored how to use Pabbly Chatflow for sending broadcast messages and setting up API campaigns. By utilizing Pabbly Chatflow, you can streamline communication, automate processes, and enhance user engagement through effective messaging strategies. Start leveraging Pabbly Chatflow today to improve your WhatsApp communication.
Ensure you check out Pabbly Connect to create business automation workflows and reduce manual tasks. Pabbly Connect currently offer integration with 2,000+ applications.
- Check out Pabbly Connect – Automate your business workflows effortlessly!
- Sign Up Free – Start your journey with ease!
- 10,000+ Video Tutorials – Learn step by step!
- Join Pabbly Facebook Group – Connect with 21,000+ like minded people!
Integrating WhatsApp Messaging with Pabbly Connect: A Step-by-Step Guide
Learn how to integrate WhatsApp messaging using Pabbly Connect. This tutorial covers API Campaigns, broadcasting messages, and automating workflows efficiently. Explore efficient methods for automating routine tasks with clear, concise instructions suited for both newcomers and experienced professionals.
Watch Step By Step Video Tutorial Below
1. Setting Up Pabbly Connect for WhatsApp Integration
To start utilizing Pabbly Connect for WhatsApp integration, you first need to log into your Pabbly Connect account. This platform serves as the central hub for automating your messaging processes via WhatsApp. After logging in, navigate to the ‘Integrations’ section to begin the setup.
Once there, you can select the applications you wish to connect. For this tutorial, we will integrate WhatsApp through Pabbly Connect with an API Campaign. Ensure that you have your WhatsApp API credentials ready to facilitate this connection.
2. Creating a Broadcast Campaign in Pabbly Connect
In this section, we will create a broadcast campaign using Pabbly Connect. Start by clicking on the ‘Add Broadcast’ button located in the Broadcast section of your Pabbly Chatflow account. Here, you will be prompted to choose the type of broadcast campaign you want to create.
- Select the broadcast type as either ‘Campaign’ or ‘API Campaign’.
- Name your broadcast campaign, for example, ‘New Blog Announcement’.
- Choose the contact list from your Pabbly Connect account to send the messages.
After setting up your campaign, you will need to select the type of message you wish to send. This could be a pre-approved template or a regular message, depending on your needs. Make sure to follow the guidelines for message types to ensure successful delivery.
3. Sending Messages via Pabbly Connect
Once your broadcast campaign is created, you can proceed to send messages using Pabbly Connect. For sending a regular message, ensure that you have an active chat window with your contacts. This allows you to send messages without prior approval.
If you opt to send a pre-approved template message, select the template from the list provided in Pabbly Connect. You can customize the message using dynamic fields such as the contact’s name or the blog title. This personalization increases engagement with your audience.
4. Testing Your Broadcast Campaign
Before launching your broadcast campaign, it is crucial to test it using Pabbly Connect. This ensures that your messages will be sent correctly. Enter the mobile number of a test contact and click on the ‘Send Test Message’ button.
- Verify the message received on WhatsApp to ensure it appears as intended.
- Check the message format, including dynamic fields, to confirm they populate correctly.
After confirming that your test message is successful, you can proceed to schedule or send your broadcast campaign to your full contact list. This step is essential to ensure that your audience receives timely updates.
5. Automating WhatsApp Messages with Pabbly Connect
To automate the process of sending WhatsApp messages, you can utilize the API Campaign feature in Pabbly Connect. This allows you to connect your e-commerce platform or any other application to automatically send messages based on certain triggers, such as a new order.
For example, when a new order is placed, configure Pabbly Connect to send an order confirmation message via WhatsApp. You will need to set up the API request parameters correctly to ensure all necessary data is included in the message.
Testing your API integration is crucial. Use tools like Postman to simulate API requests and ensure that your WhatsApp messages are sent correctly. This integration significantly enhances your communication efficiency with customers and streamlines your operations.
Conclusion
In this tutorial, we explored how to use Pabbly Connect to integrate WhatsApp messaging effectively. By setting up broadcast campaigns and automating messages, you can enhance communication with your audience and streamline operations.
Ensure you check out Pabbly Connect to create business automation workflows and reduce manual tasks. Pabbly Connect currently offer integration with 2,000+ applications.
- Check out Pabbly Connect – Automate your business workflows effortlessly!
- Sign Up Free – Start your journey with ease!
- 10,000+ Video Tutorials – Learn step by step!
- Join Pabbly Facebook Group – Connect with 21,000+ like minded people!
How to Create a WhatsApp Chatbot Using Pabbly Chatflow
Learn how to create an automated WhatsApp chatbot using Pabbly Chatflow. This step-by-step tutorial covers everything from setup to execution. Discover how to design chat experiences that feel personal and responsive while handling customer inquiries automatically around the clock.
Watch Step By Step Video Tutorial Below
1. Introduction to Pabbly Chatflow for WhatsApp Automation
In this section, we will introduce Pabbly Chatflow as the primary tool for creating WhatsApp chatbots. This platform allows users to automate conversations without needing programming skills. With Pabbly Chatflow, you can set up flows that guide the chatbot to respond to customer inquiries effectively.
By leveraging Pabbly Chatflow, businesses can enhance their customer service by providing instant responses and personalized interactions. This tutorial will guide you through the process of setting up a WhatsApp chatbot for a Wellness Center, showcasing how Pabbly Chatflow can transform customer interactions.
2. Setting Up Your Pabbly Chatflow Account
To begin, access your Pabbly Chatflow account and navigate to the dashboard. This is where all your chatbot flows will be managed. Click on the ‘Flows’ option located on the left sidebar to see existing flows and create a new one.
- Log in to your Pabbly Chatflow account.
- Select the ‘Flows’ option from the left sidebar.
- Click on the ‘Add Flow’ button to create a new flow.
After setting up your flow, you will need to define the trigger for your chatbot. In this case, we will use specific keywords related to the Wellness Center that will activate the chatbot when sent by a customer.
3. Creating the Flow in Pabbly Chatflow
Now that you have set up the initial flow, it’s time to create the actual chatbot flow using Pabbly Chatflow. Start by defining the trigger using keywords. Enter commonly used keywords like ‘hey’, ‘hello’, and ‘hi’ to activate the chatbot.
To enhance the flow, you can use Regular Expressions (Rex) to capture variations of inquiries. For instance, you might enter keywords like:
- Services
- Therapy
- Appointment
Once the triggers are set, proceed by dragging and dropping actions such as ‘Ask a Question’ to personalize the interaction. This is where the chatbot will ask for the customer’s name and provide a welcoming message.
4. Building the Chatbot Interaction
With the flow established, you can now enhance the interaction by adding structured service options. In this step, utilize the list feature of Pabbly Chatflow to present services offered by the Wellness Center, such as yoga and therapy.
Each service can be linked to further actions, like sending brochures or videos. For example, if a user selects ‘Guided Yoga Sessions’, the bot will send a brochure with session details. Similarly, for ‘Mindfulness Meditation’, an introductory video will be provided.
Drag and drop the ‘List’ action to display services. Connect each service option to corresponding media content. Use the ‘Text Plus Button’ action for interactive responses.
By structuring your flow in this manner, Pabbly Chatflow ensures that customers receive relevant information based on their selections, making the interaction more engaging.
5. Finalizing and Testing Your Chatbot
After building the flow and adding all necessary actions, it’s crucial to save your work. Name your flow appropriately, such as ‘Wellness Center Chatbot’, and ensure it is enabled for activation.
Once saved, test the chatbot by sending a WhatsApp message with the trigger keywords. For example, sending ‘Hey, I want to know more about your yoga plan’ should activate the chatbot, prompting it to ask for your name and provide service options.
During testing, verify that the chatbot responds correctly to various inquiries, sends the appropriate media, and collects customer information like email and address. This ensures that Pabbly Chatflow is functioning as intended, providing a seamless customer experience.
Conclusion
Creating a WhatsApp chatbot using Pabbly Chatflow significantly enhances customer engagement for businesses like Wellness Centers. This tutorial outlined the steps to set up triggers, build flows, and personalize interactions. By implementing these strategies, businesses can automate conversations and improve customer service.
Ensure you check out Pabbly Connect to create business automation workflows and reduce manual tasks. Pabbly Connect currently offer integration with 2,000+ applications.
- Check out Pabbly Connect – Automate your business workflows effortlessly!
- Sign Up Free – Start your journey with ease!
- 10,000+ Video Tutorials – Learn step by step!
- Join Pabbly Facebook Group – Connect with 21,000+ like minded people!
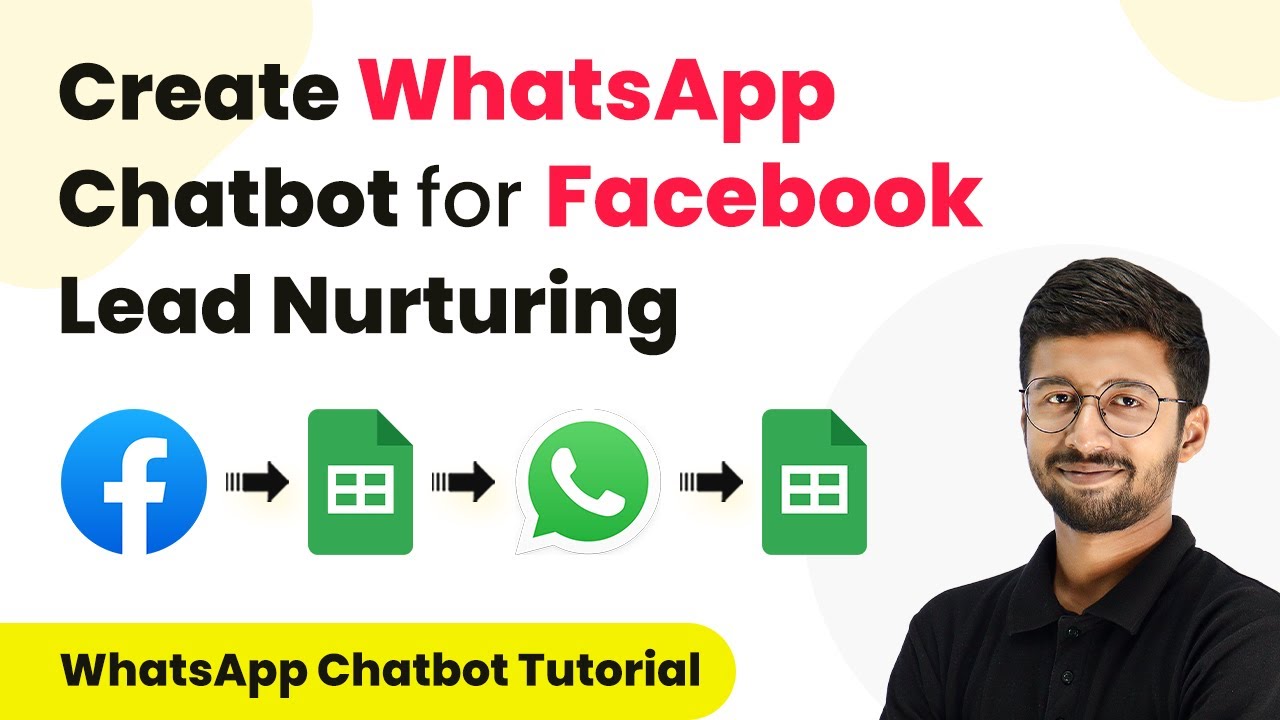
How to Create WhatsApp Chatbot for Facebook Lead Nurturing
Learn how to automate Facebook lead nurturing with a WhatsApp chatbot using Pabbly Connect. Step-by-step guide to streamline your process. Master proven automation processes with practical implementation examples and strategic recommendations you can apply immediately in your workflow.
Watch Step By Step Video Tutorial Below
Setting Up Pabbly Connect for Facebook Lead Nurturing
To create a WhatsApp chatbot for Facebook lead nurturing, the first step is to set up Pabbly Connect. This platform allows seamless integration between applications like Facebook and Google Sheets. Start by logging into your Pabbly Connect account and creating a new workflow.
In this workflow, you will need to select the trigger event. Choose ‘Facebook Lead Ads’ as the application and select ‘New Lead Instant’ as the trigger event. This setup allows Pabbly Connect to capture new leads generated on your Facebook page automatically.
Connecting Facebook Lead Ads with Pabbly Connect
Next, you will connect your Facebook Lead Ads to Pabbly Connect. Click on the ‘Connect’ button and add a new connection. You will be prompted to log into your Facebook account, where you need to allow Pabbly Connect access to your Facebook page.
Once connected, select the specific Facebook page where your leads are generated. After that, choose the lead generation form you want to capture leads from. Click on ‘Save and Send Test Request’ to confirm that the connection is working properly.
- Connect your Facebook account to Pabbly Connect
- Select the Facebook page for lead generation
- Choose the lead generation form to capture leads
After setting this up, you will see that Pabbly Connect is now ready to capture leads from your Facebook ads.
Adding Captured Leads to Google Sheets
After capturing leads from Facebook, the next step is to add these details to Google Sheets using Pabbly Connect. In the action step, search for ‘Google Sheets’ and select it. Choose the action event as ‘Add New Row’ to insert the lead details into your spreadsheet.
Connect your Google Sheets account by clicking on ‘Sign in with Google’. Select the spreadsheet where you want to save the lead information. You will need to map the fields from Facebook Lead Ads to the corresponding columns in your Google Sheets.
- Map lead name, email, mobile number, and city to Google Sheets
- Ensure all relevant details are captured in the correct columns
Once the mapping is complete, click on ‘Save and Send Test Request’ to verify that the data is being added correctly to your Google Sheets.
Sending WhatsApp Messages Using Pabbly Connect
To initiate WhatsApp communication, you will need to connect Pabbly Connect with your WhatsApp account using Pabbly Chatflow. In the next action step, search for ‘Pabbly Chatflow’ and select the action event as ‘Send Template Message’.
After connecting your Chatflow account, map the recipient’s mobile number from the lead details captured earlier. Ensure that the mobile number is formatted correctly, removing any plus signs as required by WhatsApp.
Map the recipient’s mobile number correctly Select the template message you want to send
Once you have configured the WhatsApp message, click on ‘Save and Send Test Request’ to ensure the message is sent successfully to the lead.
Creating the Chatflow for Lead Nurturing
Finally, you will create a flow in Pabbly Chatflow to manage conversations with your leads. Go to the flow section in Pabbly Chatflow and create a new flow. Here, you can define how the chatbot interacts with the lead after the initial WhatsApp message is sent.
Set up various options for the leads to choose from, such as ‘Looking to Buy’ or ‘Just Exploring’. Depending on the user’s selection, the chatbot will ask follow-up questions to gather more information about their property preferences.
Define the flow based on user responses Update contact custom fields based on user input
After finalizing the flow, connect it back to Pabbly Connect to send the collected data back to Google Sheets. This completes the lead nurturing automation process.
Conclusion
In this tutorial, we demonstrated how to use Pabbly Connect to create a WhatsApp chatbot for effective Facebook lead nurturing. By integrating Facebook Lead Ads, Google Sheets, and Pabbly Chatflow, you can automate the entire lead management process efficiently.
Ensure you check out Pabbly Connect to create business automation workflows and reduce manual tasks. Pabbly Connect currently offer integration with 2,000+ applications.
- Check out Pabbly Connect – Automate your business workflows effortlessly!
- Sign Up Free – Start your journey with ease!
- 10,000+ Video Tutorials – Learn step by step!
- Join Pabbly Facebook Group – Connect with 21,000+ like minded people!
With this setup, you can streamline your communication, ensuring timely responses to potential clients while keeping track of their preferences in a structured manner.
