Tired of manually adding Automizy contact from new WooCommerce orders? If yes, then worry not my friend as today we are going to explain how you can integrate WooCommerce to Automizy.
But before getting into the integration process, let’s know a wee bit about the software that we are about to integrate. Basically, WooCommerce is an open-source e-commerce plugin for WordPress. It is designed for small to large-sized online merchants. Whereas Automizy is an email marketing tool that enables small and medium-size business and marketing consultants to send personalized emails and increase email open rates.
Thus, integrating these two services can help you automatically add contacts to Automizy for new WooCommerce orders. Apart from this, you can also keep your customers updated about all the latest news and services via this integration.
Now you must be thinking about how we are going to integrate these services, well the answer to this question is a wonder tool named Pabbly Connect. It is a fantastic integration and automation software, which allows you to integrate two or more applications and automate all the projects. You just have to do the integration once and then everything will be automatically taken care of by the software.
Why Choose This Method Of Integration?
In contrast with other integration services-
- Pabbly Connect does not charge you for its in-built apps like filters, Iterator, Router, Data transformer, and more
- Create “Unlimited Workflows” and smoothly define multiple tasks for each action
- As compared to other services which offer 750 tasks at $24.99, Pabbly Connect offers 50000 tasks in the starter plan of $29 itself
- Unlike Zapier, there’s no restriction on features. Get access to advanced features even in the basic plan
- Try before you buy! Before spending your money, you can actually signup & try out the working of Pabbly Connect for FREE
Other than the integrations, the software also offers many other useful features:
- Create unlimited workflows without any restrictions
- Unlimited premium apps
- Set unlimited triggers, unlimited actions to those triggers
- Path routers
Moreover, the noteworthy part is that this software is free to get started and you can access all the features with the free plan.
Hence, without taking any more of your time, let’s get started with the blog about how to add Automizy contact from new WooCommerce orders.
Step 1: Sign up to Pabbly Connect
Begin the process to add Automizy contact from new WooCommerce orders by visiting the website of Pabbly Connect and then click on the ‘Sign-Up Free‘ button. On the registration page, either signup using an existing Gmail account or manually fill out the form.
Try Pabbly Connect for FREE
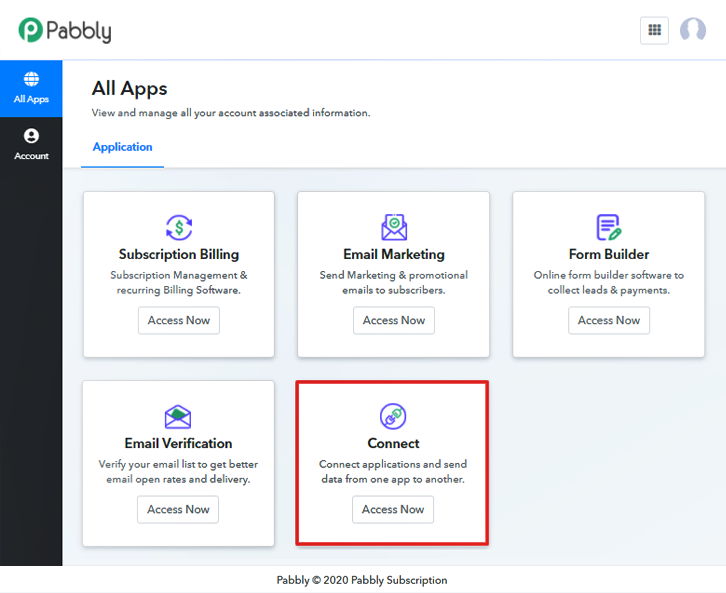
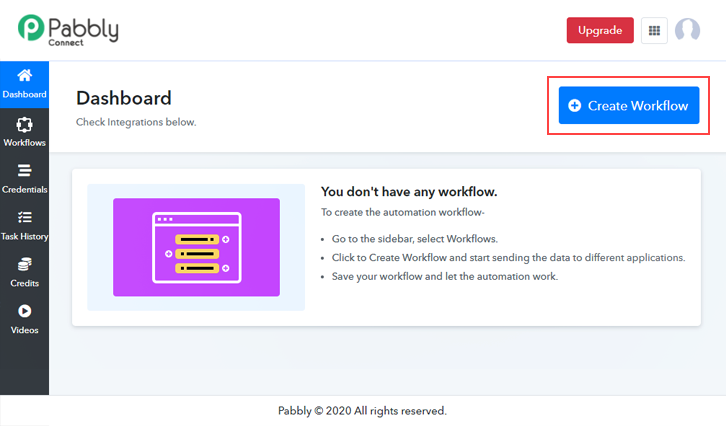
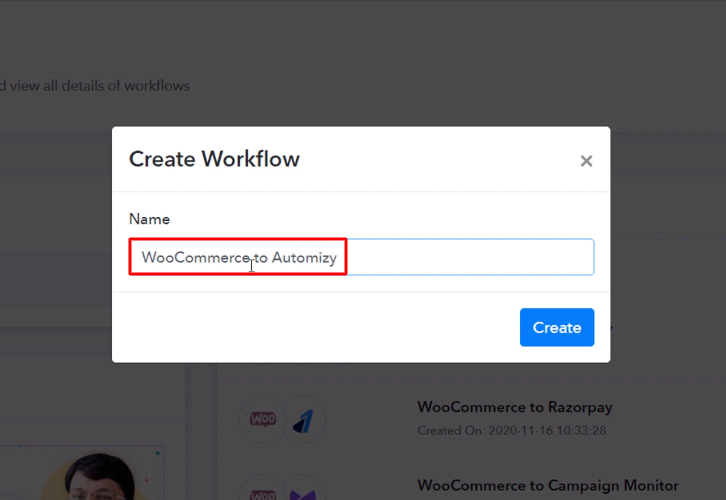
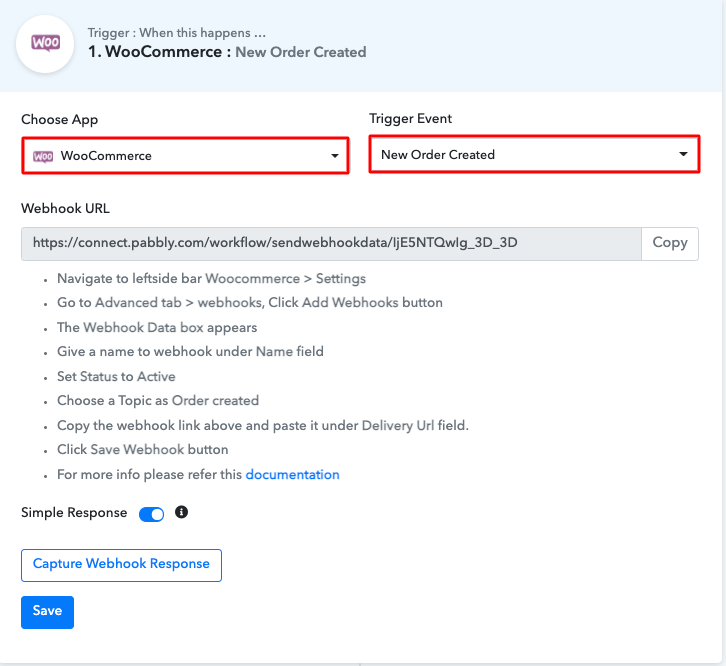
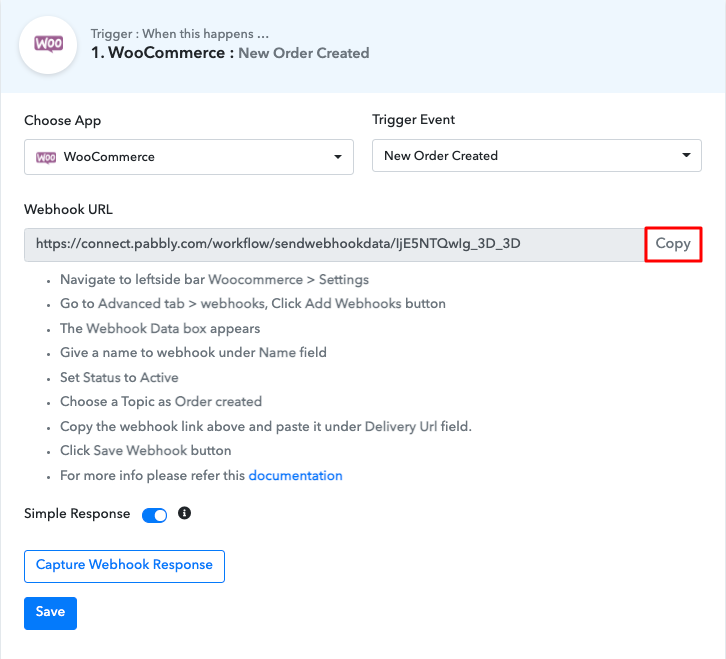
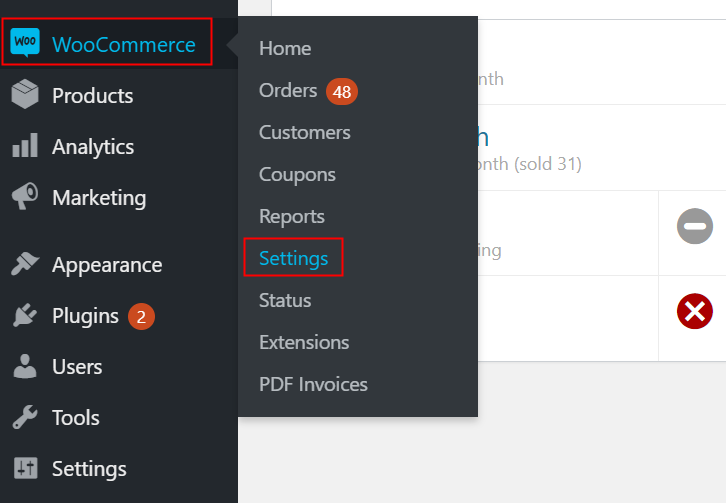
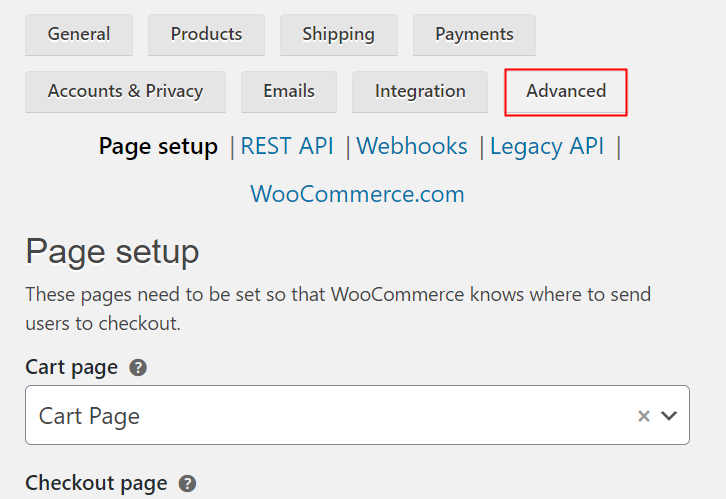
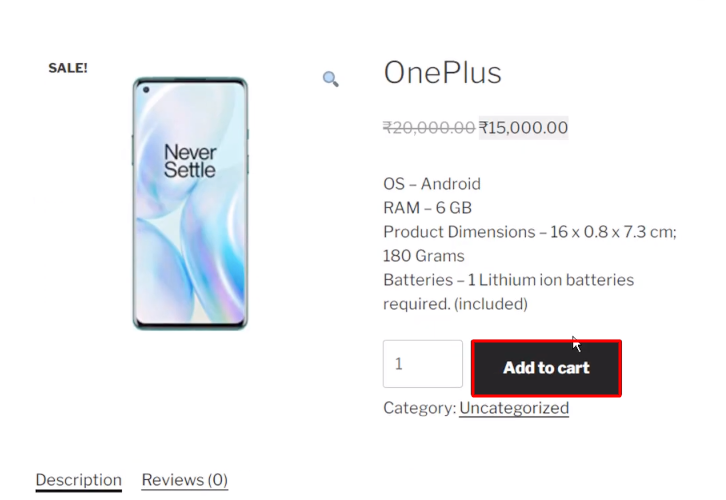
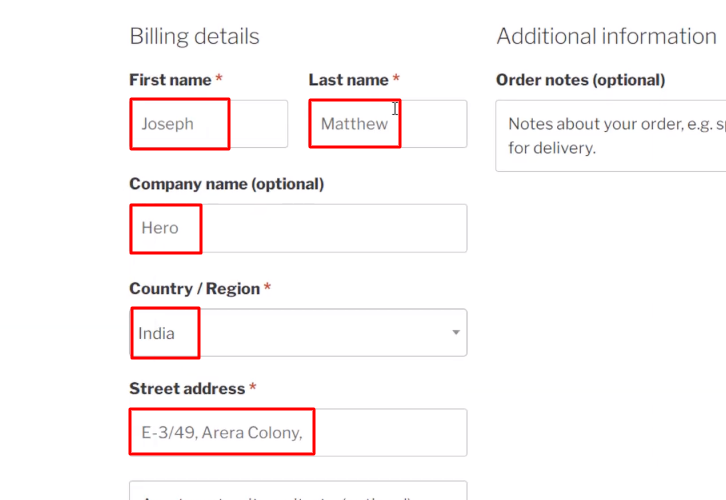
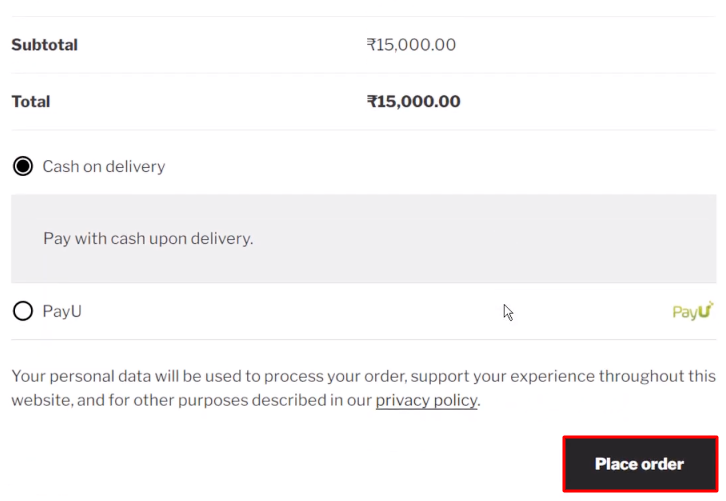
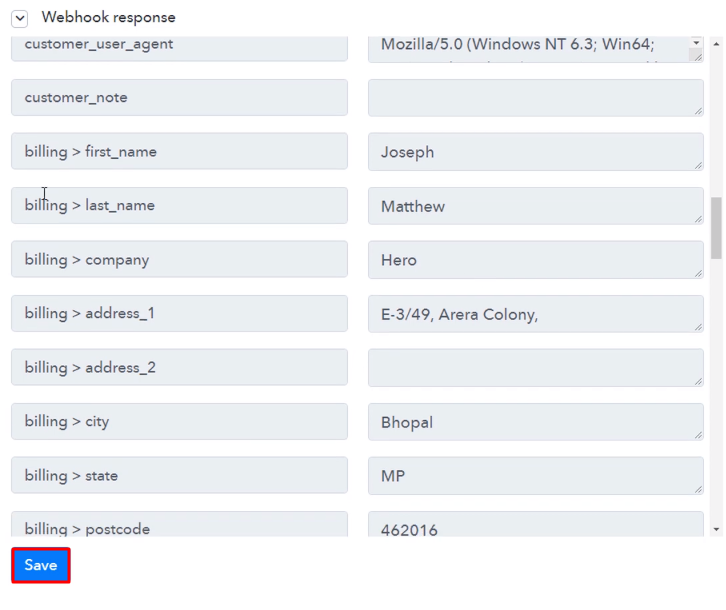
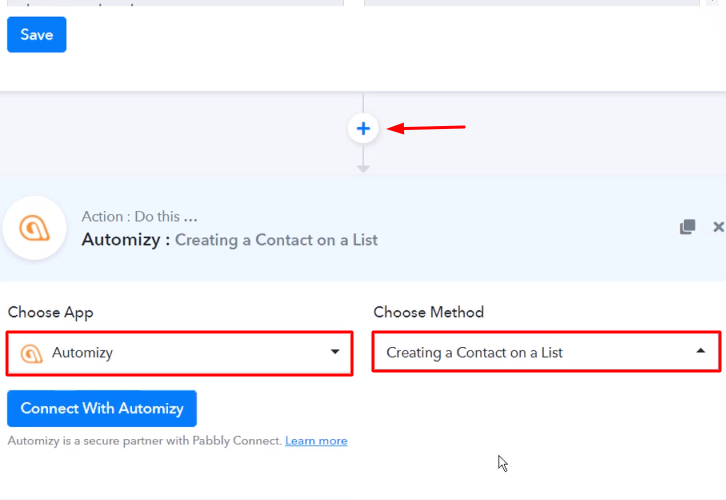
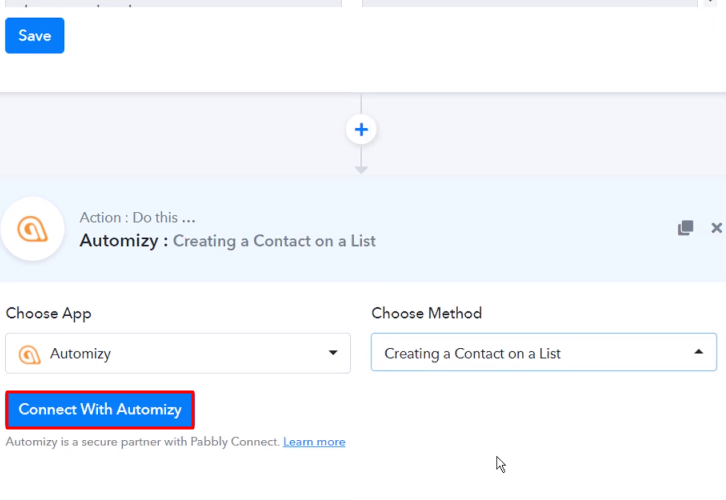
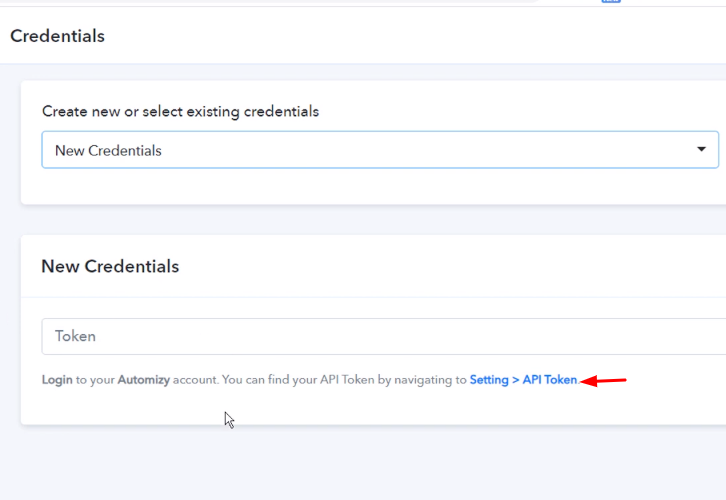
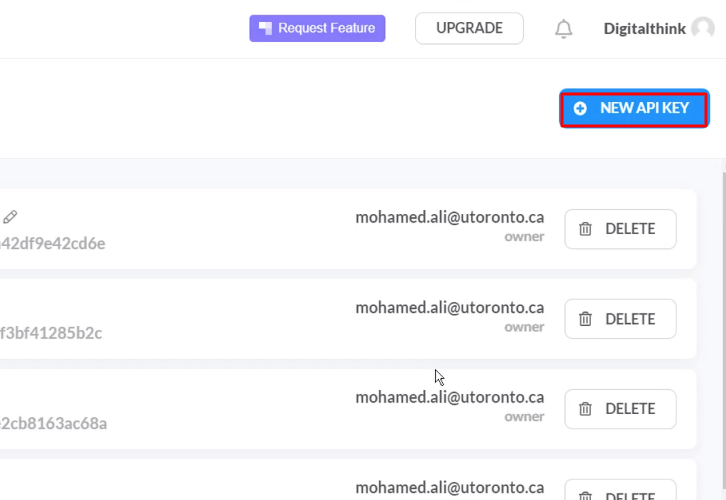
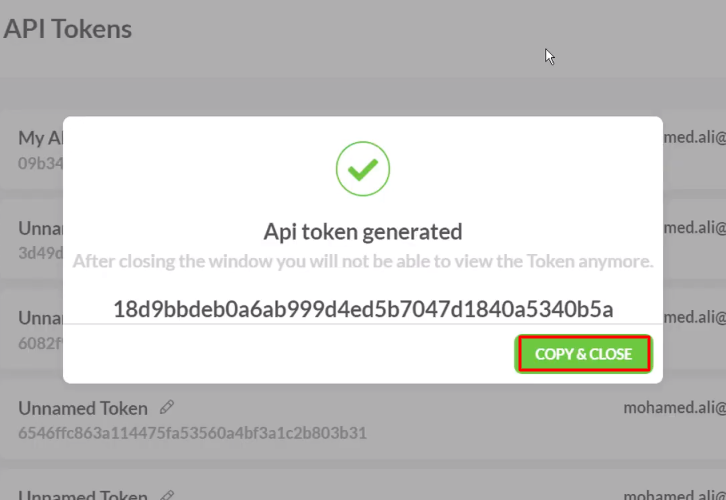
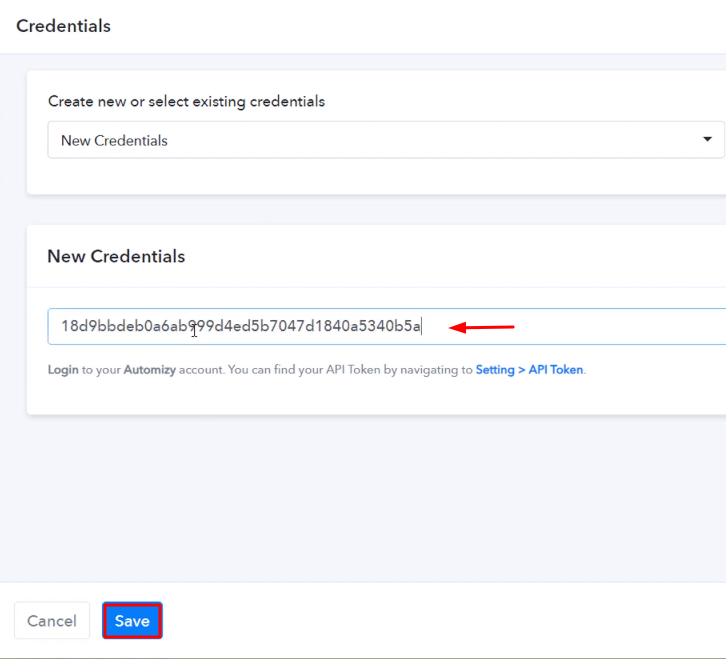
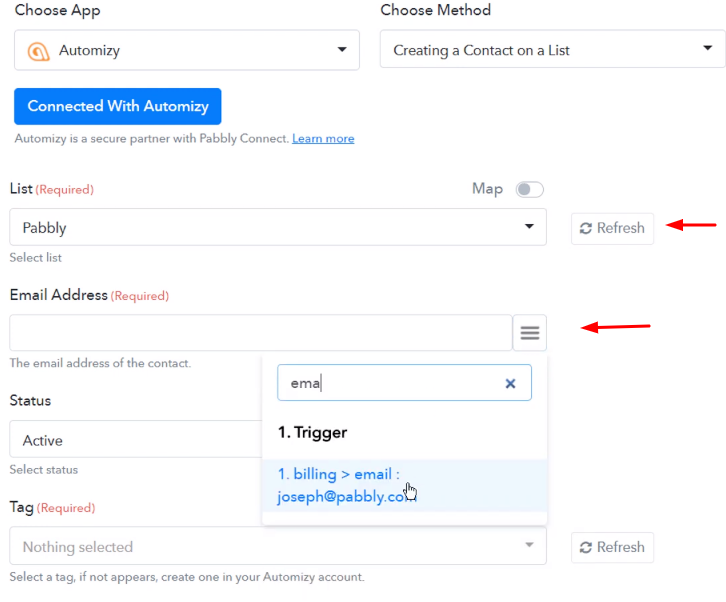
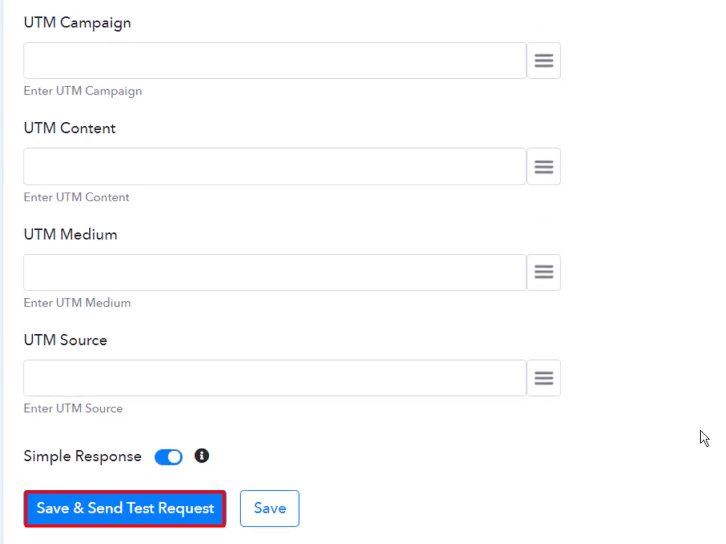
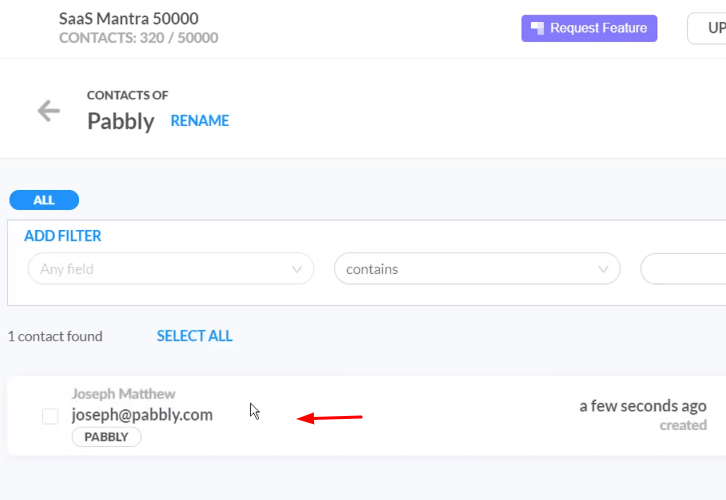
Once you have completed the signup process, click on the Connect section in the dashboard to access Pabbly Connect. Start with creating a workflow for your project by clicking on the ‘Create Workflow’ button. Now, you need to name the workflow just like in the above-shown image. I named the workflow ‘WooCommerce to Automizy’, you can obviously name the workflow as per your requirements and needs. After naming your workflow, you have to select the application you want to integrate. Pabbly Connect allows you to integrate unlimited premium applications, try Pabbly Connect for free. Now, you have to select the application that you want to integrate. In this case, we are choosing ‘WooCommerce’ for integration. After selecting the application select ‘New Order Created’ in the choose method section. After selecting the application, now you have to copy the webhook URL just like in the above-shown image to take further the integration process. To connect WooCommerce with Pabbly Connect, you have to paste the copied webhook URL in the software, for that, you need to log in to your WordPress account. Once you have logged into your WordPress account, now click on WooCommerce then select settings. After clicking on ‘Settings’, a tab will open up with different options, here you have to select ‘Advanced’. Now, after clicking on ‘Webhooks’, click on the ‘Add Webhook’ option. Name the Webhook according to your requirement. Make sure that the status should be ‘Active’ and in the topic section, select ‘Order Created’. Then in the delivery URL, paste your copied URL from Pabbly Connect. After making all changes, click the ‘Save Webhook’ button. To check if the integration is capturing data or not, we will make a test purchase in WooCommerce. Select any of your listed products and then click on the ‘Add to Cart’ button. Next, you need to fill in all the customer details like name, company name, country, etc. After filling in all the details, hit the ‘Place Order’ button. But before hitting the button, make sure to click ‘Capture Webhook Response’ in the Pabbly Connect dashboard. As soon as you click on the ‘Place Order’ in WooCommerce and ‘Capture Webhook Response’ in Pabbly Connect the entry will appear on the Pabbly Connect dashboard. Then, click on the ‘Save’ option. To make this WooCommerce-Automizy integration work, you have to choose the action for your trigger. Now in this step, click on the + button below and choose the application that you want to integrate. Here we will choose ‘Automizy’ to integrate and in the method section select ‘Creating a Contact on a List’. After choosing the application click on the ‘Connect with Automizy’ button to move forward. To connect Automizy with Pabbly Connect, you need to paste the API key from your Automizy account to the Pabbly Connect dashboard. For that, you have to log in to your Automizy account. To get the API key, click on the given API link in the Pabbly Connect dashboard. Now, to generate a new API Key click on the ‘New API Key’ button. Once the new API key is generated, simply copy it to move further. Paste the copied API key and then click on the ‘Save’ button. Once you are connected with your Automizy account, now you have to add all the field data like list, email id, etc. Map up all the fields quickly by clicking on the map button given at the side of every field. Once you are done mapping up all fields click on the ‘Send Test Request’ button. Here, you can see that integration was successful and the new order info from WooCommerce has been added to the Automizy automatically as a contact. Now in a similar way, whenever there will be any new purchase in your WooCommerce store, the contact will be automatically added to your Automizy account. That’s it! Now you know the answer to your question ‘How to Add Automizy Contact from New WooCommerce Orders in real-time?’ Just follow all the step by step procedure mentioned above & your WooCommerce to Automizy integration is set. So, what are you waiting for? Go ahead and catch your deal by signing up for a free account.Step 2: Access Pabbly Connect
Step 3 : Workflow for WooCommerce to Automizy Integration
(a) Create New Workflow
(b) Name the Workflow
Step 4 : Setting Triggers for WooCommerce to Automizy Integration
(a) Select Application you want to Integrate
(b) Copy the Webhook URL
Step 5 : Connecting WooCommerce to Pabbly Connect
(a) Go to WooCommerce Settings
(b) Click on Advanced Option
(c) Click on Webhooks Option
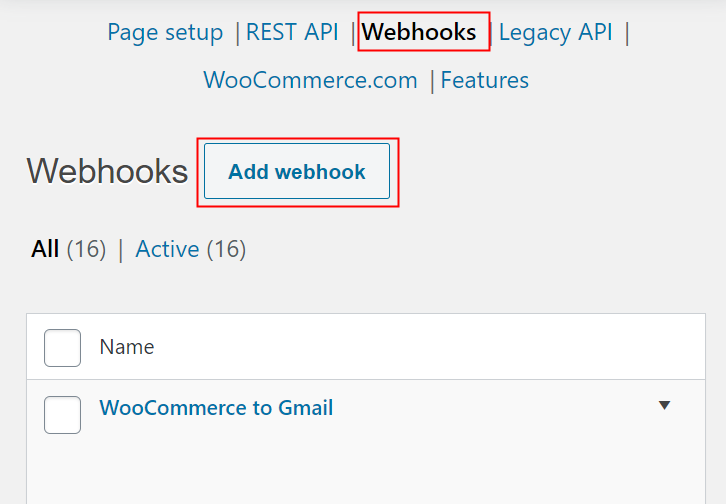
(d) Add Webhook
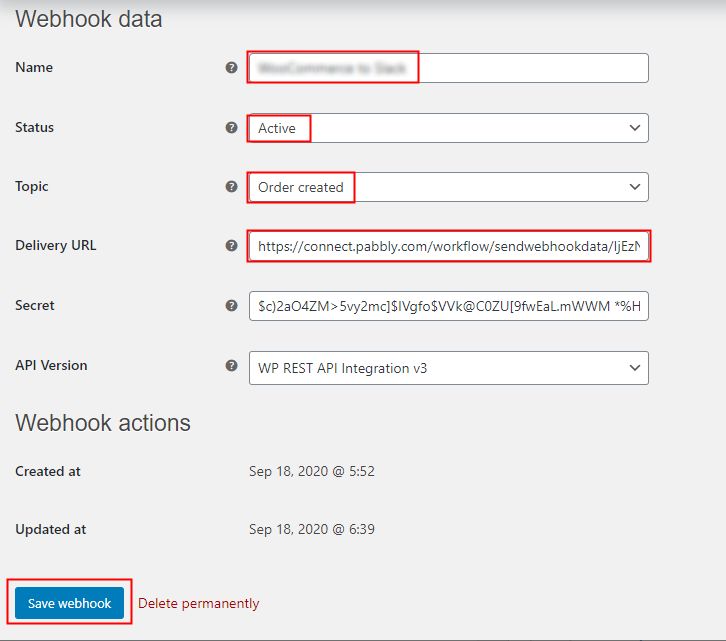
Step 6 : Make a Test Purchase
(a) Click on Add to Cart
(b) Add the Customer Details
(c) Place Order
Step 7 : Test the Submission in Pabbly Connect Dashboard
Step 8 : Setting Action for WooCommerce to Automizy Integration
(a) Select Application you Want to Integrate
(b) Click the Connect Button
Step 9 : Connecting Automizy to Pabbly Connect
(a) Click on the Link
(b) Generate New API Key
(c) Copy the API Key
(d) Paste the API Key
(e) Map the Fields
(f) Send a Test Request
Step 10 : Check Response in Automizy Dashboard
Conclusion –
You May Also Like to Read –


