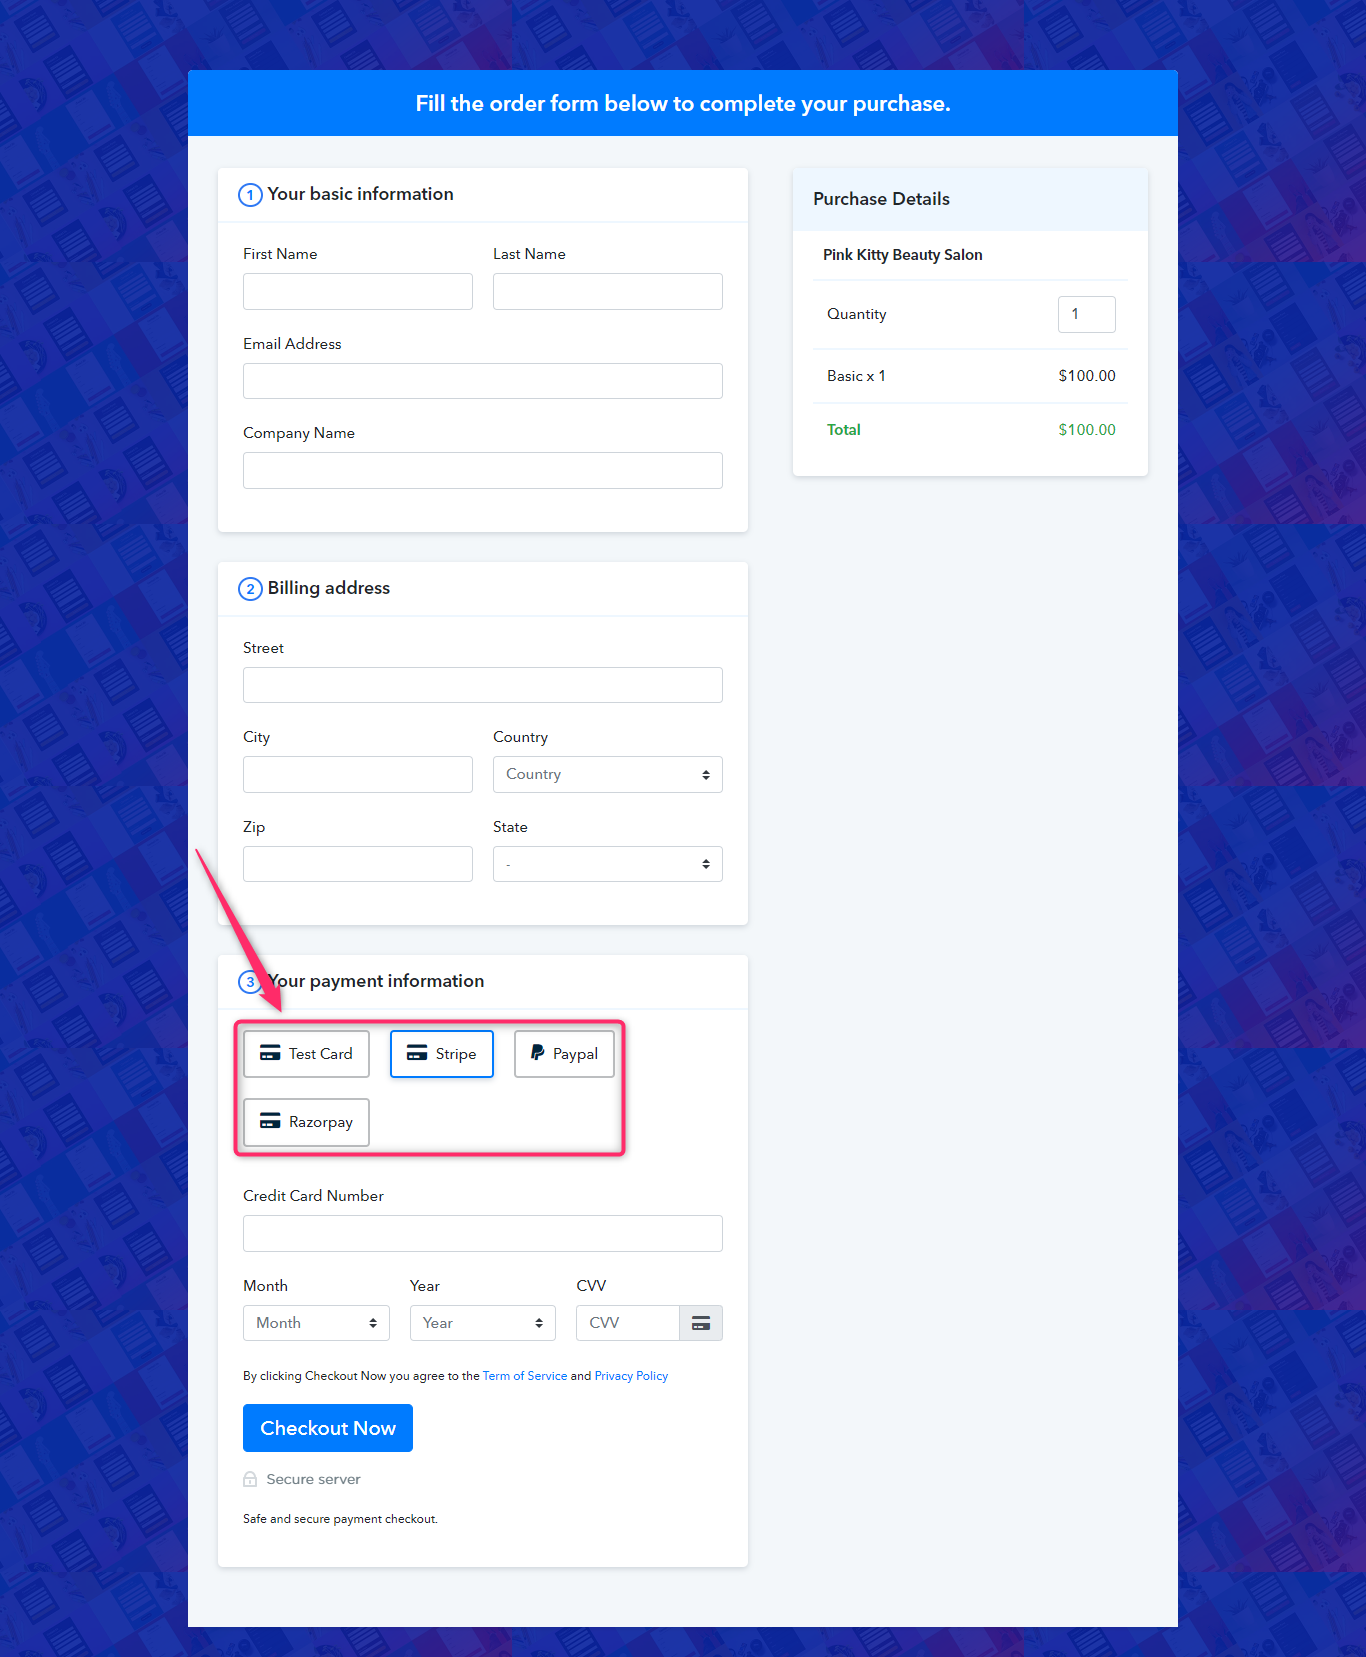
This guide explains how you can add Payment Gateways plan-wise in Pabbly Subscription Billing.
With this excellent option you can create plans for your products with dedicated Payment Gateway options. There could be many possibilities for this.
You can provide all the connected gateway options within a plan.
Or you can show a single payment gateway to your customers for collecting payments.
And you can select any combination of gateways choices for a plan.
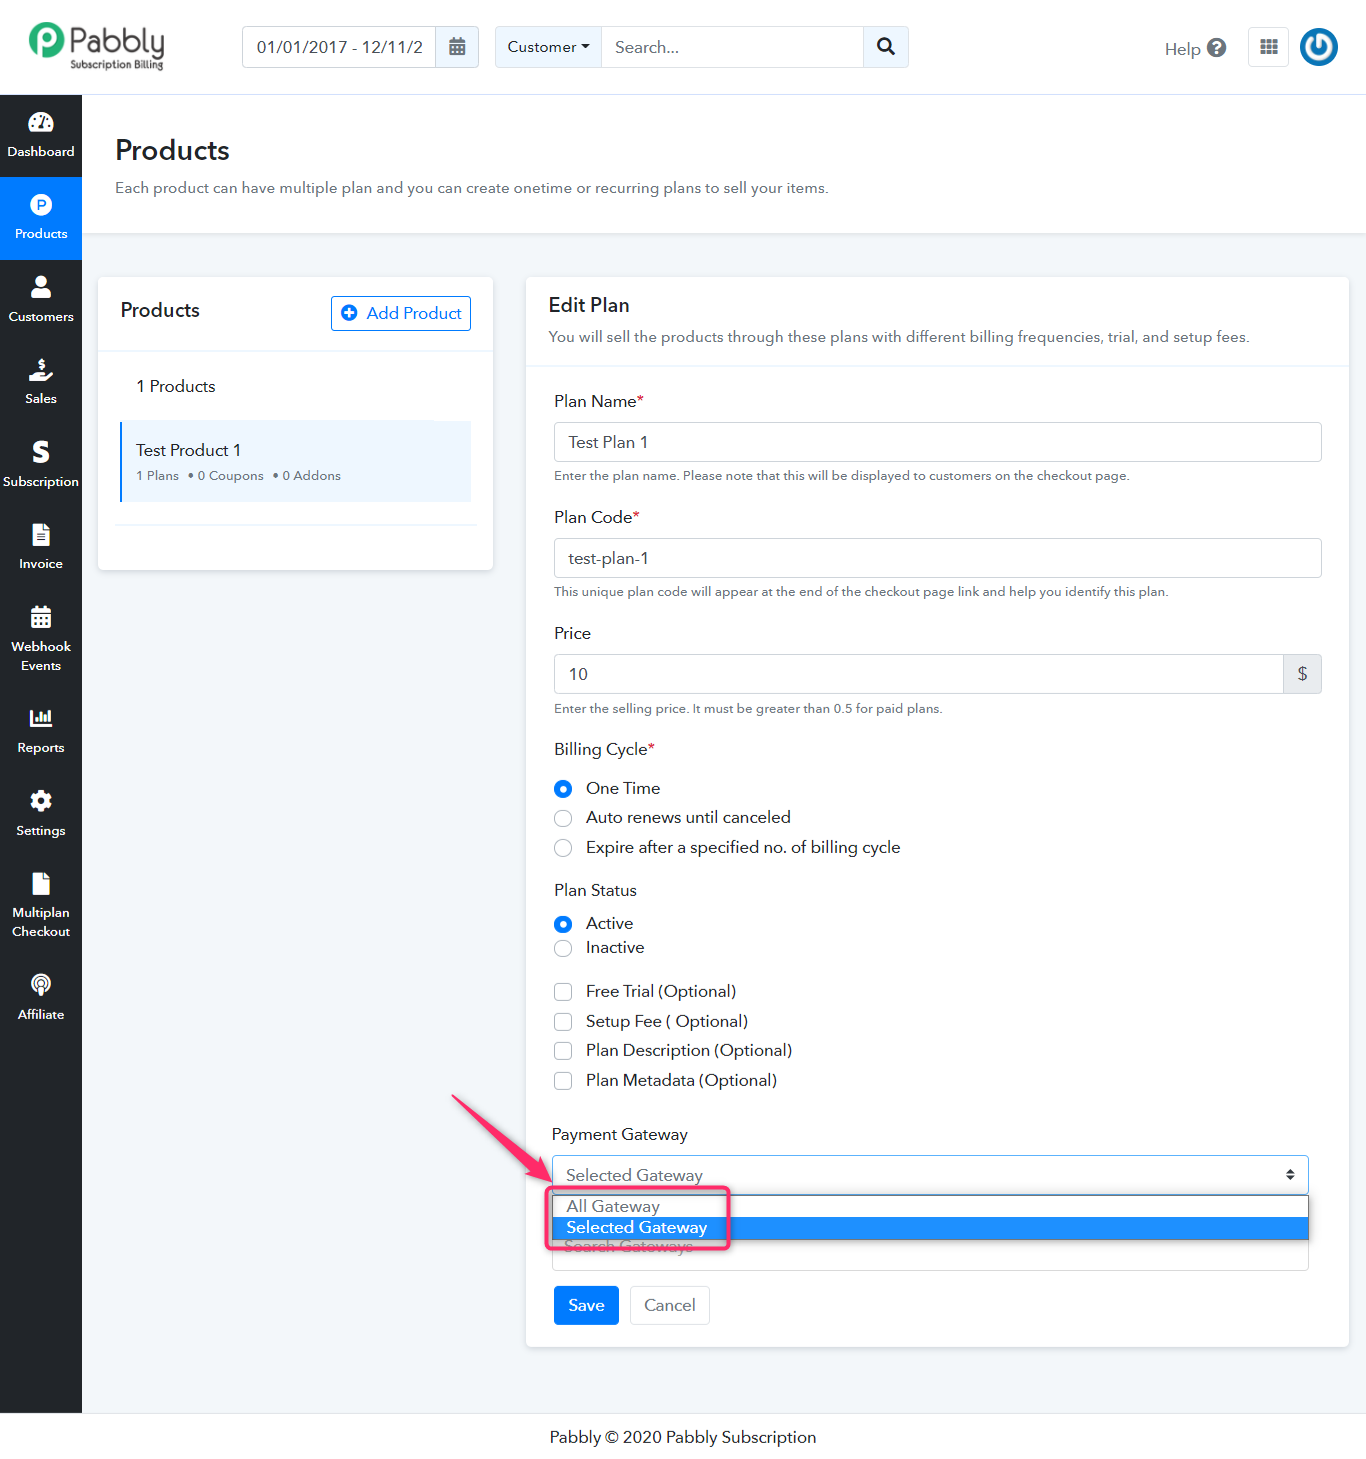
The single payment option is used when a particular gateway works majorly on a particular area or country. For instance, Razorpay payment gateway is exclusively used in India.
1. Show Single Gateway Option
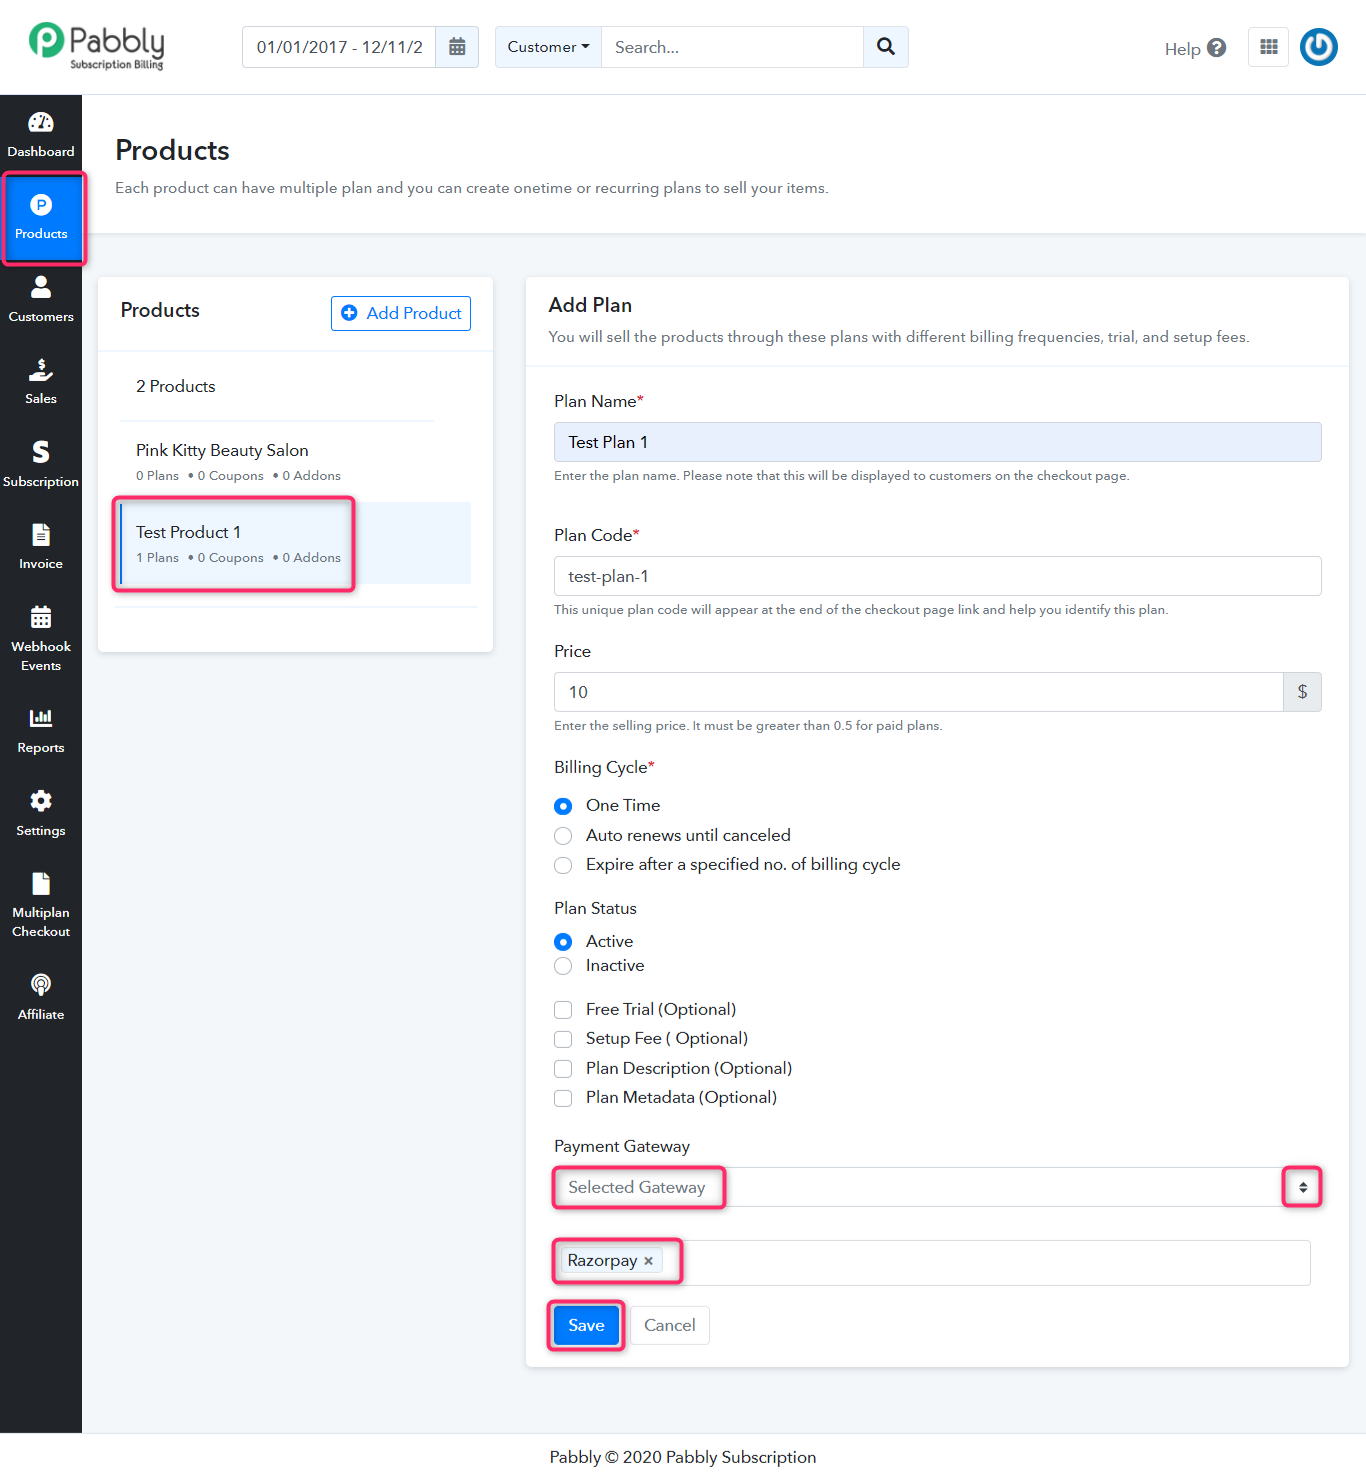
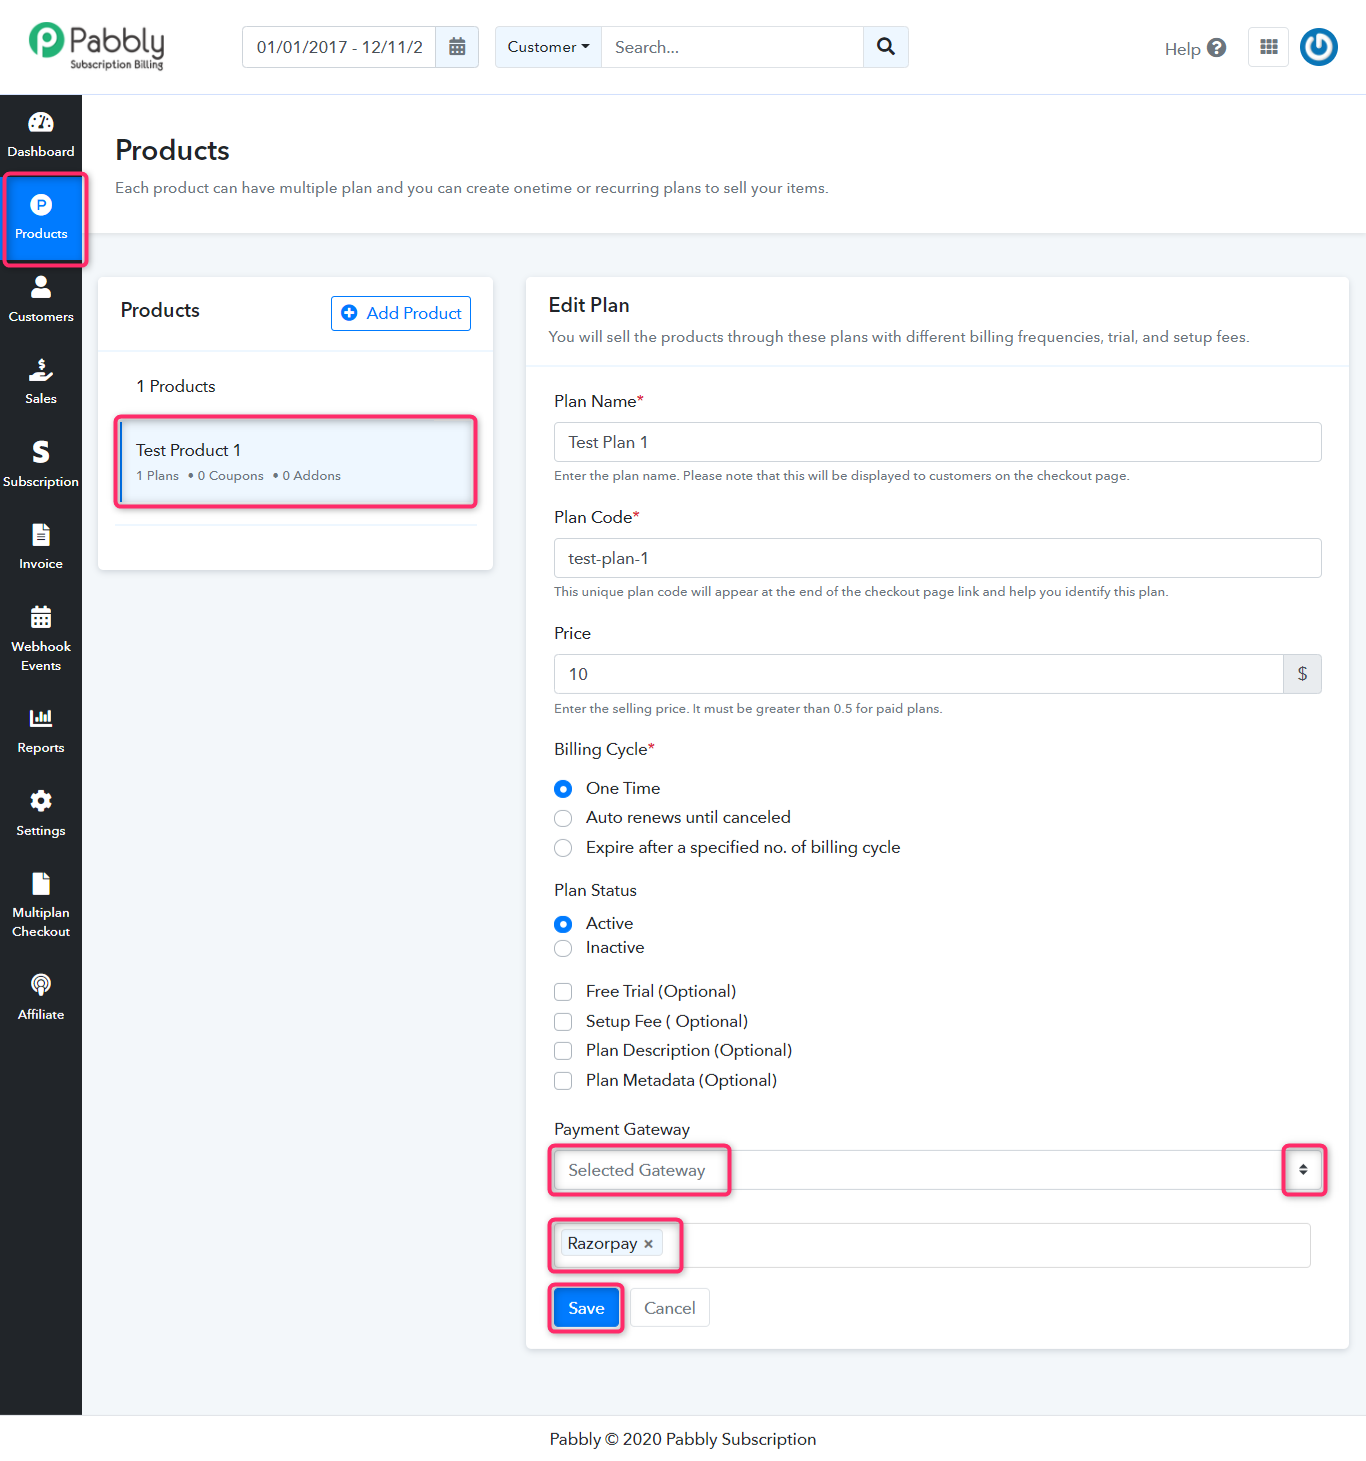
For showing a single gateway option, go to:
Pabbly Subscription Billing Dashboard -> Products -> Add Plan -> Payment Gateway
And, select a single gateway option from the available choices.
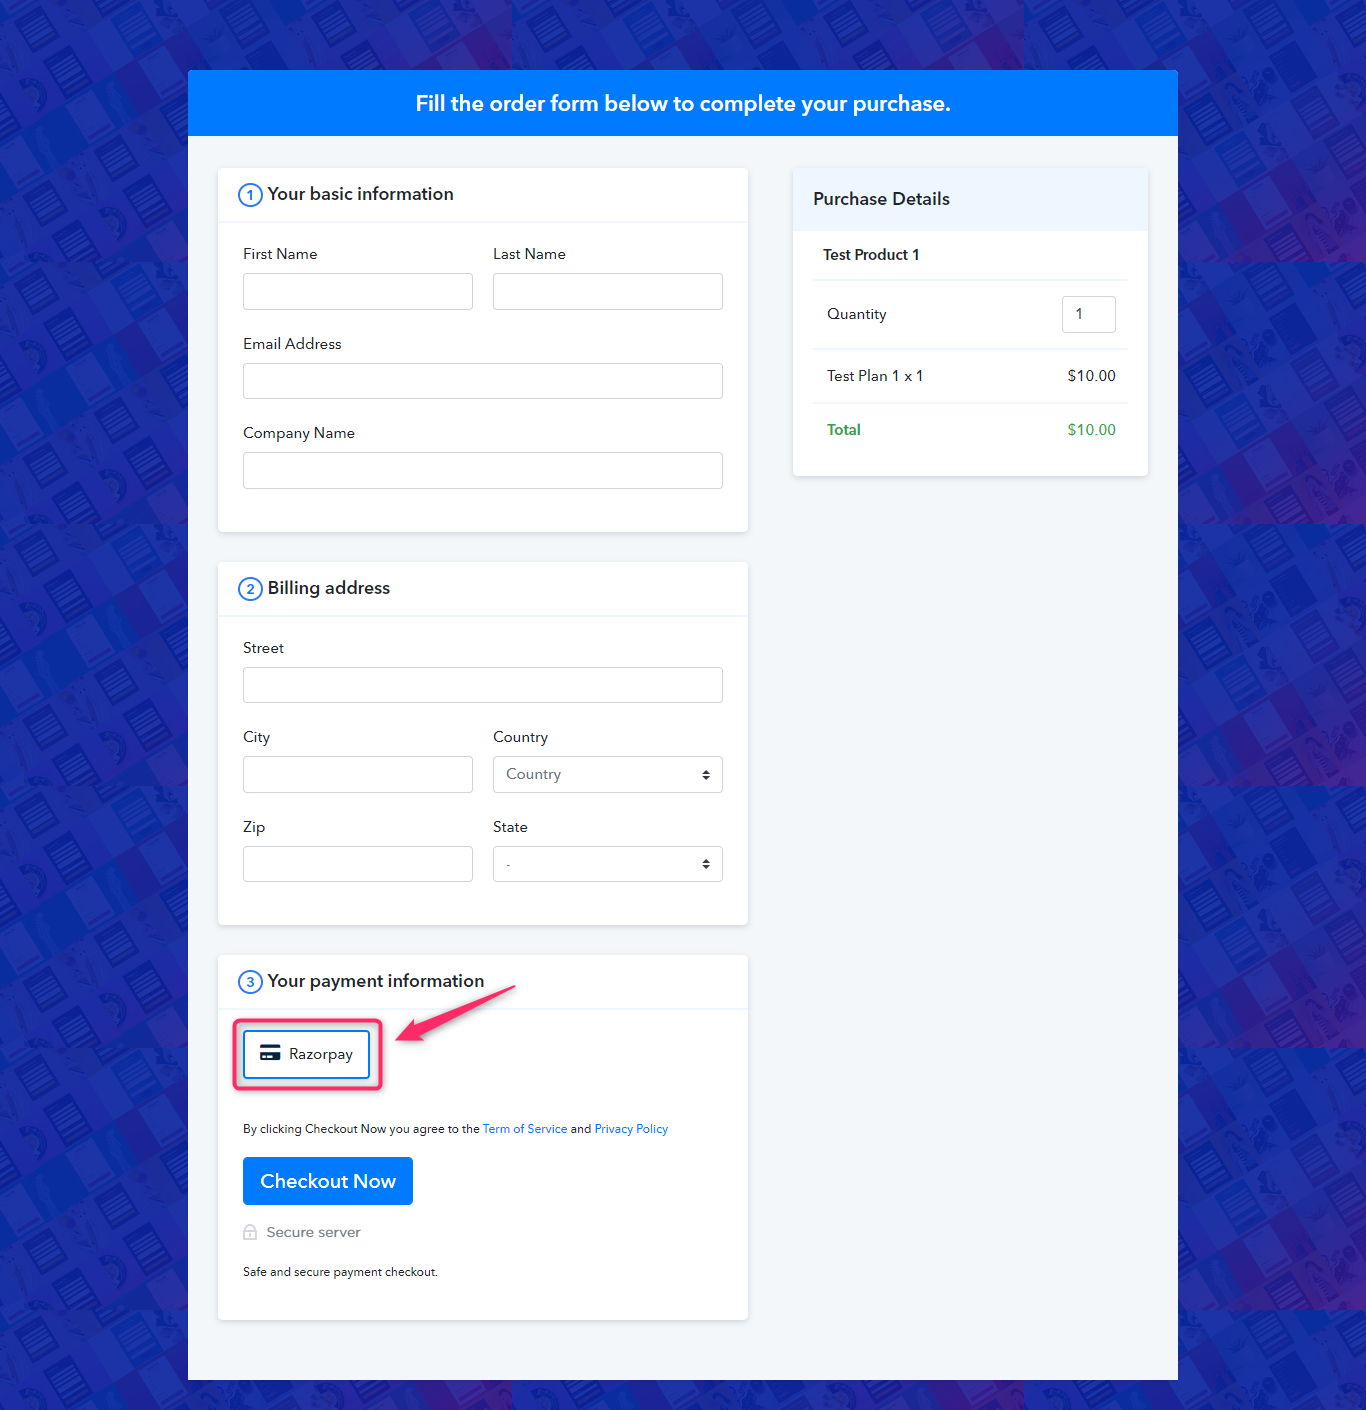
Your plan checkout page will look like this with a single payment gateway enabled.
Also, you can always edit a plan to change the gateway settings.
Pabbly Subscription Billing Dashboard -> Products -> Edit Plan -> Payment Gateway
2. Show Multiple Gateways
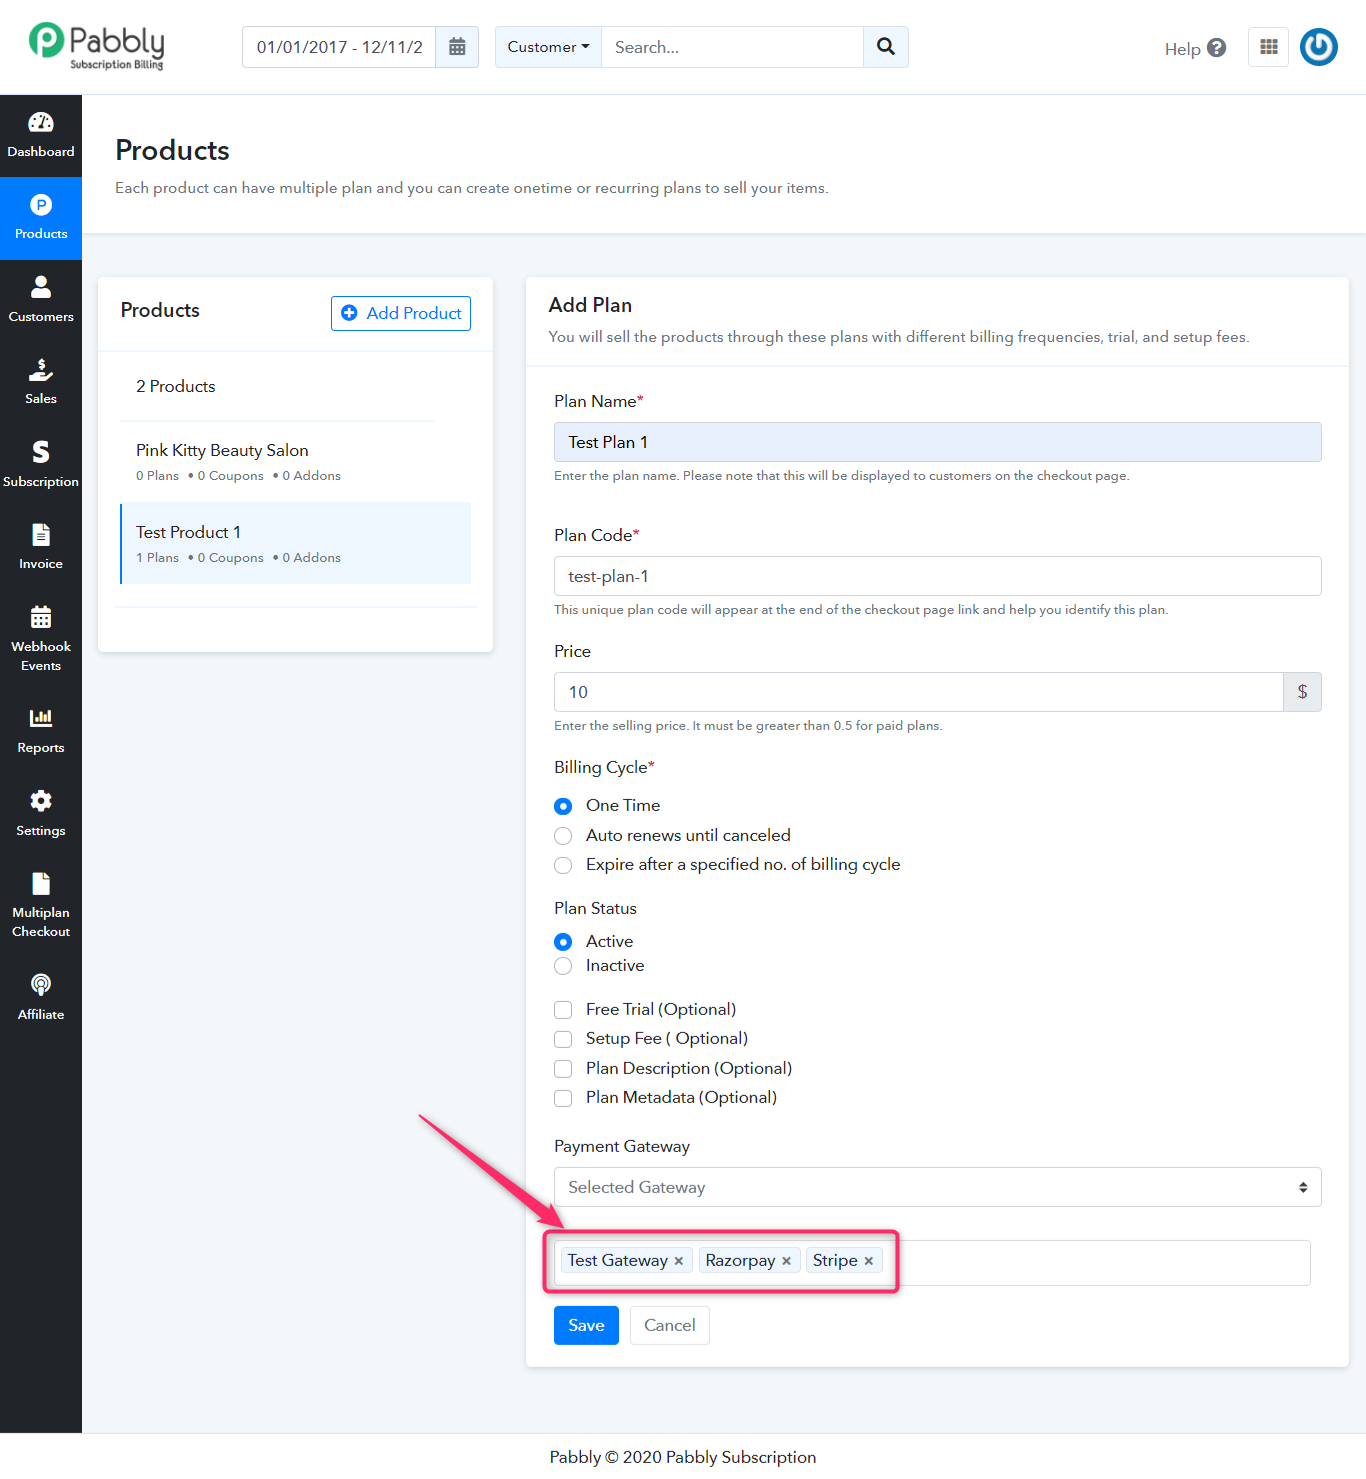
For more combinations of ‘Payment Gateway’ choices, you can select multiple payment gateways too.
The steps are similar to the single gateway selection just with a little change that you’ll need to select multiple payment gateway options.
3. Show ‘All Gateways’
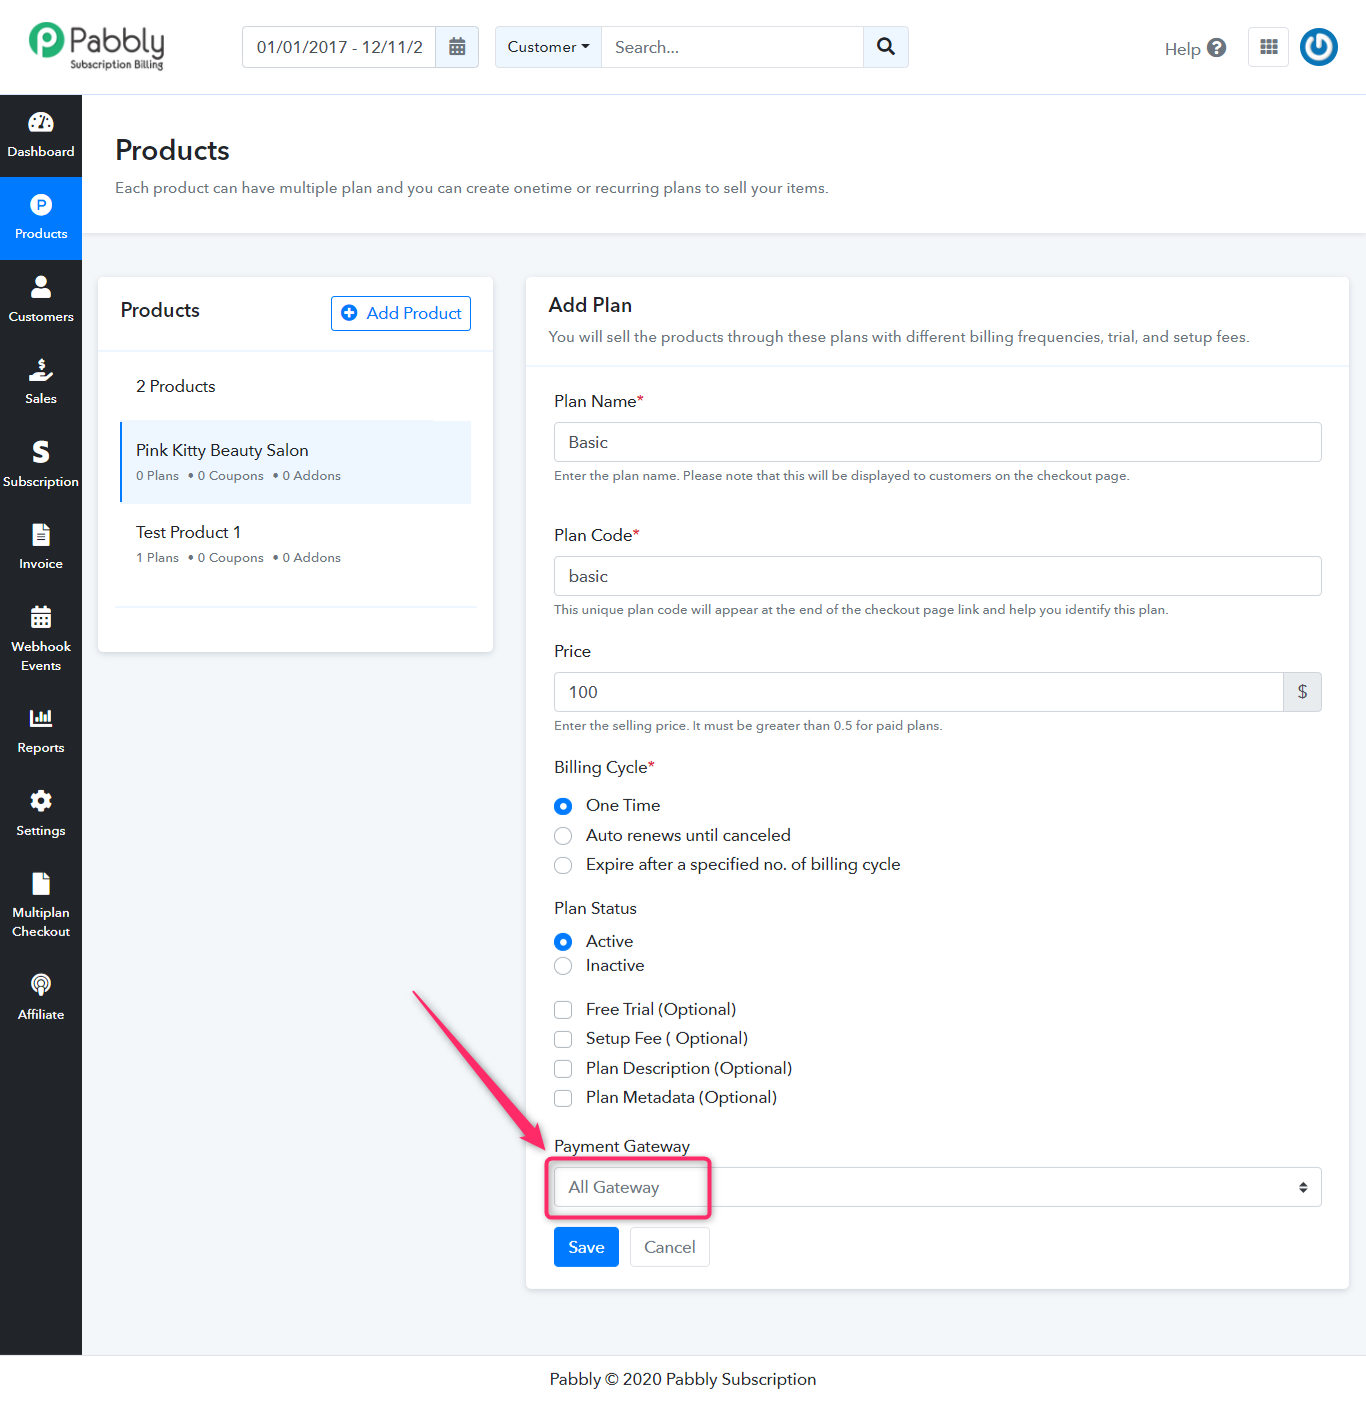
You can provide all the connected gateways in any single plan too. When you add multiple payment gateways with your account then your plans will automatically start showing an ‘All gateway’ option under the ‘Payment Gateway’ choice of a plan. And whenever you select this option for any plan its checkout page starts showing all the payment gateways that you connected with the account as available payments gateway choices. Your customer can then pick any one gateway to complete the payment.
To do so, simply select the ‘All Gateway’ option for a plan.
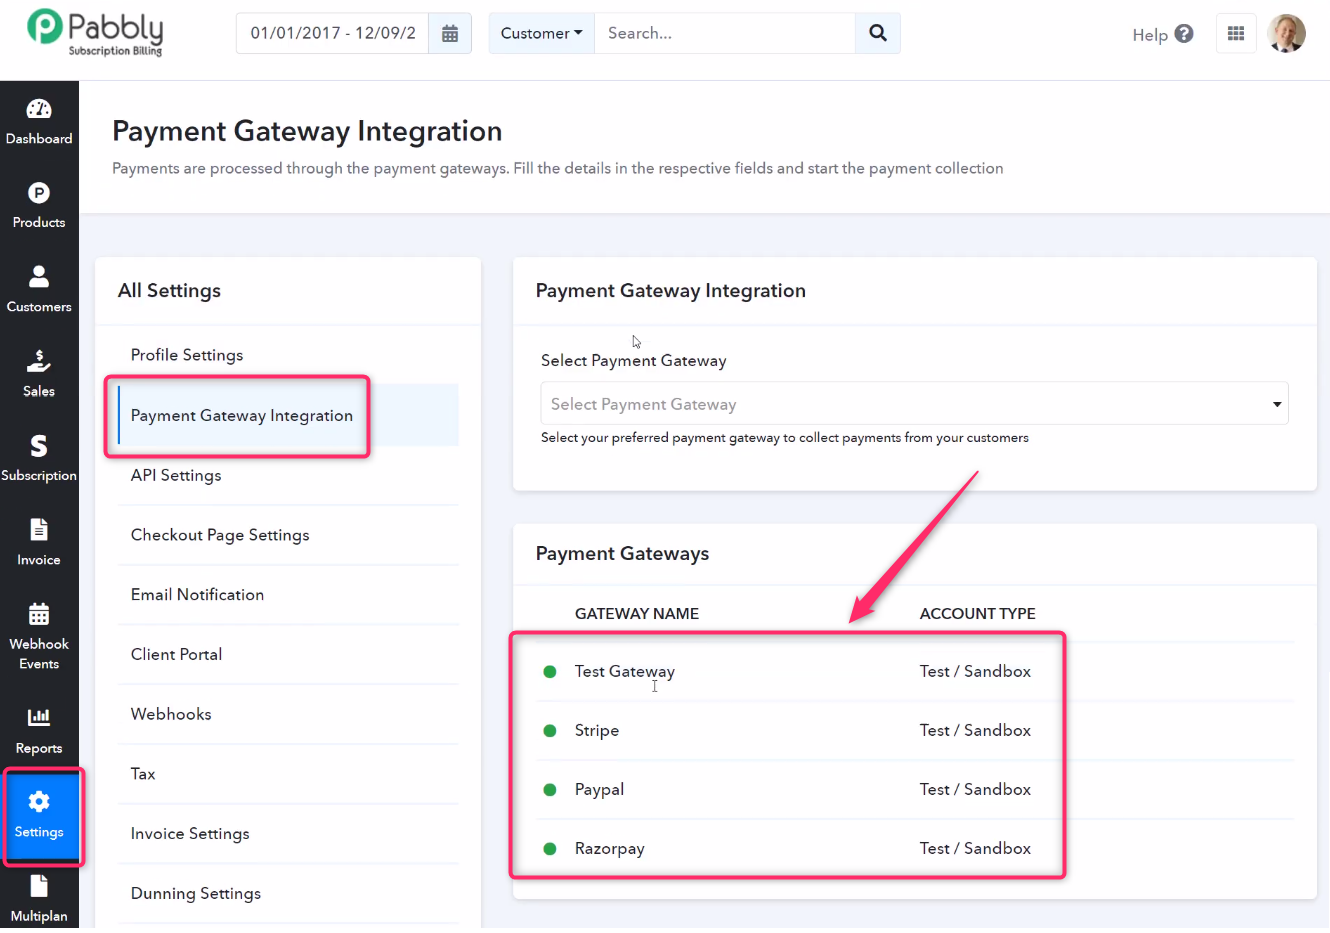
All the integrated payment gateways automatically get added here:
Pabbly Subscription Billing Dashboard -> Settings -> Payment Gateway Integration
This is how the checkout page will look like with the Payment Gateway option as ‘All Gateway’ option enabled.
