Want to know a way to integrate Calendly with Pabbly Email Marketing software? If yes, then sit back and relax as we are going to reveal the automation process.
But before jumping on that part, let’s put a light on both the software and its use. Basically, Calendly is an automated scheduling tool used by business personalities to book meetings, schedule events, and much more in advance. On the other hand, Pabbly Email Marketing is an email marketing software that allows users to send unlimited customized emails to prospects in no time.
Now, most of the time users want their Calendly response in email marketing software as a subscriber. The reason for doing that is to send email alerts, reminders, or customize newsletters to customers in the near future. By this, one can build a strong relationship with their customers.
Why Choose This Method Of Integration?
In contrast with other integration services-
- Pabbly Connect does not charge you for its in-built apps like filters, Iterator, Router, Data transformer and more
- Create “Unlimited Workflows” and smoothly define multiple tasks for each action
- As compared to other services which offer 750 tasks at $24.99, Pabbly Connect proffers 50000 tasks in the starter plan of $29 itself
- Unlike Zapier, there’s no restriction on features. Get access to advanced features even in the basic plan
- Try before you buy! Before spending your money, you can actually signup & try out the working of Pabbly Connect for FREE
For doing the same people search for a lot of techniques and software over the internet that saves manual effort. Filling every entity one by one is a lot in such a busy life. Considering this, we are removing drape from an amazing software named Pabbly Connect that lets you connect multiple software, automates the data transmission task, and removes all the manual work through a single interface. One can use this software without any technical skill which makes it the easiest automation software on the market.
With its lifetime deal, you can get access to unlimited premium apps, workflows, path routers, and much more.
Here, in this article, we will understand how one can integrate Calendly with Pabbly Email Marketing using Pabbly Connect.
So, let’s start the process.
Step 1: Sign up to Pabbly Connect

Start the process of connecting Calendly to Pabbly Email Marketing by clicking on the “Sign Up Free” icon on the Pabbly Connect dashboard. Further, either manually fill-up all the details or sign up using Gmail credentials.
Try Pabbly Connect for FREE
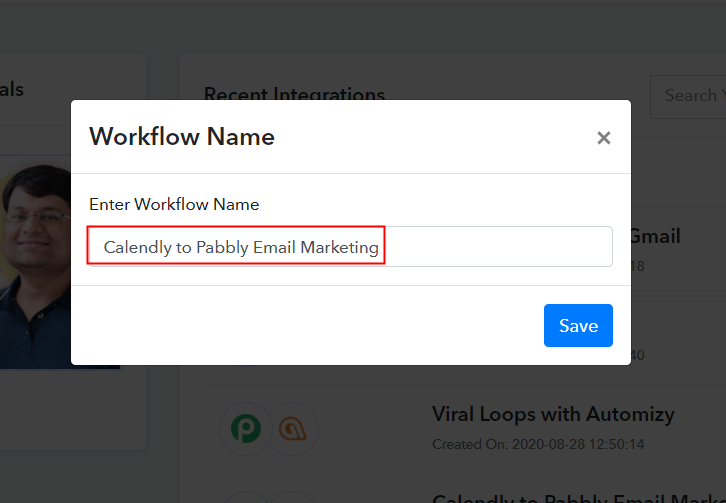
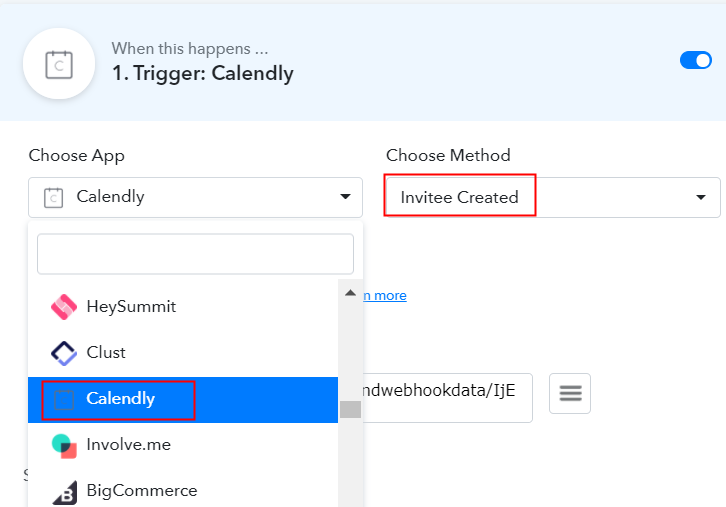
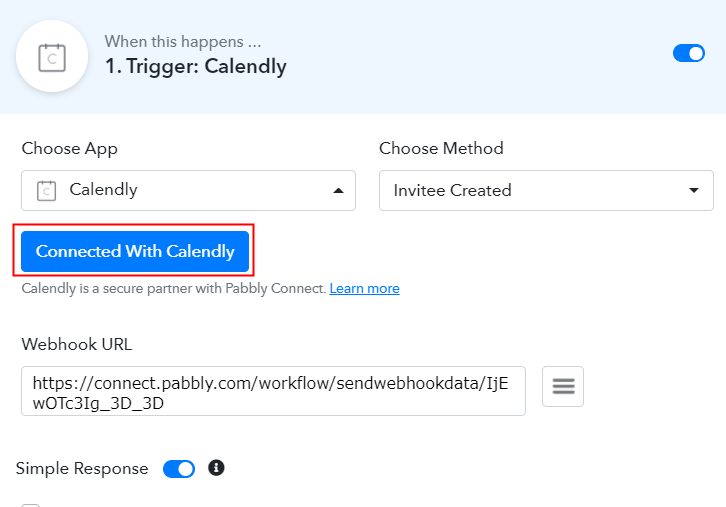
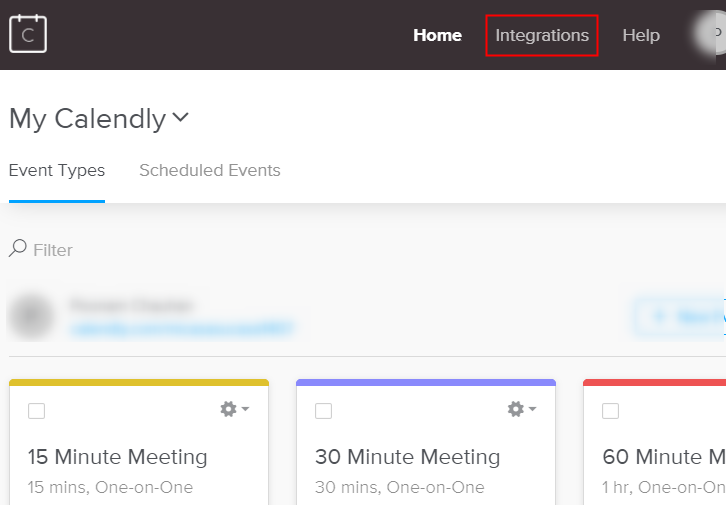
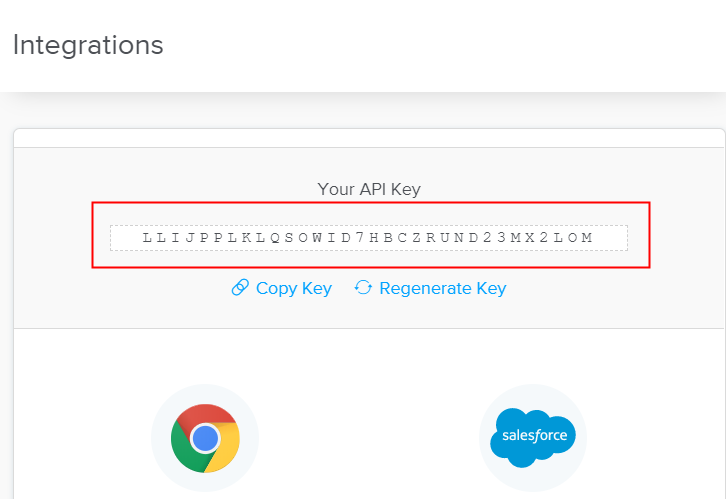
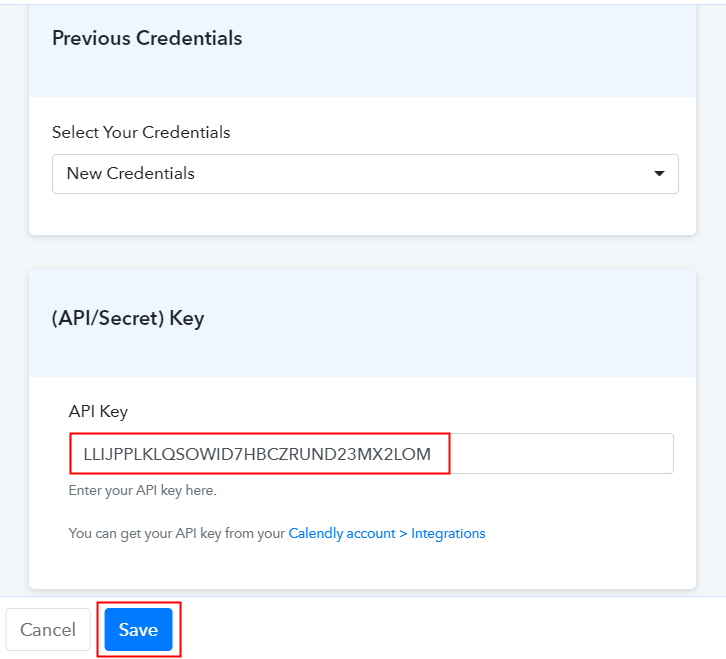
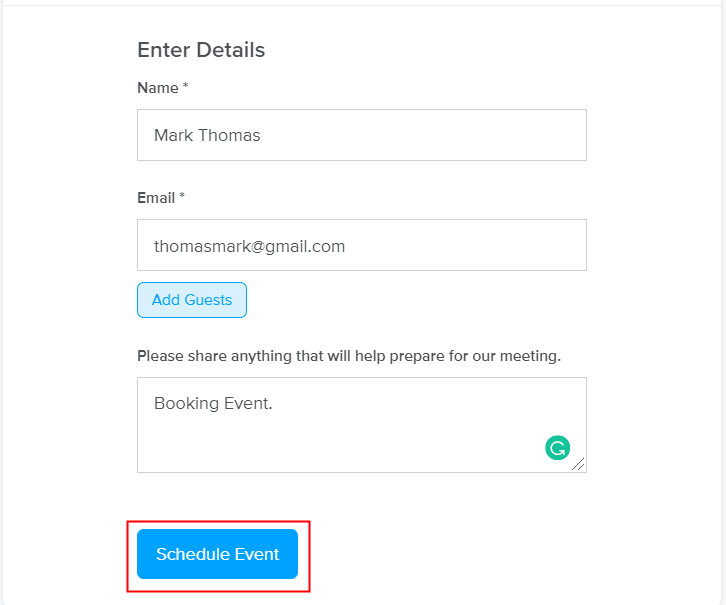
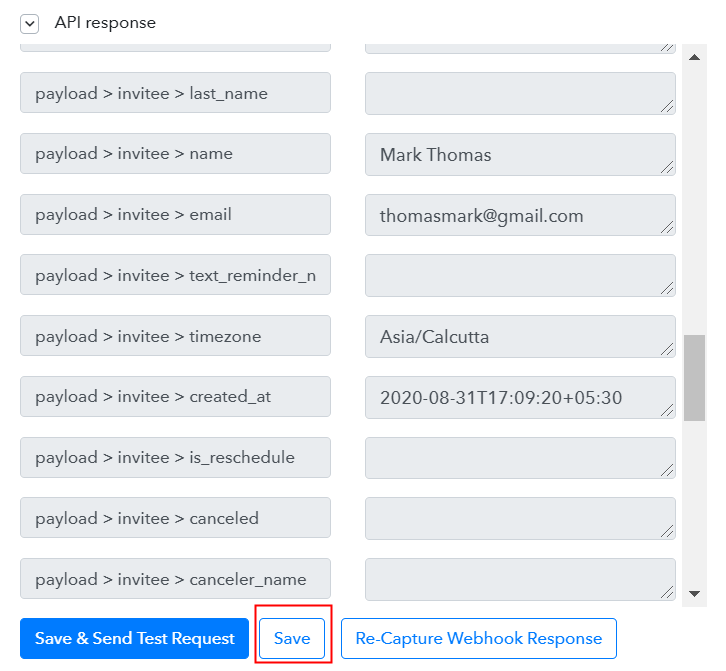
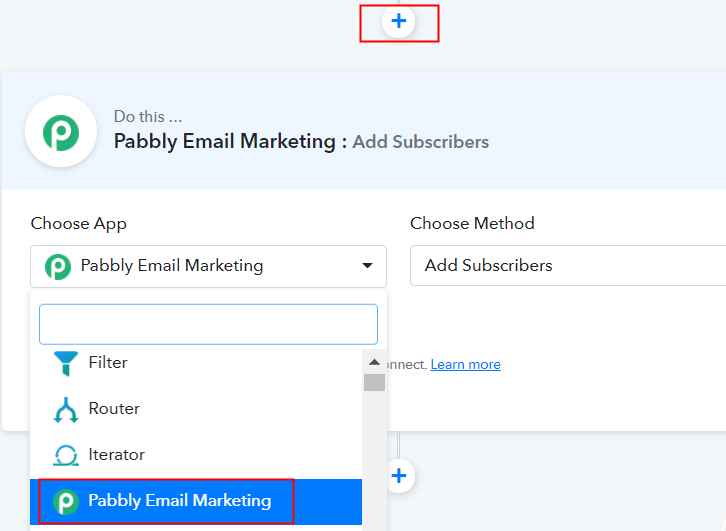
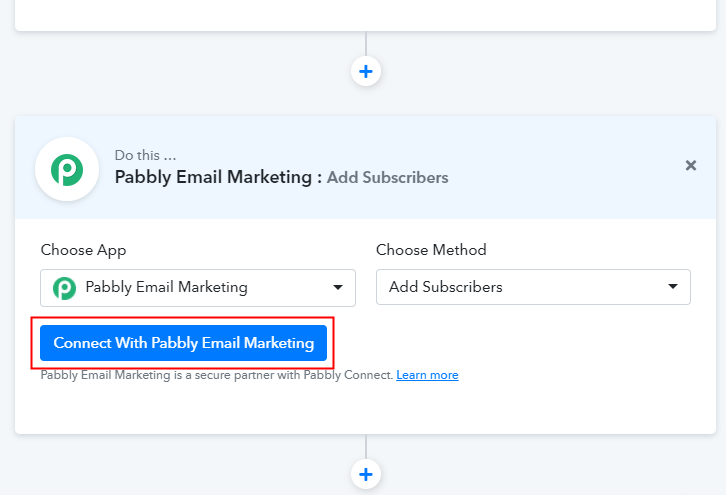
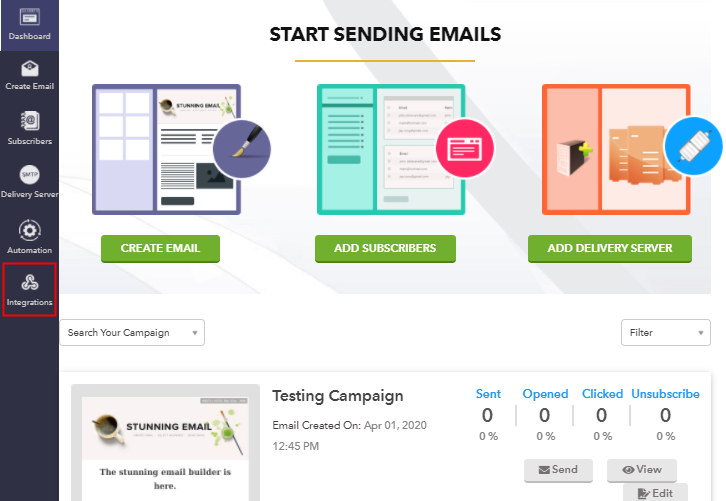
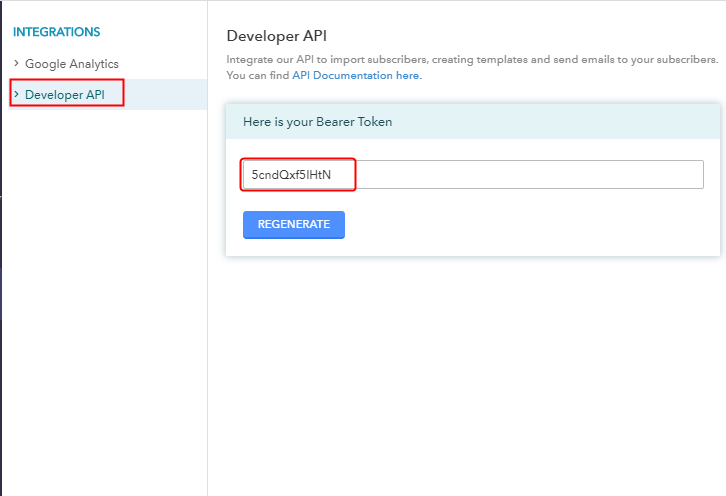
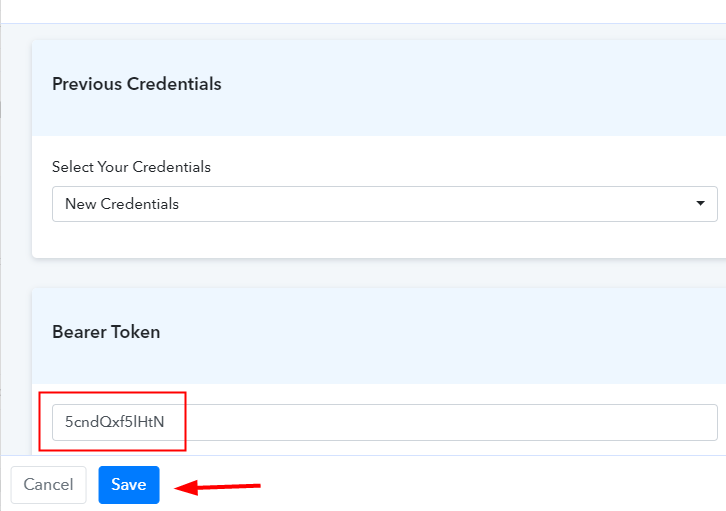
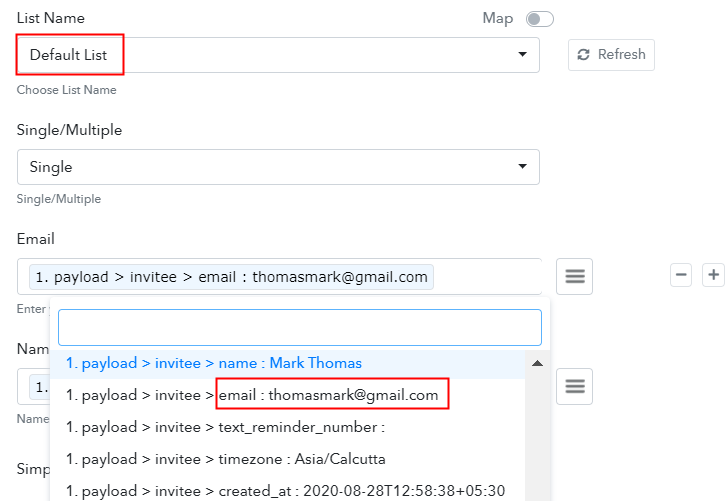
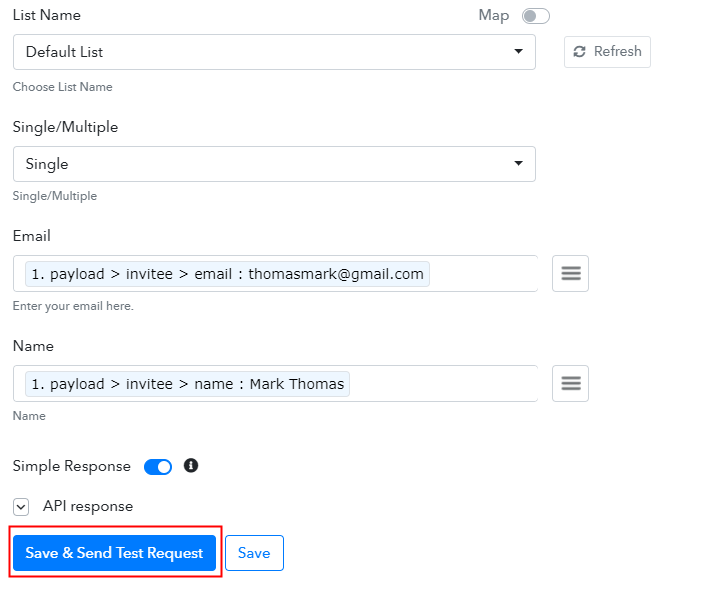
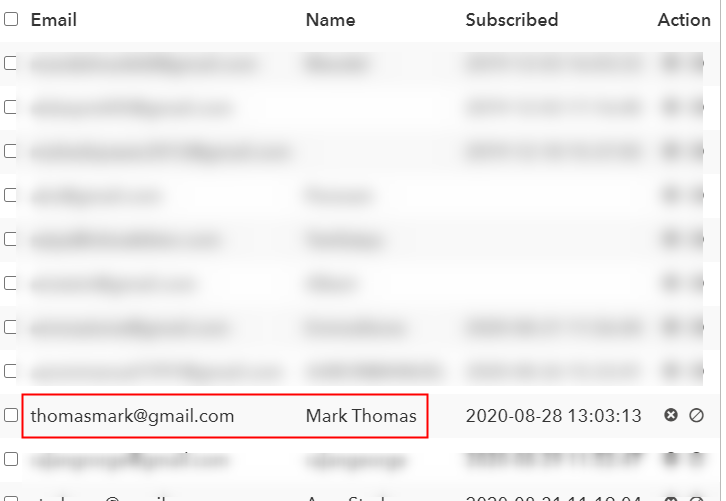
After login into the account, click on the “Access Now” button of Connect. Start the process of making a workflow for your automation by clicking the “Create New Workflow” button. Afterward, add the name of workflow which in our case is “Calendly to Pabbly Email Marketing”. Nevertheless, you can name the workflow according to your requirements. Now after creating a workflow, you have to choose the application you want to integrate. The following step is to select “Calendly” from the dropdown, then choose the “Invitee Created” option. As soon as you click on the “Connected” button, it will open up the page with the choice “New Credentials”. Below on this page, you will see the option of “API Key” which you need to fill. To move further in the Calendly – Pabbly Email Marketing integration process, you gotta copy the API key for which you have to log in to your Calendly account. After login to your Calendly account, click on the “Integrations” option appearing on top. Further, it will give you two options either copy the API key appearing on the dashboard or regenerate the key as per your need. Simply copy the key. Now to paste the API key, move back to the Pabbly Connect dashboard. As we mentioned above in the article that when you click on the “Connected” button it will open up the page with the “API key” option. Just paste the copied API there. Further, click on the “Save” button. Now to check the Calendly integration we have to schedule an appointment using the software. For this, go back to Calendly software, copy the link of the event and paste in another tab, then book an appointment by filling all the details. After filling all the necessary details, click on the “Schedule Event” button. However, a response can take a while to appear so make sure to click “Capture Webhook Response” in Pabbly Connect before scheduling an event. As soon as you submit the response, go back to the Pabbly Connect dashboard where you will see the submitted entry. Then, click on the “Save” button to continue the workflow. Now the next step is to set a trigger, select the action for your trigger. For this, you have to select the application you want to integrate. Next, click on the “+” icon to add an action for your trigger. Here we are going to select “Pabbly Email Marketing” from the dropdown. Then, select the “Add Subscribers” option. Now, after making all the necessary changes, click on the “Connected with Pabbly Email Marketing” button. Further, it will ask for “Bearer Token”, for which you have to visit the Pabbly Email Marketing account. To copy the “Bearer Token”, you have to log in to your Pabbly Email Marketing account. Login to your Pabbly Email Marketing account and select the “Integrations” option from the tab on the left. Then, further, click on the developer API option. Now copy the “Bearer Token” code provided on the dashboard as shown in the above image. So, to paste the copied token, go back to the “Pabbly Connect” dashboard. As we mentioned above when you click on the “Connected with Pabbly Email Marketing” button. It will showcase the page with “New Credentials”. Here on this page, you will see the option of “Bearer Token”, just paste your copied token there. Now, as you can see “Default List” is appearing in the “List Name” field. Now, all you have to do is add the required field from drop-down such as for the email field, select the email option, and for the name field select the name option. After making all the changes, save the setting and then “Send Test Request”. Lastly, when you check the default subscriber list in Pabbly Email Marketing, your submitted response will automatically appear there. This is a one-time process, after that, all the form submissions will automatically get added to your subscriber list. There you have it! Here you have successfully gained the knowledge on “how to integrate Calendly with Pabbly Email Marketing” software. Just follow all the above-mentioned steps and you’re good to go. We all understand the importance of time and that’s why software like Pabbly Connect is a great help as it provides easy automation with zero coding skills. So, don’t confuse yourself anymore. Try this software out and you can contact the support staff in case of any difficulty.Step 2: Access Pabbly Connect

Step 3: WorkFlow for Calendly with Pabbly Email Marketing Integration
(a) Start with a New Workflow

(b) Name the Workflow
Step 4: Setting Trigger for Calendly – Pabbly Email Marketing Integration
(a) Select Application you Want to Integrate
(b) Click on Connect button
Step 5: Copy the API Key
(a) Click on Integrations
(b) Copy or Regenerate the API Key
(c) Paste API Key in Pabbly Connect Dashboard
Step 6: Schedule the Event to Test Calendly Integration
Step 7: Test the Response in Pabbly Connect Dashboard
Step 8: Setting Action for Calendly – Pabbly Email Marketing Integration
(a) Select Application you Want to Integrate
(b) Click the Connect Button
Step 9: Connecting Pabbly Email Marketing to Pabbly Connect
(a) Click on Integrations
(b) Copy Bearer Token
(c) Paste Bearer Token in Pabbly Connect Dashboard
(d) Add Field Data
(e) Save and Send Test Request
Step 10: Check Response in Pabbly Email Marketing Dashboard
Conclusion –
You May Also Like To Read –


