Ideal For: All tissue manufacturers, tissue paper suppliers & exporters, shopkeeper owners and all other merchants can use this method to take their tissue paper selling business online.
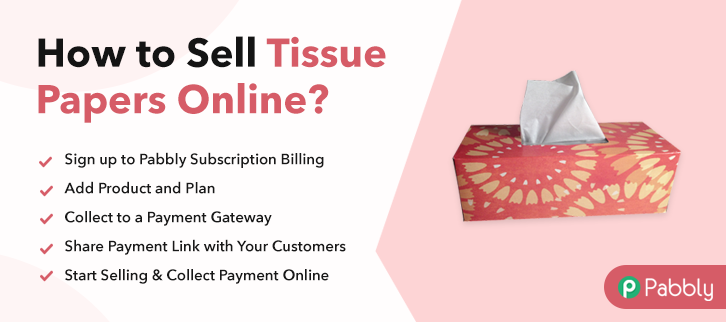
Why Choose this Method To Sell Tissue Papers Online?
Unlike any other solution, this method allows you to:
- List and sell your tissue papers for FREE. Absolutely no payment required.
- No need to pay commission on any of your sale.
- Multiple payment options like PayPal, Credit Card, etc to collect payment from a single place.
- Sell one time or recurring subscriptions of your tissue papers.
- Collect payments & sell products in any currency as per your requirement.
- Give discounts on your products by offering special coupon codes.
- Add sales commission agents to help you in selling tissue papers online.
Selling tissue paper is a great idea and profitable business with low investment as it is a highly consumed item that is used on a daily basis. Tissue papers are used in homes, hotels restaurants, hospitals, etc for cleaning & hygienic purpose, and in this health-conscious world, you can start selling tissue paper to earn some money.
In this article, we suggested software named Pabbly Subscription Billing that helps you in selling tissue paper without worrying about your own website. You just need to create the checkout page then share it with users via several social media links and collect payments. Further, it has some advanced features include:
- Track & record payments
- Create unlimited products & plans
- Tax Management
- Generate invoices
- Collect online & offline payment
Final View of Checkout Page For Your Tissue Papers Selling Business
Step 1: Log in to Pabbly Subscription Billing

Begin the process for creating a checkout page for tissue paper by visiting the Pabbly Subscription Billing in your browser. After that, click on the “Sign up Free“ button. Moreover, either manually filled out the details or sign in using your Gmail account.
Sign Up For Free!
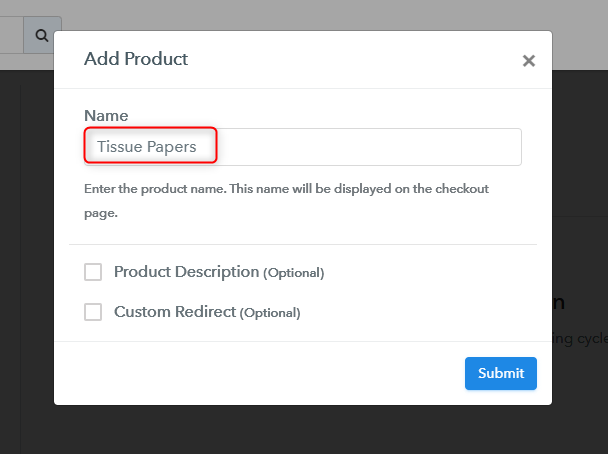
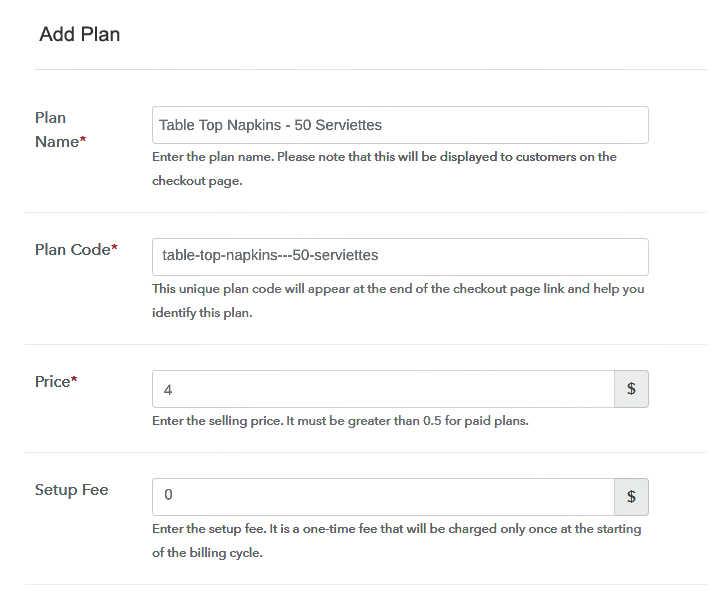
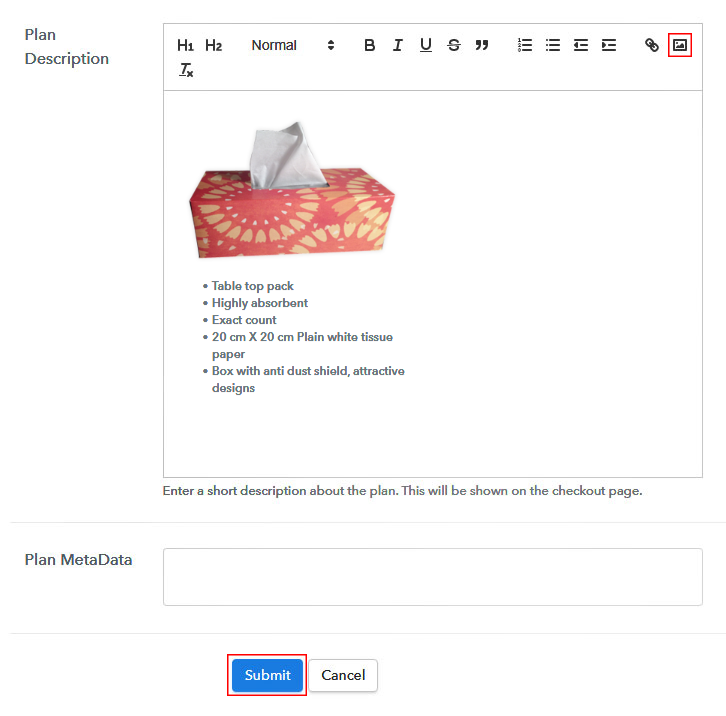
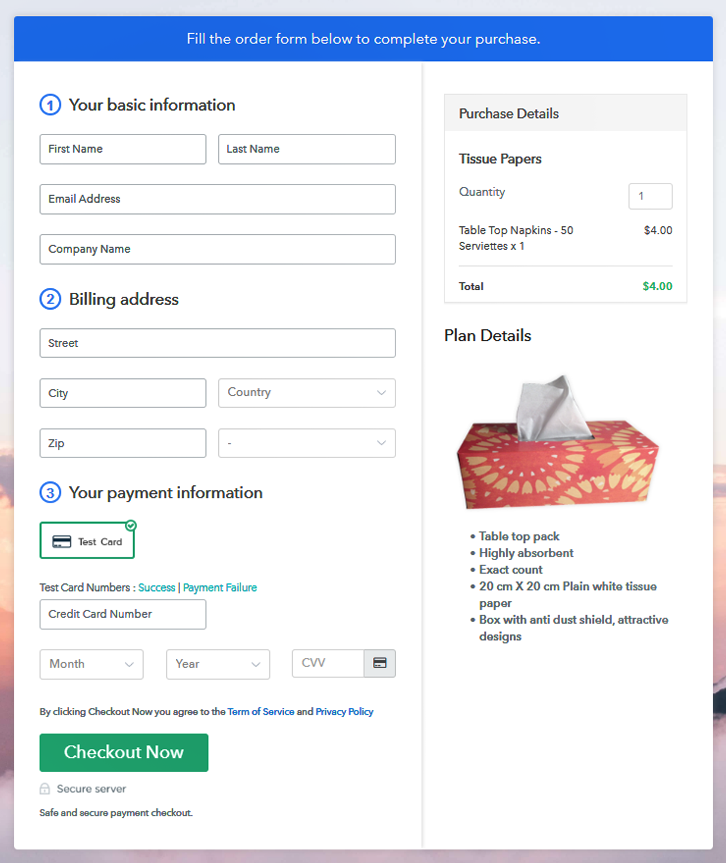
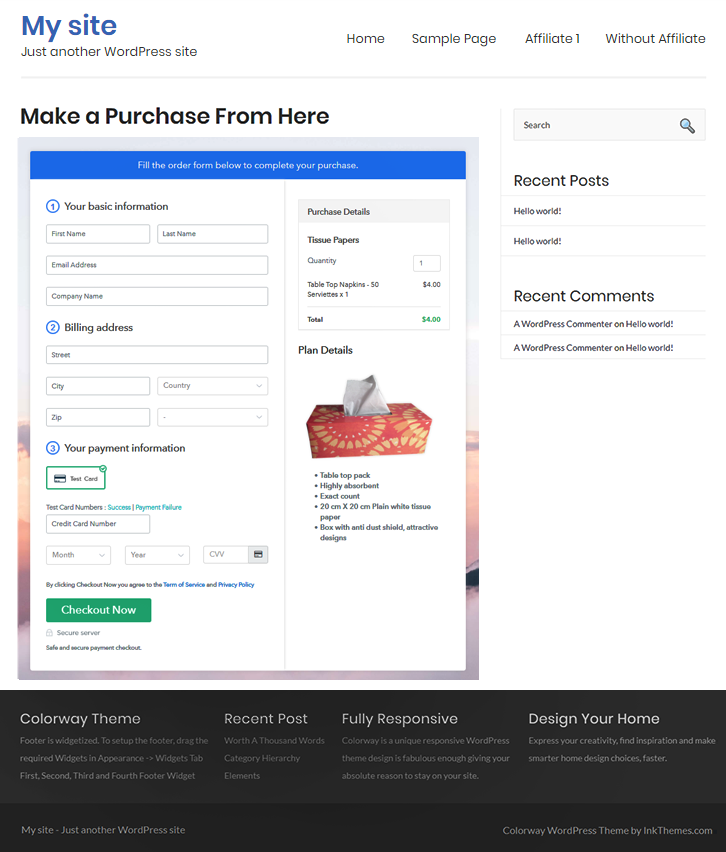
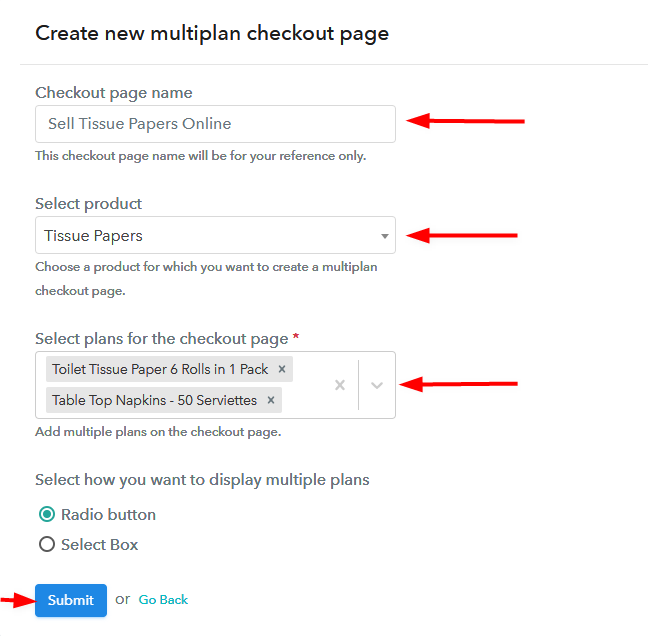
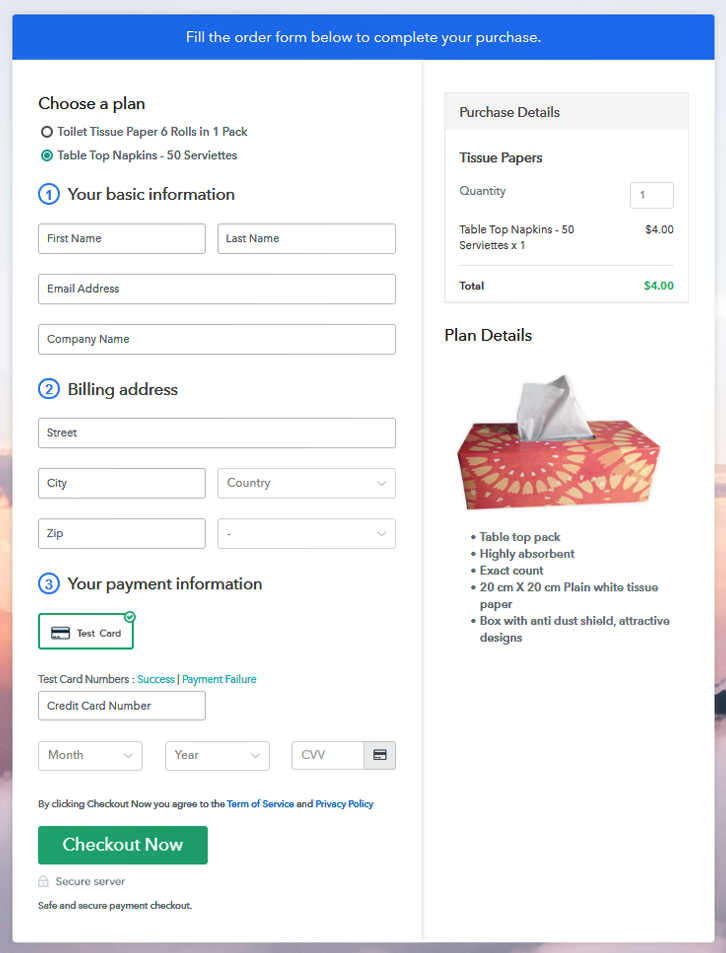
Besides, after clicking on the “Access Now” button of the software, a page will open with fields like company name, select currency, and phone number. Simply fill out those details to continue creating a checkout page for tissue papers. The subsequent step is to gaining knowledge about payment procedures using a “Test Payment Gateway”. Here, we will describe the checkout page process for tissue paper with the help of a test payment gateway. Besides this, the tool offers various payment gateways such as PayPal, Stripe, etc. Further, below are the payment integration guides to help you out. Additionally, add the name, which in our case is “Tissue Papers”. Here you can specify the type like table top pack, toilet tissue paper, etc. Further, write a short description about the tissue paper to grab the customer’s attention. Moreover, just fill out all those details and your product is created. Note: Here you can add all the products related to the similar category by creating plans for each of them. Let’s rollout plans for different kinds of tissue papers available in your store. The next thing to do is fill all the details of the tissue paper like plan name, code, price, set-up fee, and much more to continue. Furthermore, write a brief description of the tissue paper using bullets, images, etc, to bring original buyers to the checkout page. Next, click on the “Submit” button to add the tissue paper on the checkout page. Finally, you can add multiple plans and kinds of tissue paper in your product list which you want to sell online. Follow up the recommended steps to preview the checkout page: Just copy the link and add the checkout page to sell tissue papers online at any proper place on your WordPress site. Further, paste the plan link on a text editor of the WordPress dashboard. Next, click the “Publish” button, after making changes. Note: In case you want to sell multiple products via a single checkout page, you can create a multi-plan checkout page otherwise skip this step. Hopefully! Now you all know how easy is to start tissue paper business online using Pabbly Subscription Billing software. We know how overwhelming can be a process of starting your own business. That’s where this software came as a savior. All you have to do is follow all the aforementioned steps and you’re good to go.Step 2: Select Subscription Billing

Step 3: Account Setup

Step 4: Connect Payment Gateways & Start Tissue Papers Selling Business Online

Step 5: Add Product For Your Tissue Papers

Step 6: Add Plans
(a) Select Add New Plan

(b) Specify the Plan & Pricing Details
(c) Add Image & Description of Tissue Papers
Step 7: Share your Checkout Page

Step 8: Preview Checkout Page
(a) Click on the View Button

(b) Take a Look at the Checkout Page
Step 9: Embed Checkout Page in Site & Sell Tissue Papers Online

(a) Edit the Page & Paste the Copied Link

(b) Save & Publish the Checkout Page

(c) Check out the Final Look of your Checkout Page on WordPress Site
Step 10: Multiplan Checkout Page
(a) Click on Add Multiplan Checkout

(b) Add Plans to Sell Multiple Tissue Papers from Single Checkout Page
(c) Take a Look at the Checkout Page
Wrapping Up
You May Also Like To Read –


