Ideal For: All the fruit farms, fruit sellers, wholesale fruit vendors, fruit suppliers, retail fruit traders and other merchants can use this method to sell fruits online.

Why Choose this Method for Selling Over any Other Solution?
Unlike any other solution, this method allows you to:
- List and sell your fruits for FREE. Absolutely no payment required.
- No commission deducted on sales.
- Collect payment through multiple payment modes from a single checkout page.
- Sell one time or recurring subscriptions of your fruits.
- Sell and collect payment in any currency as per your requirement.
- Give discounts on your products by offering special coupon codes.
- Add sales commission agents to help you in selling your fruits.
Fruits are considered as the most healthiest food for human beings. That is the reason why people offer fruits to someone who is sick and wish them to get well soon. Hence, you might be looking for ways to start your fruit selling business online.
Why would you like to sell fruits online?
We understand how digital world has turn out to be the most important part of our day to day life. And, to cope up with that selling things online is a new trend which everyone is following. Therefore, we would like recommend you Pabbly Subscription Billing tool so that you can sell fruits online without any hassle. Here, let me take you through the most prominent feature this software provides.
- Collect payment either offline or online
- Create unlimited products and plan
- Provide coupons and discounts
- Add tax and delivery charges
Not only that, but you can also create checkout pages that can be shared on social media like Facebook, Twitter, etc or else embed on the website. Want to know how? Let me take you through those easy 10 steps.
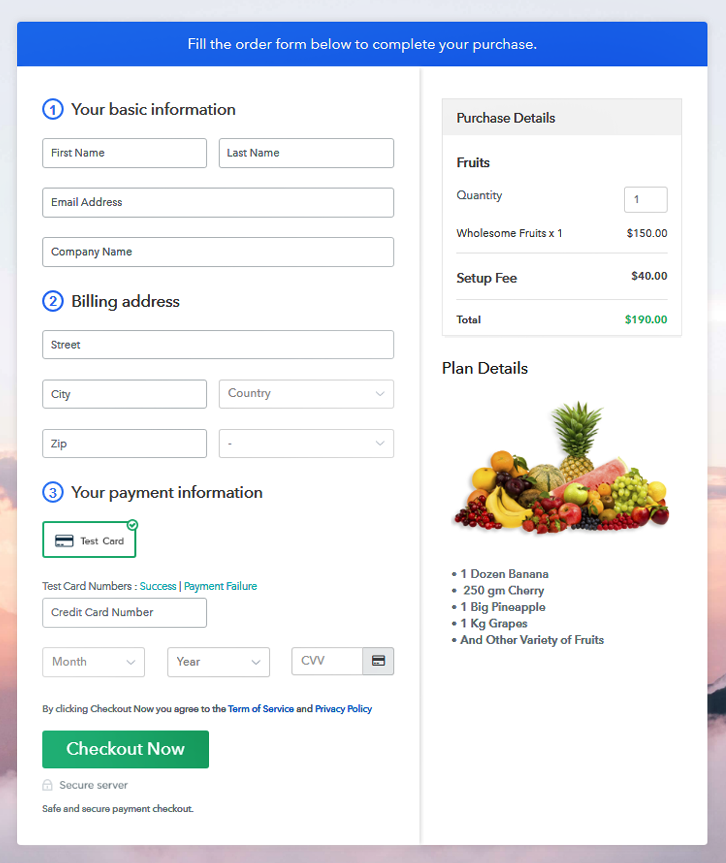
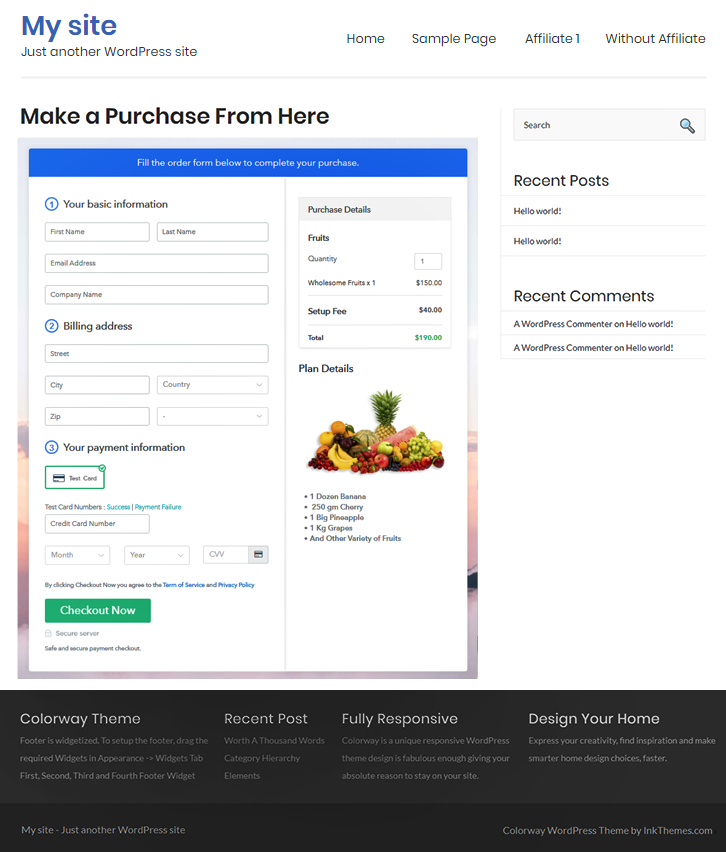
This is How your Checkout Page will Look Like After Creation
Step 1: Log in to Pabbly Subscription Billing

First of all, go to the site of Pabbly Subscription Billing then click on the button “Sign up Free” which will redirect you to their sign-up page. Fill out all the fields manually or else sign in via Gmail account.
Step 2: Select Subscription Billing

Step 3: Account Setup

Then, fillup the entire details of the company like name, currency standards, and phone number. Next, click on “Continue” to complete the whole process.
Step 4: Connect Payment Gateways To Sell Fruits Online

In order to stimulate the whole payment experience of a customer, the next step is to check the payment gateways. Besides, Pabbly Subscription Billing offers you multiple payment gateways like PayPal, Stripe, Razorpay, etc. In the meantime, I am enabling the test payment gateway so that you can understand the entire process with the help of test payment gateway.
- PayPal integration guide
- Stripe integration guide
- Razorpay integration guide
- Authorize.net integration guide
Step 5: Add Your Product

After successfully embedding the payment gateway, the following step is to add products. Just click on the “Add New Product” button which will open a dialog box. Next, fill out the details of the fruits with its specifications.
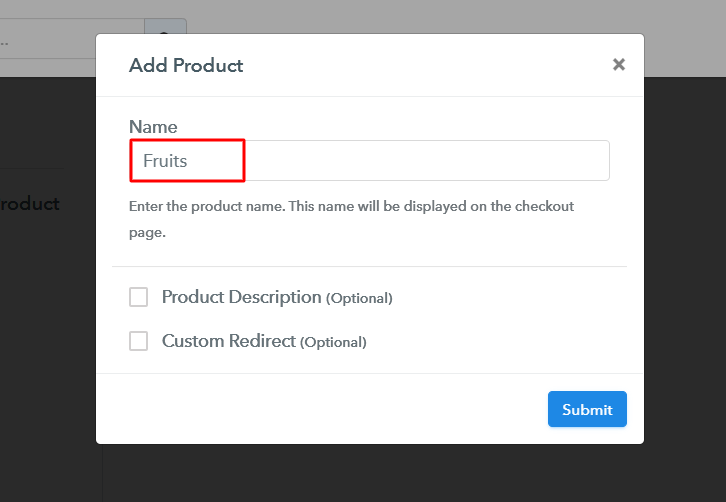
Enter the details and your product is created.
Note: Here you can add all the products related to the similar category by creating plans for each of them.
Step 6: Add Plans
Now, create plans for fruits that are available in your stocks.
(a) Select Add New Plan

(b) Specify the Plan & Pricing Details
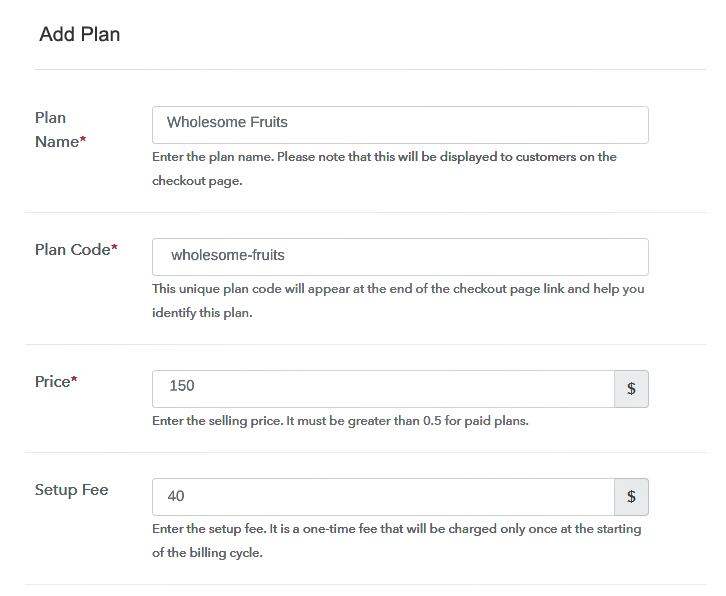
To add a plan, you will be redirected to the plan page in order to enter the details like name, code, price, setup fees, billing cycle, etc.
(c) Add Image & Description
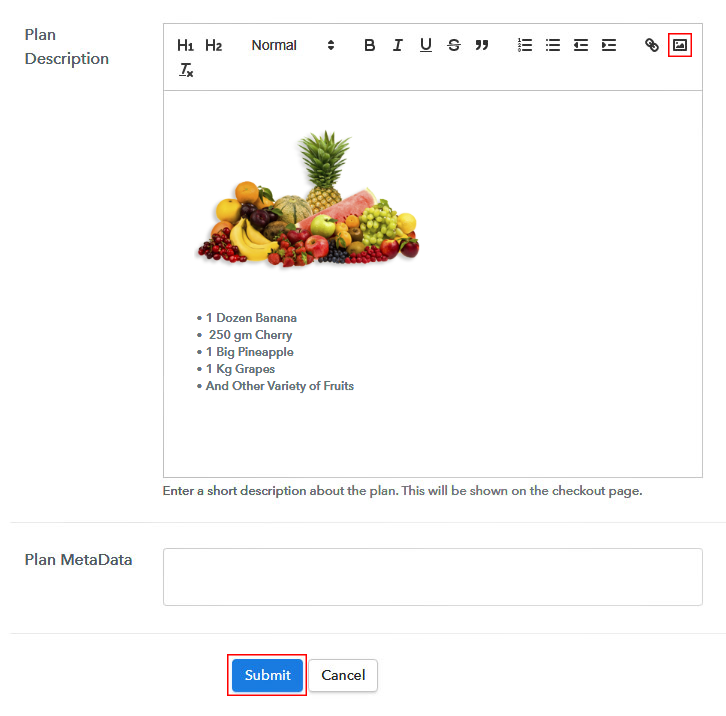
Subsequently, paste the image of the fruits you wish to sell online.
Further, provide some product information of the fruits in bullet points like quantity, quality, etc.
Once you fillup the information, just tap on the “Submit” button.
Step 7: Share your Checkout Page

- Succeeding, you can now share the checkout page on Twitter & Facebook by using the direct buttons.
- Furthermore, using emails and SMS you can directly share the checkout page link to customers.
- Likewise, it enables you to add the provided plan link in the buttons. Along with that, you can also use the anchor text anywhere on your website so that you can redirect users to the checkout page.
Step 8: Preview Checkout Page
Follow up these steps to preview checkout page:
(a) Click on the View Button

(b) Take a Look at the Checkout Page
Step 9: Embed Checkout Page in Site & Sell Fruits Online

Simply, copy the embed link in order to insert the checkout page on your WordPress website.
(a) Edit the Page & Paste the Copied Link

Afterward, just copy the link and paste it to the text area of the editor.
(b) Save & Publish the Checkout Page

Then, tap on the buttons named ‘Publish’ once you paste the code. Voila! your checkout page is embedded.
(c) Check out the Final Look of your Checkout Page on WordPress Site
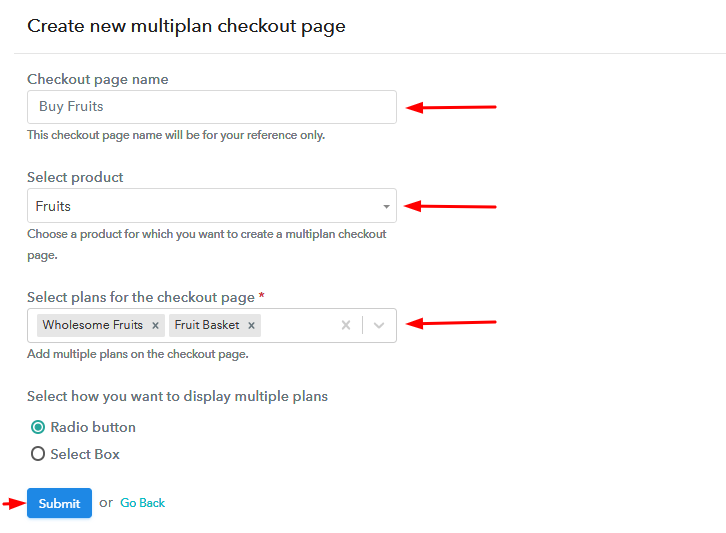
Step 10: Multiplan Checkout Page
Note: In case you want to sell multiple products via a single checkout page, you can create a multi-plan checkout page otherwise skip this step.
(a) Click on Add Mutiplan Checkout

(b) Add Plans to Sell Fruits from Single Checkout Page
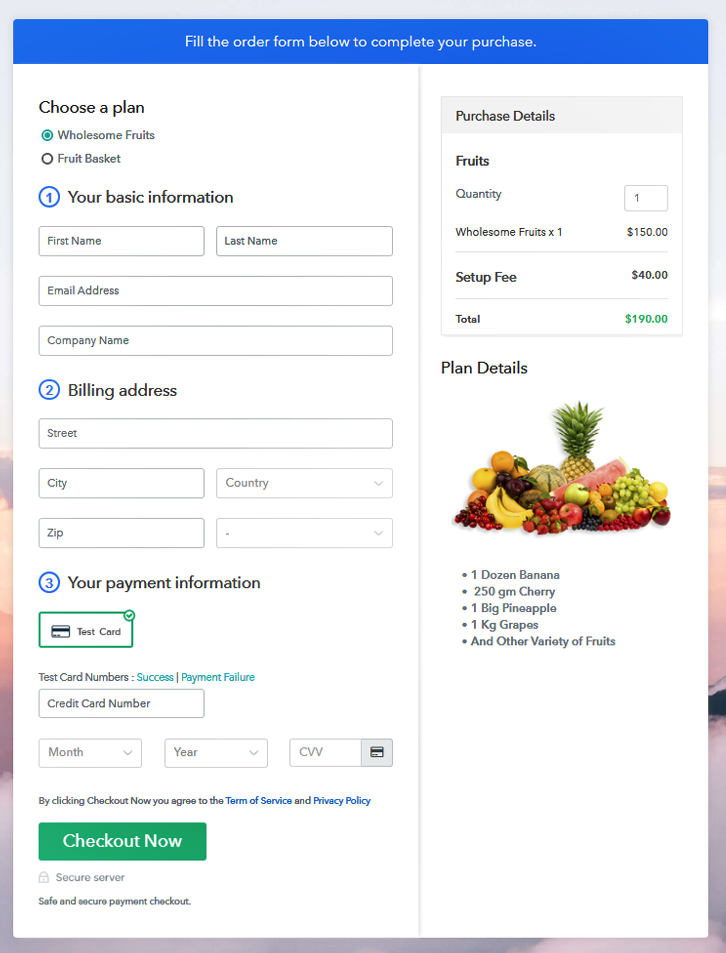
(c) Take a Look at the Checkout Page
Wrapping Up
We hope this article has helped you to solve your query on “How to sell fruits online?”. You just need to follow the above-mentioned steps in order to start your online fruit selling business without any hassle. So, what are you waiting for? Go ahead and start selling fruits online.


