Ideal For: All the grocery dealers, household enterprises, retail grocery item traders and other merchants can use this method to sell grocery items online.
Why Choose this Method for Selling Over any Other Solution?
Unlike any other solution, this method allows you to:
- List and sell your grocery items for FREE. Absolutely no payment required.
- No commission deducted on sales.
- Collect payment through multiple payment modes from a single checkout page.
- Sell one time or recurring subscriptions of your grocery items.
- Sell and collect payment in any currency as per your requirement.
- Give discounts on your products by offering special coupon codes.
- Add sales commission agents to help you in selling your groceries.
Grocery items come in the basic needs of every human being. Therefore, grocery sellers are never out of business. So, you must be looking for ways to start your grocery business online.
Why would you like to sell grocery items online?
We understand how important it is to stay updated with day to day business. And taking your grocery business online is one of the important step to take. Therefore, an online tool is required that helps you to manage your business online without any hassle. Thus, we would like to recommend Pabbly Subscription Billing as the best tool to start your grocery business online. Here, let me take you through its prominent features.
- It helps you to maintain an inventory of all the groceries in stock
- Moreover, you can set up delivery or extra charges as per your needs
- Further, you can collect payments both in offline and online mode
- Besides, it enables you to create invoices that can be used as tax receipts.
- You can also provide a comprehensive description of each and every product
So, why wait to sell grocery items online? Just create checkout pages by following the step below and you are ready to share it on social media or on website in few snaps.
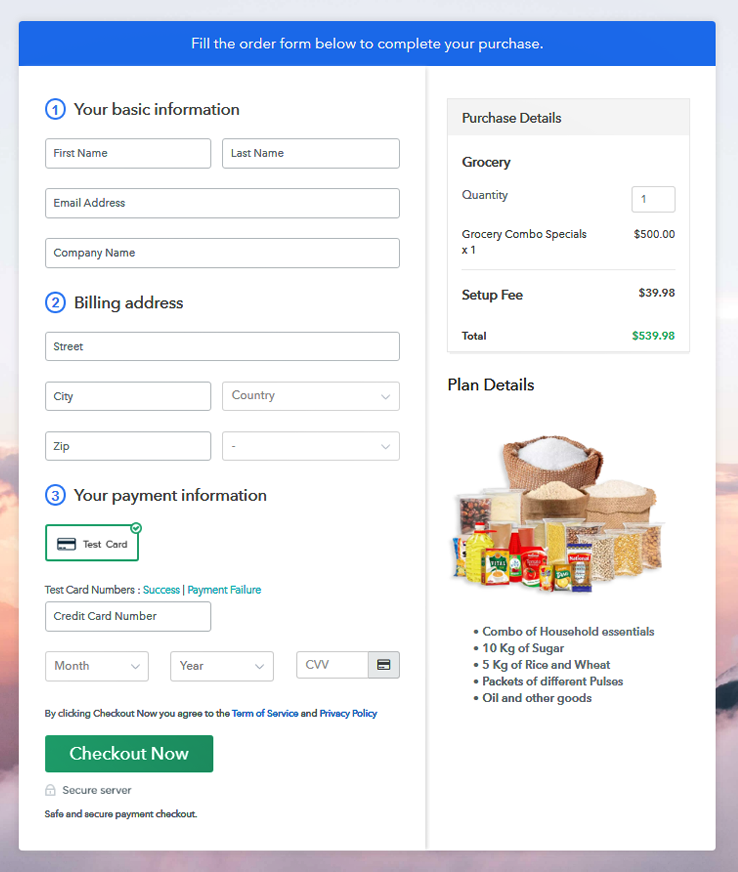
This is How your Checkout Page will Look Like After Creation
Step 1: Log in to Pabbly Subscription Billing

First of all, search out for Pabbly Subscription Billing and click on their website. Then, tap on the button “Sign up Free” that will redirect you to a sign-up page. Just fill out all the fields manually or sign in via Gmail account.
Sign Up For Free!
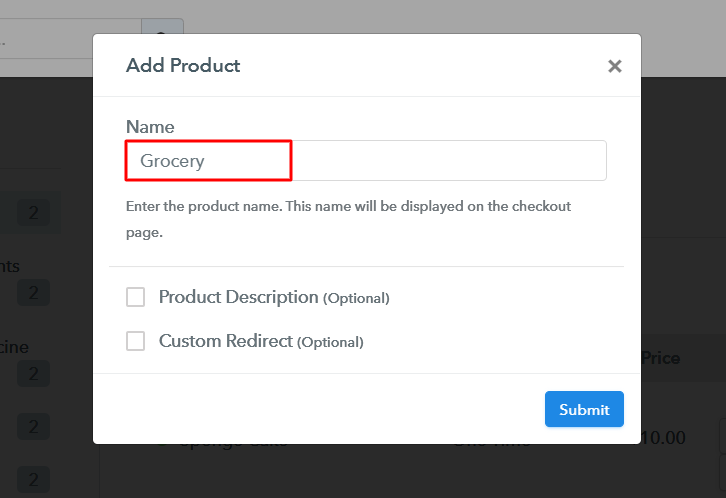
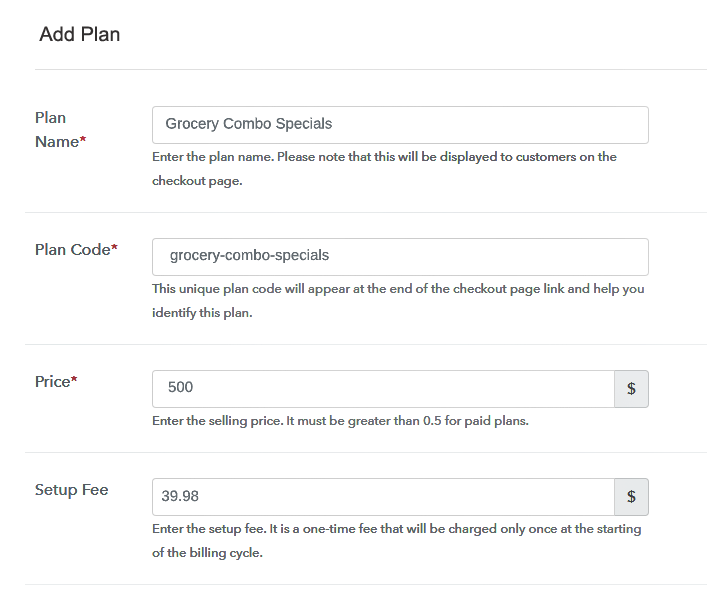
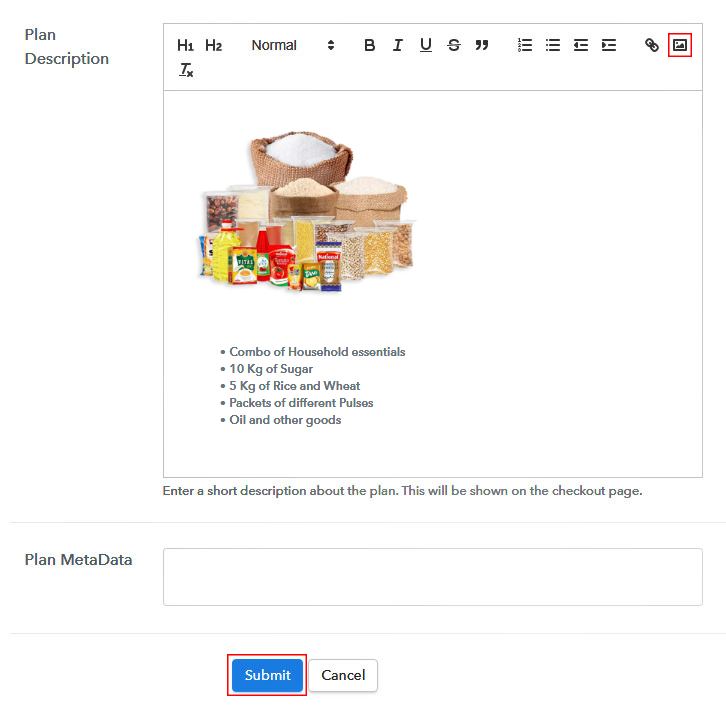
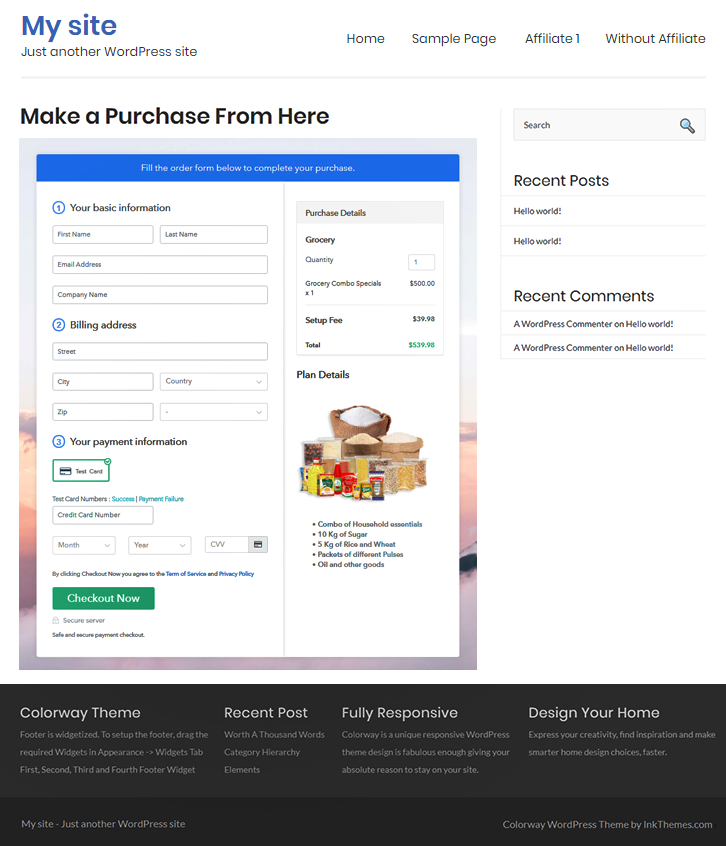
Subsequently, fill out the company details such as name, currency standards, and phone number. Then, click on continue in order to complete the process. The next step is to check the payment gateways as it helps you to stimulate the whole payment experience of a customer. Moreover, Pabbly Subscription Billing comes with multiple payment gateways such as PayPal, Stripe, Razorpay, etc. In the meantime, here I am enabling the test payment gateway in order to elaborate the whole process using test payment gateway. When successfully embedded your payment gateway, the next step is to add your product. Simply tap on the “Add New Product” button that will open a dialog box. Then, enter the details of the groceries with the product specifications. Fill up the details and your product is created. Note: Here you can add all the products related to the similar category by creating plans for each of them. Now, create plans for grocery items that are available in your store. In order to add a plan, you will be redirected to the plan page to fill details such as name, code, price, setup fees, billing cycle, etc. Now, paste the image of the grocery items you want to sell online. Moreover, also provide some product description of the groceries in bullet points such as quantity, quality, etc. After filling out the description, just click on the “Submit” button. Follow up these steps to preview checkout page: Just copy the embedding link to insert the checkout page on your WordPress website. Consequently, after copying the link, paste it to the text area of the editor. Next, hit the ‘Publish’ button after pasting the code and your checkout page is embedded. Note: In case you want to sell multiple products via a single checkout page, you can create a multi-plan checkout page otherwise skip this step. There you go! Now you know how to sell your grocery items online. Just follow the above-mentioned steps and you are good to go. So, what are you waiting for? Start your Grocery business online and earn more than ever by selling grocery items without any hassle.Step 2: Select Subscription Billing

Step 3: Account Setup

Step 4: Connect Payment Gateways To Sell Grocery Items Online

Step 5: Add Your Product

Step 6: Add Plans
(a) Select Add New Plan

(b) Specify the Plan & Pricing Details
(c) Add Image & Description
Step 7: Share your Checkout Page

Step 8: Preview Checkout Page
(a) Click on the View Button

(b) Take a Look at the Checkout Page

Step 9: Embed Checkout Page in Site & Sell Grocery Items Online

(a) Edit the Page & Paste the Copied Link

(b) Save & Publish the Checkout Page

(c) Check out the Final Look of your Checkout Page on WordPress Site
Step 10: Multiplan Checkout Page
(a) Click on Add Mutiplan Checkout

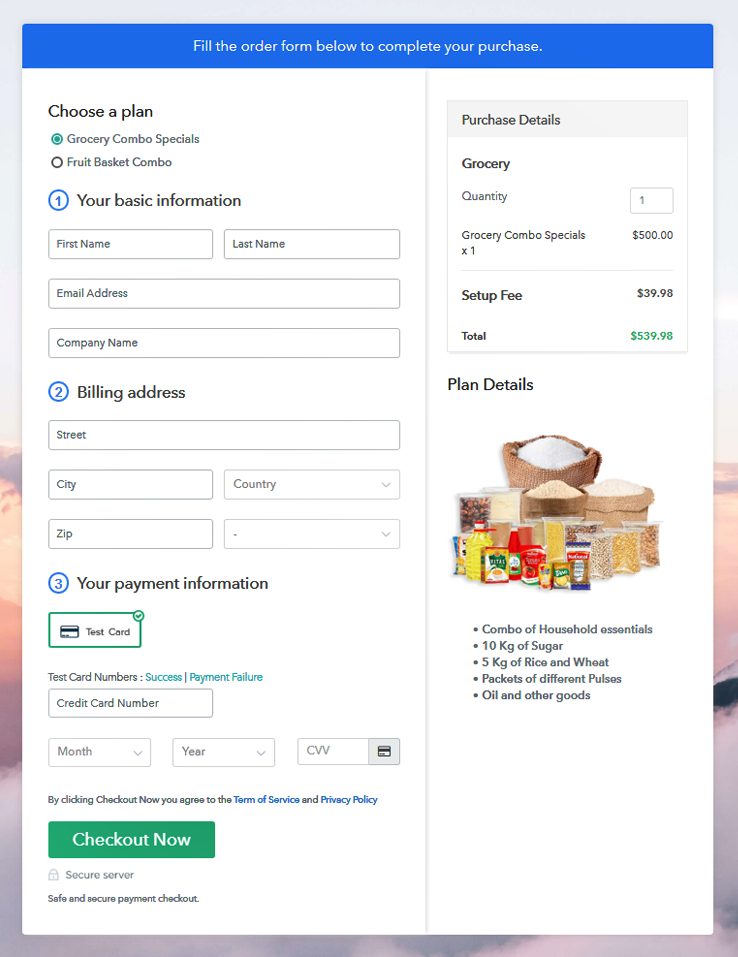
(b) Add Plans to Sell Grocery Items from Single Checkout Page

(c) Take a Look at the Checkout Page
Wrapping Up
You May Also Like To Read –


