Ideal For: All the candles manufacturers, candle sellers, retail candle shop owners, wholesale candle sellers and other merchants can use this method to take their candles selling business online.
Why Choose this Method for Selling Over any Other Solution?
Unlike any other solution, this method allows you to:
- List and sell your candles for FREE. Absolutely no payment required.
- No commission on sales.
- Collect payment through multiple payment modes from a single checkout page.
- Sell one time or recurring subscriptions of your candles.
- Sell and collect payment in any currency as per your requirement.
- Give discounts on your products by offering special coupon codes.
- Add sales commission agents to help you in selling your candles.
As the online market is flourishing, it is the best time to boost your candle selling business. Therefore, you must be scrolling over the internet to start a candle business online.
Why would you like to sell candles online?
Undoubtedly, the online market is silicon valley for all startup and small business owners. And selling your homemade candles online is not that tricky. We all know that half of the population uses candles for home decor, aromatherapy, and meditation purposes.
Meanwhile, in one of the datasheets released by the National Candle Associations, it has been confirmed that selling candles online is way much profitable. Some of the benefits of selling products online are:
- Higher margins and better cash flow
- A business will be at your fingertips
- Lower set-up cost
- Allure customers across the globe
- Receive payments both online and offline
So, reading all the aforesaid points it is quite clear why people shift their energy towards the online market. And that’s where good checkout page comes in picture. In simple words, checkout pages make the selling of goods and product a walk in the park.
Here, we are going to discuss how to create effective checkout pages for selling candles online.
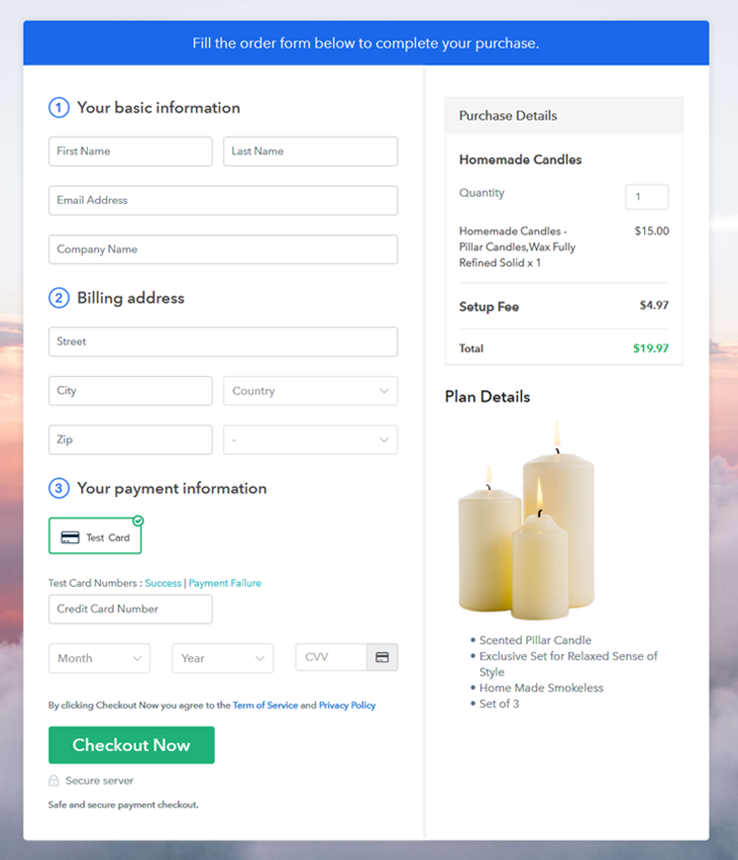
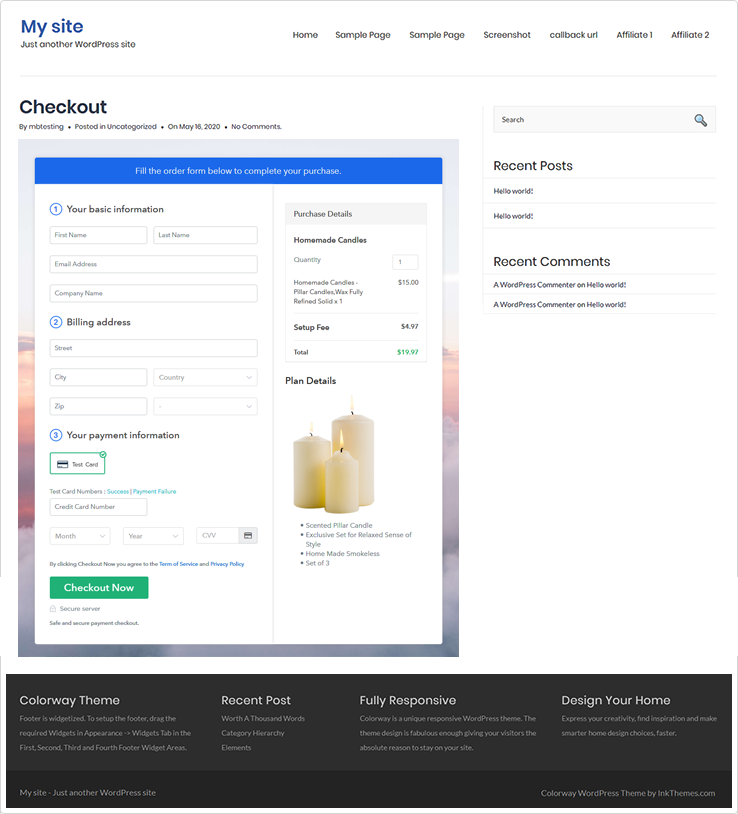
This is How your Checkout Page will Look Like After Creation
Step 1: Login to Pabbly Subscription Billing

First things first, go to Pabbly Subscription Billing and click on the “Sign Up Free” button appearing on the top left corner. Either you can access the software using your Gmail credentials or can create a new account. Then, you have to fill your details to proceed.
Sign Up For Free!
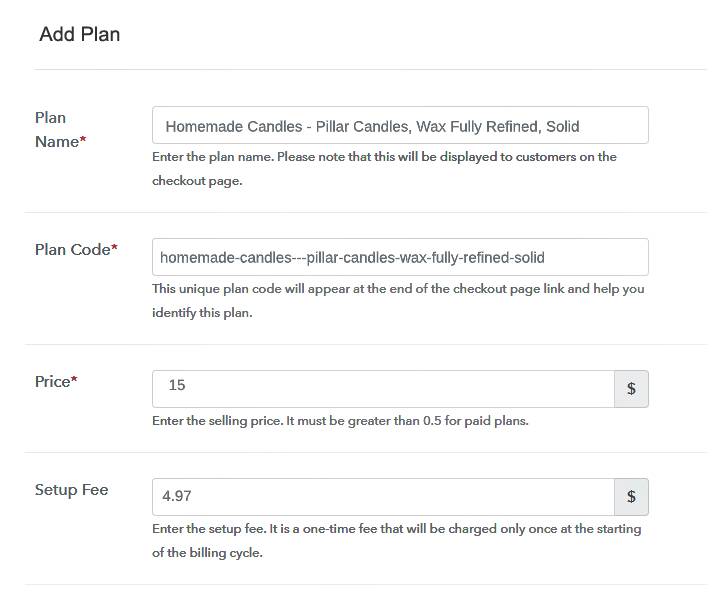
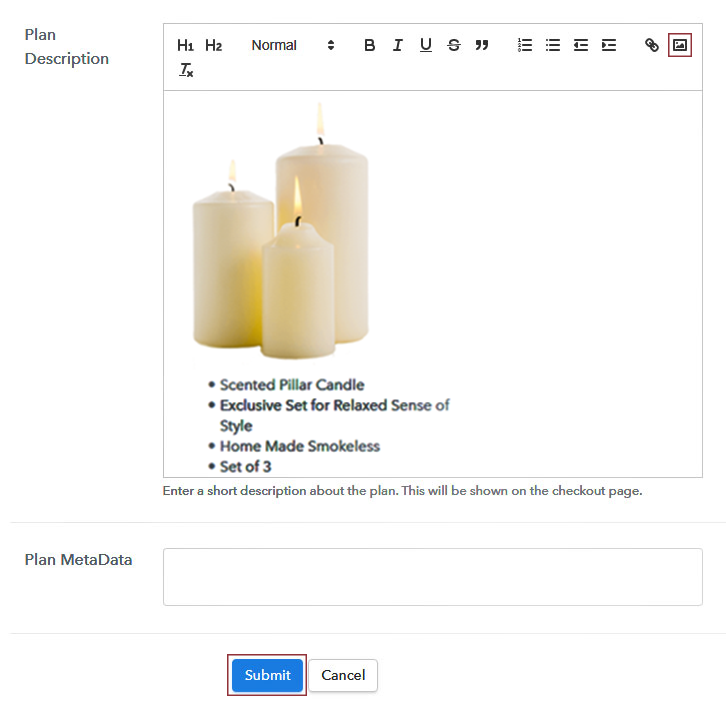
Once you’re done clicking on the “Access Now” button of Pabbly Subscription Billing, a page will pop-up with details like company name, currency, and contact number. Next, you need to fill those details to go on. For the very first time, here we are using test payment mode so that we can understand all about the software’s payment procedure. Furthermore, the tool is packed with multiple payment gateways. Below we are mentioning the payment integration guide to help you out. The next part involves adding your product which is candles. Here you can specify the details like homemade candles and stuff all the related types of candles in the same product by creating different plans. Furthermore, fill all the necessary details and your product is created. Note: Here you can add all the products related to the similar category by creating plans for each of them. Let’s roll out the plans for all the different types of candles available in your store. Moreover, after successfully adding the plan, the page will appear asking for plan name, plan code, price, set up fee, and much more to start selling candles online. Hence, you need to satisfy all those details to proceed. Further, specify a little about candles in bullet points, add images and links too. Next, on hitting the submit button, your candles will be successfully added. Likewise, you can create multiple plans and can add all the candles you want to sell online. Subsequently, follow all these steps mentioned below to preview checkout page. Further, all you have to do is copy the checkout page link and attach the checkout page at any preferrable place on your WordPress site. Now, paste the copied link on the text editor of a WordPress site. Further, when you’re done with pasting the code on a text editor, simply hit the ‘Publish’ button to embed the checkout page on your WordPress site. Note: In case you want to sell multiple products via a single checkout page, you can create a multi-plan checkout page otherwise skip this step. Voila! This is all we have for how to sell candles online? We know how much overwhelming can be a process of bringing candle selling business online. It’s never been easy to start candle business online and that’s why we compiled this help guide where you can learn how to sell products using checkout pages without any difficulty. Not to forget “Selling Products Online Is New Black Now”. So, sit back and enjoy this guide and let us know your reaction in the comments section.Step 2: Select Subscription Billing

Step 3: Account Setup

Step 4: Connect Payment Gateway to Sell Candles Online

Step 5: Add Your Product


Step 6: Add Plans
(a) Select Add New Plan

(b) Specify the Plan & Pricing Details
(c) Add Image & Description
Step 7: Share your Checkout Page

Step 8: Preview Checkout Page
(a) Click on the View Button

(b) Take a Look at the Checkout Page

Step 9: Embed Checkout Page in Site & Sell Candles Online

(a) Edit the Page & Paste the Copied Link

(b) Save & Publish the Checkout Page

(c) Check out the Final Look of your Checkout Page on WordPress Site
Step 10: Multiplan Checkout Page
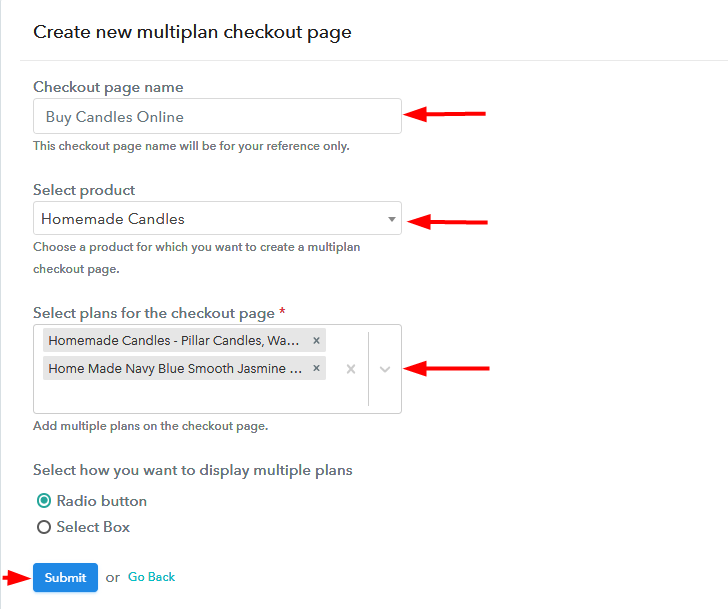
(a) Click on Add Mutiplan Checkout

(b) Add Plans to Sell Multiple Candles from Single Checkout Page
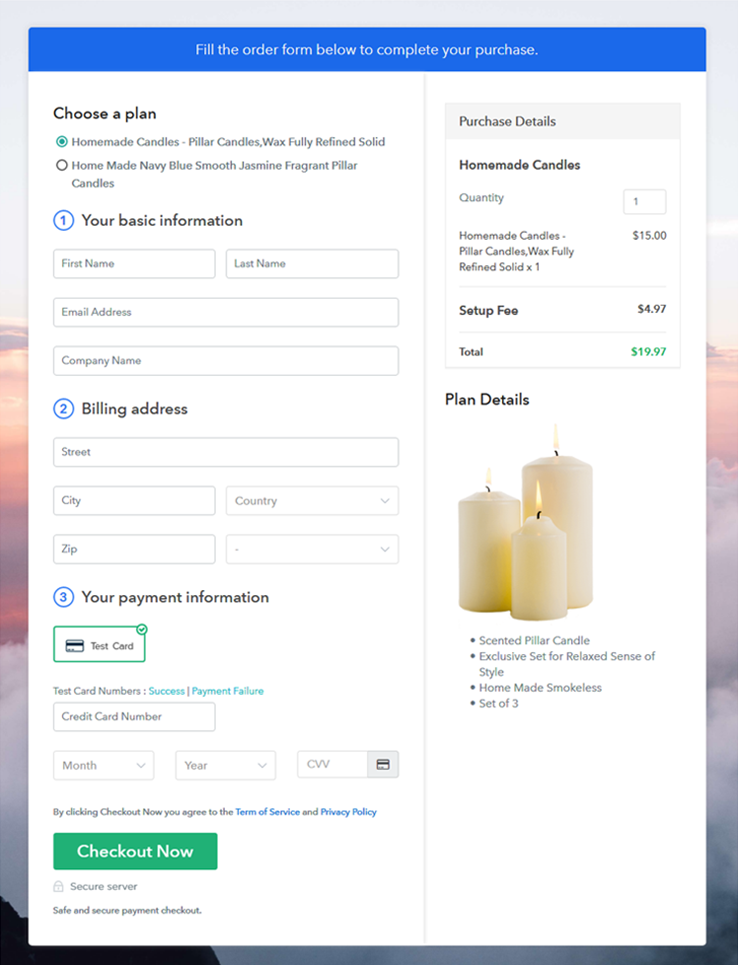
(c) Take a Look at the Checkout Page
Wrapping Up
You May Also Like To Read –


