This feature is for important for the merchants who have a vast customer base.
Pabbly Subscriptions gives you the ability to add all your customers in the application from the backend. So you will not need to ask your customer to sign up again. Check the details of the Customer Import and Export feature of Pabbly Subscriptions.
There are 2 methods of importing customers in Pabbly Subscriptions account.
-
- From Stripe payment gateways account.
- From CSV file
How To Import Customers via Stripe?
You can import the details of the customer from your Stripe account. Just integrate your Stripe account with Pabbly Subscriptions by using the API.
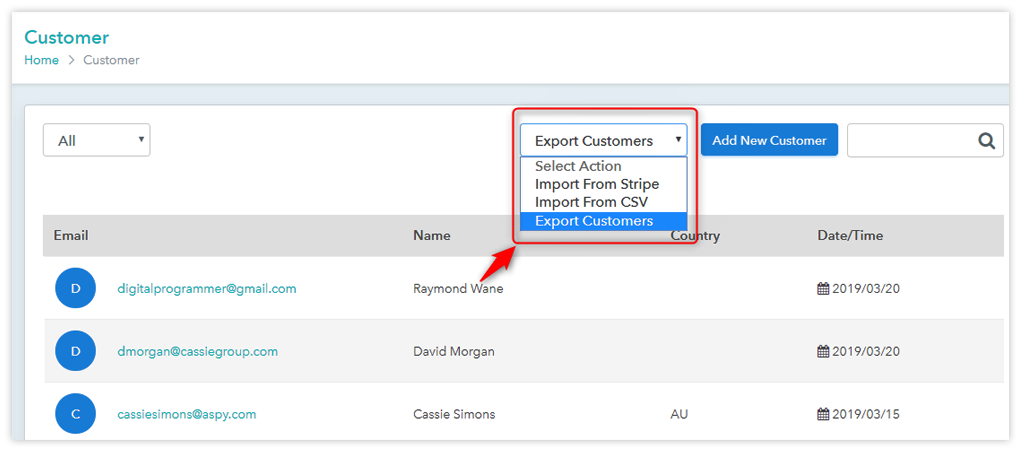
Then go to the Customer’s section. You will find a drop-down field named “Select Action”.
The first option of this section is the “Import from Stripe”.

The customers from the Stripe account that you have integrated into the Pabbly Subscriptions application will be imported just by a single click.
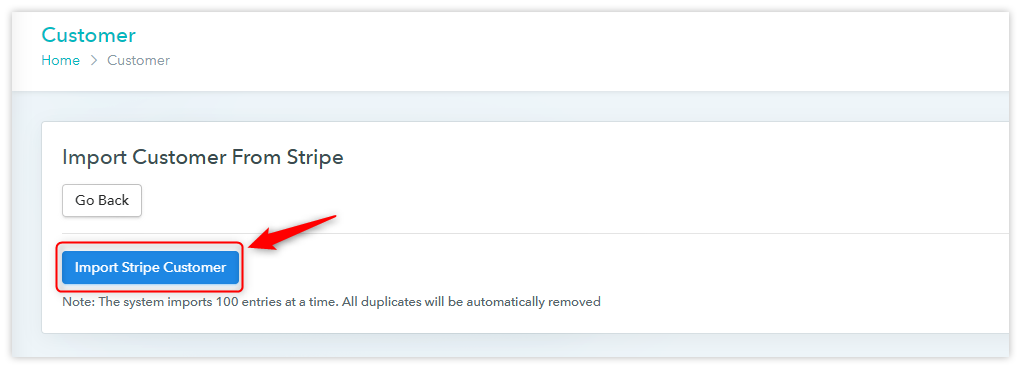
Select the “Import from Stripe” option and then you will be redirected to a new page where you find the “Import Stripe Customer” button.

Just click on this button and all the customers from your Stripe account will be imported automatically in the Pabbly Subscriptions account.
There are some points to remember while importing customers from Stripe.
- The system will import 100 customers in a single attempt and will skip the duplicates automatically.
- Only the customer details and the Stripe customer Id will be imported. Stripe subscriptions will not be imported.
- Continue clicking on the Import button until all the customers are imported.
- You can see the details of the imported customer’s in the “Customer section” and count in the reports section.
Next option in the “Select Action” drop-down section is –
How To Import Customers via CSV File?
Import the details of customer and Subscription.
If you have your customers data in a CSV file then you can just upload the file and select the fields which you want to import. All the details will be added once you hit the Submit button.
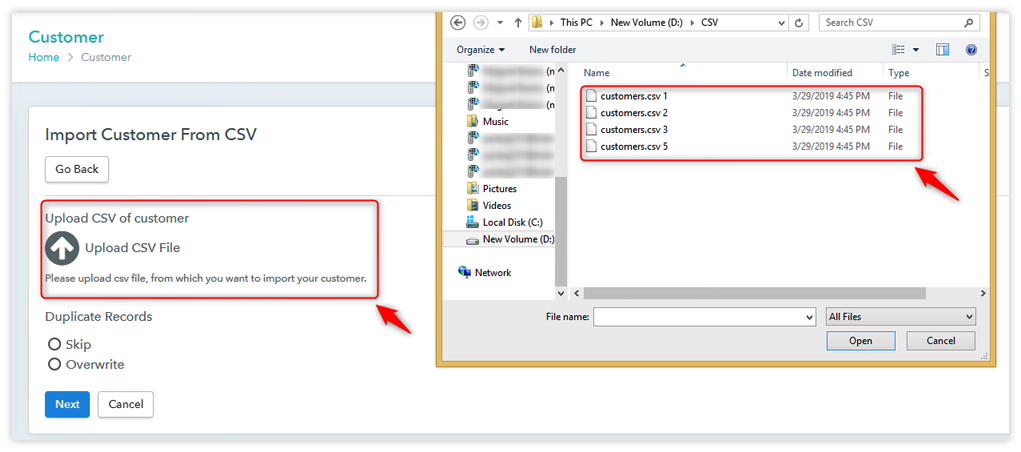
⇒ First, click on the upload icon and select the CSV file from your system.

Next select if you want to Skip or overwrite the duplicates and click on Next button.
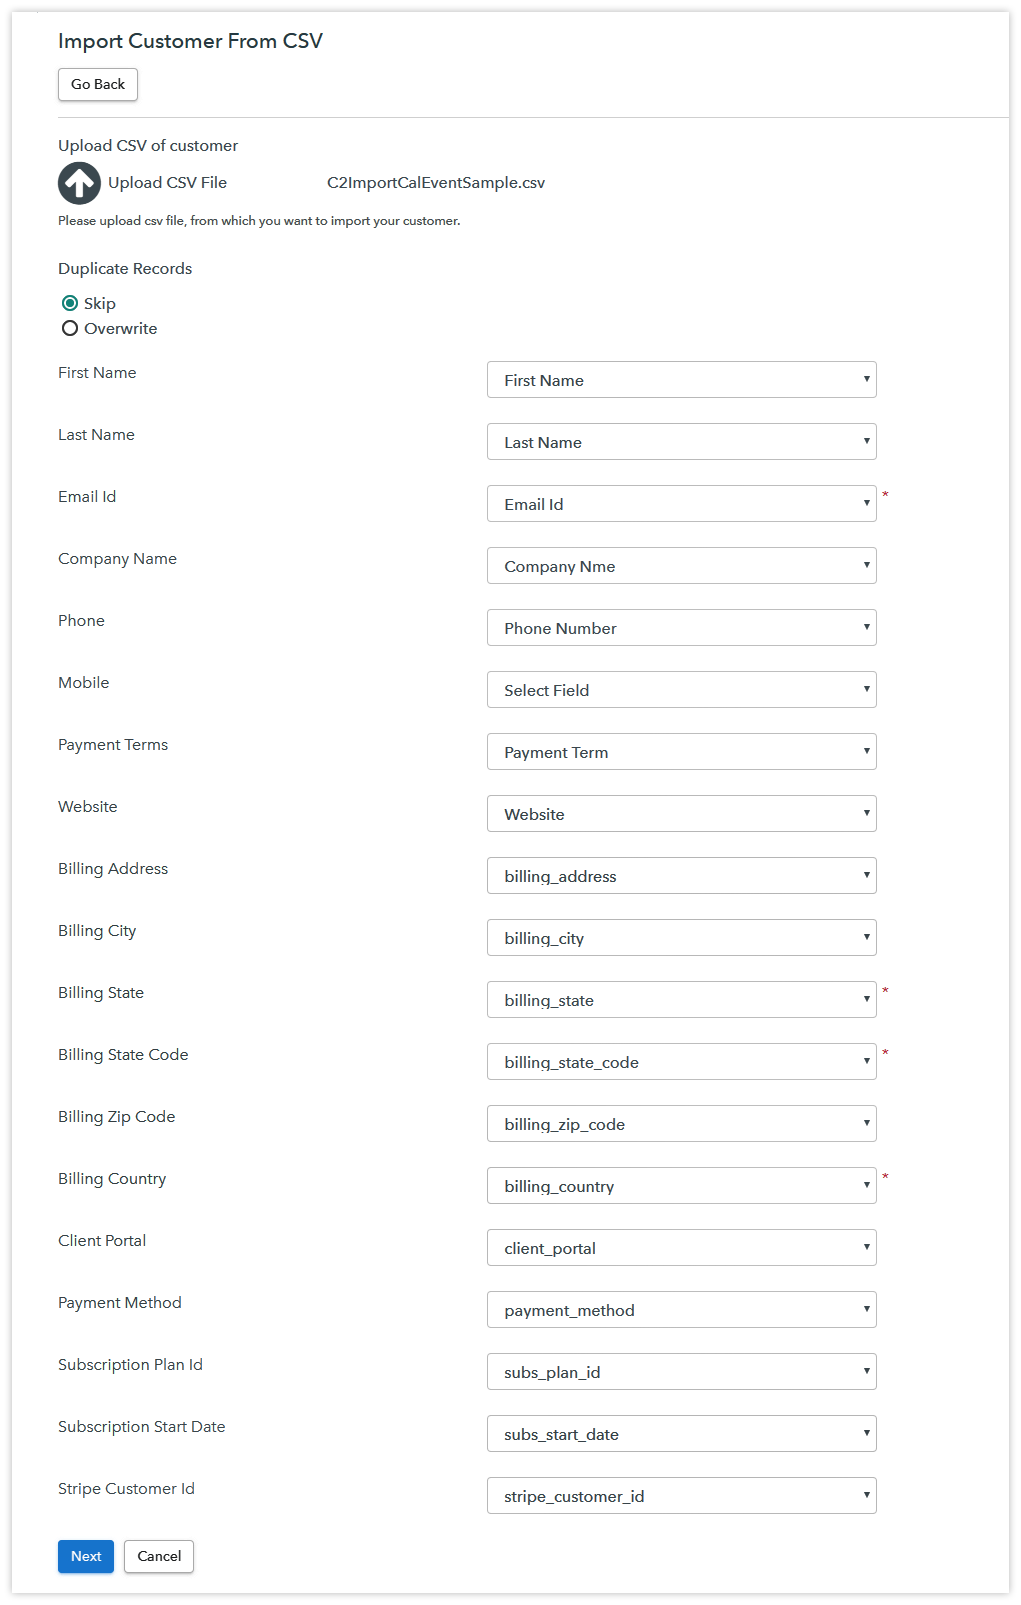
Then you can see different fields like First Name, Last Name, Email address, and billing info. You need to match these fields from the fields of your CSV file.
And finally, click on the “Next” button.

You will get the details about how many customers are imported and how many are failed and skipped.
Further, there are 3 important fields which are mandatory to be filled in the CSV file to import the subscription for the customers. Which are –
-
- Subscription plan Id – Suppose the customer data you have in the CSV file are on different subscription plans. Like some are billed $100 monthly, Some are billed $200 in every three months. So you will make plans according to the billing cycle of your customers in Pabbly Subscriptions and grab the plan Id. Add the respective plan Id in the row of particular customers in the CSV file.
- Subscription Start date – You need to add the activation date of the subscription for all your customers. That date format will always be YYYY-MM-DD. When the API for crone activation will be fired the status of the imported subscription will be turned live on this particular subscription activation date.
- Stripe customer Id – If you want your customer to be billed automatically from the existing card. Then you can add the customer Id in your CSV file and then import it. If you import the CSV file with Stripe customer Id then after the crone is activated the status of subscription will be turned “Live” and status od Invoice will be turned “Paid”.
There are some points to remember while importing customers from a CSV file
-
- Please check off the fields of your CSV file and the fields of Pabbly Subscriptions are matching properly or not. If not then select the particular field from the drop-down section.
- Subscription of the customer will not be imported if you skip the filed of Plan Id and Subscription start date.
- If you are adding the Stripe customer Id in CSV file then add “stripe” in the payment method. Then only the system accepts the customer Id and activates the subscription. If you do not have the Stripe customer Id then add “offline” in the payment method field.
- The format of the Subscription activation date will always be YYYY-MM-DD. If you change the date format then the subscription will not be imported.
We have provided a sample CSV file in the Customer Import section, or you can download the sample CSV file from this button –
Export Customers With Single Click –
Last option in this drop-down section is the Export customer.
This feature is a single click process.
Just click on the customer Export option and all the customer’s basic data will be exported and automatically downloaded in your system.


